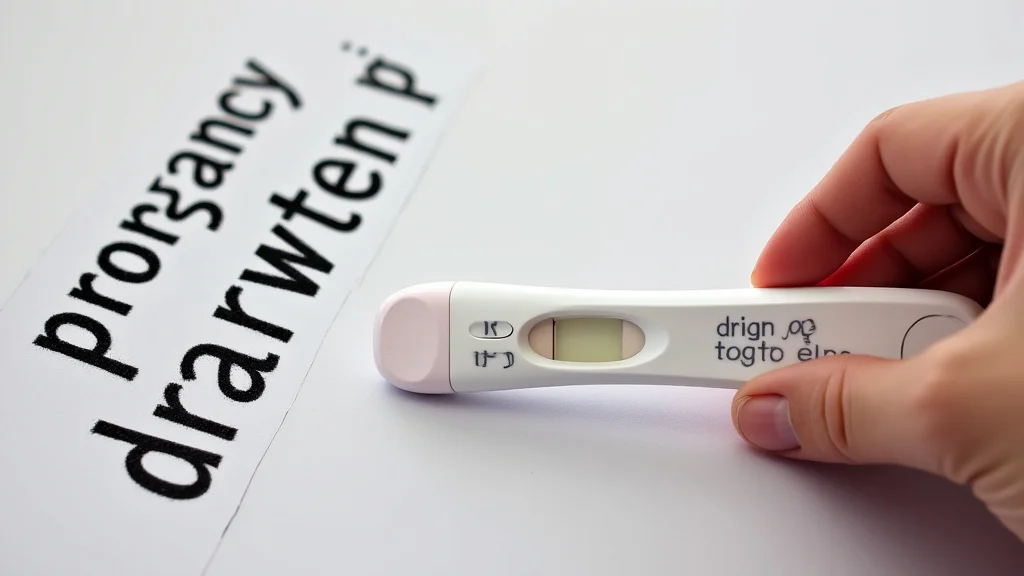
Learning how to draw a pregnancy test might seem a little tricky at first, especially if you’re new to drawing. It’s a common subject people want to illustrate, and sometimes it’s hard to get it just right. But don’t worry, it’s actually quite simple!
We’ll walk through it step-by-step so you can easily create your own. Get ready to see how straightforward drawing this object can be, and we’ll get you drawing like a pro in no time.
Key Takeaways
- You will learn the basic shapes needed for a pregnancy test.
- Simple lines and curves will be used to create the test’s structure.
- Shading techniques will be discussed to add realism.
- Tips for drawing different types of test results will be included.
- The process will be broken down into easy, manageable steps.
Getting Started with Pregnancy Test Drawing
This section will cover the fundamental shapes and lines that make up a typical pregnancy test. Think of it like building blocks for your drawing. We will start with the simplest forms and gradually add detail.
This approach makes the entire process feel less overwhelming and much more achievable, even for those who have never drawn before. We’ll focus on clear, easy-to-follow instructions so you can build confidence with each stroke of your pencil.
The Basic Structure
Most home pregnancy tests share a common design. They usually have a wider handle or grip area and a narrower testing end. This basic shape is what we will focus on first.
It’s crucial to get these proportions right because they form the foundation of your drawing. Imagine you are sketching a small, elongated rectangle with a rounded end. This will be your starting point for the overall form of the pregnancy test.
The handle part is where a person holds the test. It’s usually a bit thicker to provide a good grip. The other end, where the result appears, is often slimmer.
This difference in width gives the test its characteristic shape. We will use simple geometric forms to represent these parts, making it easy to sketch them out quickly. Don’t worry about perfection at this stage; the goal is to capture the overall shape and proportions accurately.
Consider the common disposable plastic tests. They often have a curved edge on the handle for comfort. The testing window is typically a rectangular or square area within the narrower end.
We will represent these elements with basic shapes first and then refine them. This method ensures that even complex shapes become manageable when broken down into simpler components. Visualizing these basic shapes will make the subsequent steps much easier to follow and execute.
Materials You Might Need
For this drawing exercise, you don’t need fancy art supplies. A simple pencil and a piece of paper are perfect. If you like, you can also use an eraser for corrections and perhaps a few different shades of gray pencil or a blending stump if you want to add shading later.
The focus is on learning the drawing technique, not on having the most expensive tools. Even a pen can work if you’re comfortable with it, though a pencil offers more flexibility for corrections.
Having a good eraser is very helpful, especially when you’re just starting. It allows you to correct mistakes easily without having to start the whole drawing over. This is particularly useful when establishing the initial shapes and proportions of the pregnancy test.
Sometimes, lightly sketching with a hard pencil (like an H pencil) and then going over it with a softer pencil (like a B or 2B pencil) can give your drawing more depth and contrast.
If you plan to add color or more detailed shading, you might want colored pencils, markers, or even digital drawing tools. However, for this basic guide, we’ll stick to pencil and paper. This keeps the barrier to entry low, encouraging everyone to try their hand at drawing a pregnancy test.
The key is to practice, and the simpler the materials, the more you can focus on the act of drawing itself.
Step-by-Step Drawing Process
Let’s begin by sketching the overall outline. Start with a long, slightly tapered rectangle. Imagine a hot dog bun shape, but flatter.
This will be the main body of the test. Then, add a rounded end to one side of this rectangle. This rounded end will become the part where the result is displayed.
Think of it as a capsule shape for now. Don’t press too hard with your pencil; light strokes allow for easy adjustments.
Next, we’ll define the handle. On the opposite end of the rounded tip, draw a slightly wider section extending from the main body. This part should be about one-third to one-half the length of the entire test.
It can have slightly rounded corners where it meets the main body. This creates the distinct grip area. We are still building the basic form, so these lines are meant to be guides.
Now, refine the shapes. Make the transition between the handle and the testing end smoother. You can gently curve the sides inward.
Also, add the characteristic dipping end. This is the part that is submerged in urine. It’s often a slightly rounded or angled shape at the very tip.
We’ll also draw a line to indicate the window where the result appears. This is usually a small rectangle in the upper part of the testing end.
Drawing the Details of a Pregnancy Test
Once the basic shape is established, we can add the finer details that make the drawing look more realistic. This involves refining lines, adding the testing window, and perhaps some subtle indicators of its plastic material. These small additions greatly enhance the overall appearance of your drawing and make it easily recognizable as a pregnancy test.
The Testing Window
The testing window is a crucial detail. It’s typically a clear or translucent plastic area where the lines or symbols appear to indicate a positive or negative result. Draw a small rectangle or square on the upper portion of the testing end.
This rectangle should be clearly defined but not too bold. You can lightly shade it to suggest it’s a separate piece of plastic or a recessed area.
Consider the edges of the window. They are usually smooth and rounded. The window itself might be slightly recessed into the plastic of the test.
When drawing, you can achieve this by drawing a thin outline and then, if you wish, adding a very subtle shadow just inside the edge on one side. This gives it a bit of depth, making it look like a physical part of the test rather than just a flat line.
The size of the testing window can vary slightly between brands, but it’s generally a modest size, proportionate to the overall test. It should be clearly visible but not take up the entire testing end. This detail helps the viewer immediately understand the function of the object you’ve drawn.
It’s a key visual cue that identifies it as a medical testing device.
Indicating the Result Lines
This is where you can get creative and show either a positive or negative result. For a negative result, you typically draw a single line, often labeled ‘C’ for control. For a positive result, you draw two lines, ‘C’ and ‘T’ for test.
These lines are usually vertical and appear within the testing window.
When drawing these lines, consider their thickness and clarity. They are usually solid and well-defined. For a negative result, draw just one clear vertical line in the area designated for the control line.
If you are drawing a positive result, draw the control line first, and then add a second vertical line next to it in the test line area. The distance between these lines can vary, but they are generally parallel and of similar thickness.
Some tests might use symbols instead of lines, like a plus sign (+) for positive and a minus sign (-) for negative. You can draw these symbols within the testing window as well. Remember to keep them neat and clear.
The lines or symbols should be positioned within the boundaries of the testing window you drew earlier. This attention to detail makes your drawing much more specific and informative.
Adding Shading for Realism
Shading brings a drawing to life. For a plastic pregnancy test, you’ll want to create a smooth, slightly glossy finish. Use light, even strokes with your pencil to build up tone.
Imagine where the light source is coming from. The areas facing the light will be brighter, and areas turned away will be darker. This creates a sense of volume and form.
To create the smooth, plastic look, try blending your pencil strokes. You can use a blending stump, a cotton swab, or even your fingertip. Blend gently to avoid smudging.
Pay attention to the edges. They should be relatively sharp, but you can add a subtle highlight along the edge where the light hits it directly. This makes the plastic look reflective.
Consider adding a soft shadow underneath the test if it’s resting on a surface. This grounds the object in your drawing and makes it look more three-dimensional. The shadow should be darkest directly beneath the test and fade out as it moves away.
This is a simple technique, but it makes a big difference in how believable your drawing appears.
Drawing Different Test Types
While the basic shape is similar, there are different types of pregnancy tests. Some are digital, displaying words like “Pregnant” or “Not Pregnant.” Others are the classic line tests. For a digital test, you would draw a small screen area instead of a window for lines.
You can then sketch simple text on this screen.
The digital screen itself is usually a dark rectangle. You can indicate the text by drawing bold letters within this rectangle. For a “Pregnant” result, you might write “PREGNANT” in all caps.
For a “Not Pregnant” result, you would write “NOT PREGNANT.” The font and style can be kept simple. This adds variety to your drawings and shows you can adapt your skills to different designs.
Another variation is the ovulation predictor kit (OPK), which looks similar but often has more testing windows and different markings. However, for the purpose of drawing a “pregnancy test drawing,” we are focusing on the standard home pregnancy test. Understanding these variations can help you create more specific and detailed illustrations if needed, but the core drawing principles remain the same.
Advanced Pregnancy Test Drawing Techniques
Once you’ve mastered the basics, you might want to explore ways to make your pregnancy test drawings even more lifelike. This involves paying attention to subtle details like reflections, textures, and how light interacts with different parts of the test. These techniques add a professional touch and can elevate your artwork.
Creating Realistic Reflections
Plastic surfaces reflect light. To make your drawing more realistic, add subtle highlights and reflections. Think about where the light source is and how it bounces off the test’s surface.
A strong light source will create sharp, bright highlights, while a softer light will create more diffused reflections.
Use your eraser to lift graphite or carefully draw thin, bright lines with a white colored pencil or gel pen. These highlights should follow the curve of the plastic. For instance, along the top edge of the handle, you might draw a curved line of light.
Similarly, the testing window can have reflections that mimic the environment around it. Don’t overdo it; just a few well-placed highlights can make a big difference.
The shape of the reflection will depend on the shape of the object causing the reflection and the surface of the test. For instance, a circular reflection might appear if a round object is nearby. If you are drawing the test on a table, you might also include a reflection of the test in the table surface itself, especially if the surface is shiny.
This adds another layer of realism.
Texturing the Plastic
While plastic is generally smooth, it’s not perfectly so. There might be tiny imperfections or a subtle grain. To suggest this texture, you can use very light stippling (dots) or cross-hatching in certain areas.
This should be done very subtly so it doesn’t look rough. The goal is to suggest a slight surface texture rather than create a visibly rough surface.
Another way to add texture is by varying the pressure of your pencil. Instead of completely uniform shading, you can introduce slight variations in tone. This can mimic the way light catches microscopic imperfections on the surface.
For instance, areas that are slightly curved might catch light differently than perfectly flat areas, creating subtle textural differences.
Consider the brand logos or instructions that might be printed on the test. These are usually flat, so they won’t add much texture, but they are important visual elements. You can draw these with clean lines, perhaps using a very light gray to suggest they are printed and not part of the molded plastic itself.
This level of detail can make your drawing stand out.
Contextualizing Your Drawing
A pregnancy test is often shown in a specific context. It might be held in a hand, placed on a surface, or shown with other items. Adding context can make your drawing more dynamic and tell a story.
For example, drawing a hand gently holding the test adds a human element.
When drawing hands, focus on the basic shapes of fingers and thumbs. You don’t need hyperrealistic hands; a simplified representation can be effective. The hand should be positioned naturally, as if someone is holding the test for use or inspection.
This implies action and purpose to your drawing, making it more engaging.
Placing the test on a surface like a bathroom counter or a table adds depth. Consider the surface material. A tiled surface will have lines and grout, while a wooden surface will have grain.
These background details, even if simplified, help to situate the pregnancy test in a believable environment. The lighting and shadows should also be consistent with this environment.
Example Scenario: Drawing a Positive Result
Let’s imagine you want to draw a pregnancy test showing a positive result. You’ve already sketched the basic shape. Now, within the testing window, draw two clear, vertical lines.
The first line, the control line, should be on the left. The second line, the test line, should be on the right, parallel to the first. Ensure both lines are within the window boundaries.
After drawing the lines, add a bit of shading to the rest of the test. Use light, smooth strokes. Add a few highlights on the curved edges of the plastic to make it look shiny.
You could also draw a subtle shadow underneath the test to give it some depth. The overall impression should be that of a standard pregnancy test with a clear positive indication.
If you want to add more detail, you could sketch a hand holding the test, or place it on a simple bathroom counter. The key is to keep the focus on the test itself while adding just enough context to make the drawing complete. The clear two lines within the window are the most important visual cue for a positive result.
Common Myths Debunked
Myth 1: Pregnancy tests are difficult to draw.
This is a common misconception. While any drawing takes practice, the basic shape of a pregnancy test is quite simple. It’s mostly made up of basic geometric forms like rectangles and rounded shapes.
By breaking it down into simple steps, anyone can learn to draw one effectively, regardless of their prior artistic experience. The process is more about understanding proportions and adding simple details than complex techniques.
Myth 2: You need special art supplies to draw a pregnancy test.
Absolutely not. You can achieve a perfectly good drawing of a pregnancy test with just a basic pencil and paper. If you want to add shading or highlights, a soft pencil and a good eraser are helpful.
Fancy art supplies are not a prerequisite for learning to draw this or any other object. The focus should be on learning the techniques and practicing them.
Myth 3: All pregnancy tests look the same.
While many share a similar overall design, there are variations. Some are digital, displaying words instead of lines. Others might have slightly different shapes or color schemes.
However, the fundamental drawing principles remain the same. You can adapt the basic method to represent most common types of pregnancy tests, focusing on the characteristic handle and testing end.
Myth 4: Shading is too complicated for beginners.
Shading can seem intimidating, but it doesn’t have to be. For a plastic object like a pregnancy test, simple shading techniques work best. Focusing on a few highlights and a general sense of light and shadow can create a convincing effect without needing advanced skills.
Starting with light, smooth strokes and gradually building tone is a manageable approach for beginners.
Frequently Asked Questions
Question: What is the easiest way to start drawing a pregnancy test
Answer: Begin by sketching a long, slightly tapered rectangle. Then, add a rounded end to one side and a wider handle section to the other. These basic shapes will form the foundation of your drawing.
Question: How do I draw the testing window
Answer: Draw a small rectangle or square on the upper part of the testing end. This is where the result lines will appear. Keep the edges clean and consider a slight recess if you want more depth.
Question: What do I draw for a negative result
Answer: For a negative result, draw a single, clear vertical line within the testing window. This is typically the control line.
Question: What do I draw for a positive result
Answer: For a positive result, draw two clear, vertical lines within the testing window. The first is the control line, and the second, a test line, appears next to it.
Question: Can I use colored pencils to draw a pregnancy test
Answer: Yes, you can use colored pencils. You can color the plastic body, and use gray or pink for the result lines. Shading techniques still apply with colored pencils to add depth.
Wrap Up
Drawing a pregnancy test is a simple skill that anyone can learn. You’ve seen how to create the basic shape with easy lines and add the essential details like the testing window and result lines. With a little practice in shading and context, your drawings will look even more real.
Keep practicing these steps, and you’ll be drawing pregnancy tests confidently in no time.
Leave a Reply