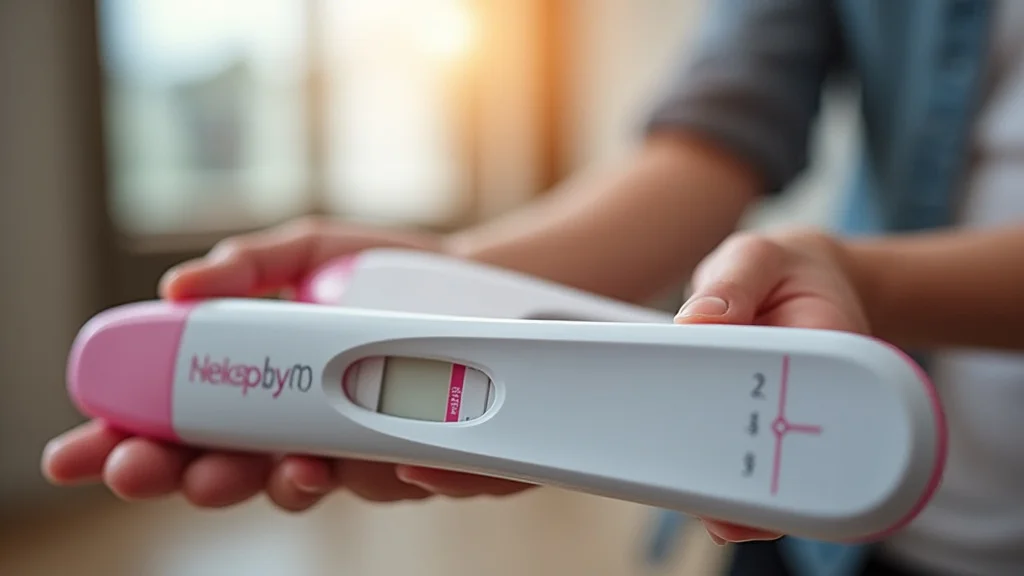
Author: Admin

  • Third Trimester Pregnancy Nutrition Guide

    Third Trimester Pregnancy Nutrition Guide

    As your pregnancy enters the final stretch, knowing what to eat becomes super important. It might feel a bit tricky at first, and that’s totally normal! You’re likely wondering about all the different nutrients you and your growing baby need.

    Don’t worry, we’ve got you covered. This post will break down third trimester pregnancy nutrition in a simple, easy-to-follow way. We’ll guide you through it step-by-step so you can feel confident about fueling this amazing time.

    Key Takeaways

    • Understanding the specific nutrient needs for the third trimester is key for a healthy pregnancy.
    • Protein, iron, calcium, and fiber are particularly vital in these last few months.
    • Focusing on balanced meals and healthy snacks can help manage energy levels and common discomforts.
    • Hydration plays a significant role in overall well-being and preventing issues like swelling.
    • Recognizing signs of nutrient deficiencies and knowing when to seek professional advice is important.
    • Making small, manageable changes to your diet can have a big impact on your third trimester experience.

    Understanding Third Trimester Nutrition Needs

    The third trimester is a time of rapid growth for your baby. They’re packing on weight, developing their lungs, and getting ready for the big arrival. This means your body needs extra support, both in terms of calories and specific nutrients.

    It’s not about “eating for two” in terms of quantity, but rather in quality and nutrient density. You might notice your appetite changes again, and you might feel fuller quicker due to your baby’s size. Paying attention to what your body is telling you is a big part of third trimester pregnancy nutrition.

    Your baby’s brain development is still a major focus during this period. Essential fatty acids, like omega-3s, are critical for this. Proteins are the building blocks for your baby’s tissues and organs.

    Calcium is crucial for their bone development, and iron is needed to carry oxygen to both you and the baby, preventing fatigue. Fiber helps with digestion, which can be a challenge in these later weeks. Thinking about these key players will help you make better food choices.

    Why This Trimester Matters Most

    The third trimester is often called the “finishing school” for babies. They are rapidly gaining weight and maturing vital organs. This intense development requires a significant increase in nutrient intake from the mother.

    Your body works hard to supply everything your baby needs, from essential vitamins to minerals and energy. This is why focused third trimester pregnancy nutrition is so important, not just for the baby’s immediate health but also for their long-term development.

    You might feel more tired or experience new discomforts like heartburn or swelling. A well-balanced diet can help alleviate some of these issues. For instance, staying hydrated can reduce swelling, and eating smaller, more frequent meals can ease heartburn.

    Proper nutrition also supports your body’s preparation for labor and delivery, as well as postpartum recovery. It’s a holistic approach to your well-being and your baby’s final growth spurt.

    Key Nutrients for Growth and Development

    During the third trimester, specific nutrients become even more vital. Protein is essential for your baby’s rapidly growing tissues and organs, as well as for building your own body’s support systems. Aim for lean sources like chicken, fish, beans, and dairy.

    Iron is crucial for increasing your blood volume and supplying oxygen to your baby. Without enough iron, you might feel very tired and at risk for anemia.

    Calcium is necessary for your baby’s bone and teeth development. Since your baby will draw calcium from your reserves, it’s important to consume enough through dairy products, leafy greens, and fortified foods. Fiber is your friend for maintaining a healthy digestive system.

    This can prevent constipation, a common issue in late pregnancy. Whole grains, fruits, and vegetables are excellent sources. Omega-3 fatty acids, found in fatty fish and flaxseeds, support your baby’s brain and eye development.

    Protein Power

    Protein is a cornerstone of healthy fetal development, especially in the final trimester when growth is exponential. It’s not just for the baby; your body also needs extra protein to support your expanding uterus, breasts, and increased blood volume. Think of protein as the brick and mortar for building new cells.

    For instance, a pregnant woman needs about 70-100 grams of protein per day during the third trimester, which is more than in earlier stages.

    Good sources of protein are abundant and can be easily incorporated into your daily meals. Examples include lean meats like turkey and chicken, fish that is low in mercury, eggs, and dairy products such as yogurt and cheese. For plant-based options, consider lentils, beans, tofu, tempeh, and nuts.

    Eating a variety ensures you get a full spectrum of amino acids, the building blocks of protein. Aim to include a protein source with each meal and snack to maintain steady energy levels and support consistent growth.

    Iron for Energy and Oxygen

    Iron deficiency anemia is quite common in late pregnancy. This is because your blood volume increases significantly to support your growing baby and placenta. Iron is vital for producing hemoglobin, the protein in red blood cells that carries oxygen.

    When you don’t have enough iron, your body can’t make enough healthy red blood cells, leading to fatigue, weakness, and a higher risk of complications during childbirth. Your baby also needs iron stores for the first few months of their life.

    The recommended daily intake of iron for pregnant women is typically around 27 milligrams. However, many women struggle to meet this through diet alone, which is why healthcare providers often recommend an iron supplement. To maximize iron absorption from food, pair iron-rich foods with vitamin C sources.

    For example, have a glass of orange juice with your iron-fortified cereal or add bell peppers to a lentil soup. Iron-rich foods include red meat, poultry, fish, beans, lentils, spinach, and fortified cereals.

    Calcium for Strong Bones

    Your baby’s skeleton is rapidly developing in the third trimester, and this requires a substantial amount of calcium. Your body will work hard to provide this, even if it means drawing calcium from your own bones. Therefore, ensuring adequate calcium intake is crucial for both your baby’s strong bone structure and maintaining your own bone health.

    Calcium also plays a role in nerve and muscle function.

    The recommended daily intake of calcium for pregnant women is 1,000-1,300 milligrams. Dairy products like milk, cheese, and yogurt are excellent sources. If you’re lactose intolerant or prefer non-dairy options, fortified plant-based milks (like almond or soy milk), tofu, and leafy green vegetables such as kale and broccoli are good alternatives.

    Remember that vitamin D is essential for your body to absorb calcium effectively, so ensure you get enough sunlight or consume vitamin D-rich foods and supplements.

    Fiber for Digestive Health

    As your uterus grows, it can put pressure on your digestive system, often leading to constipation. A high-fiber diet is essential for keeping things moving smoothly and preventing this common discomfort. Fiber adds bulk to your stool, making it easier to pass, and also helps regulate blood sugar levels.

    Adequate fiber intake can contribute to a feeling of fullness, which can be helpful in managing appetite.

    Aim for 25-30 grams of fiber per day. You can easily boost your fiber intake by choosing whole grains over refined grains, eating plenty of fruits and vegetables with their skins intact, and incorporating legumes like beans and lentils into your meals. Snacks like apples with the skin, berries, and whole-wheat crackers can also help.

    Staying well-hydrated is equally important when increasing fiber to ensure it works effectively.

    Practical Strategies for Third Trimester Eating

    Managing your diet in the third trimester isn’t just about knowing what to eat, but also how and when. Your stomach capacity might feel reduced, and you might experience heartburn more frequently. This means adjusting your meal patterns and choosing foods that are easier to digest and less likely to cause discomfort.

    The goal is to get the nutrients you need without making yourself feel overly full or uncomfortable.

    Focusing on nutrient-dense foods is key. These are foods that pack a lot of vitamins, minerals, and other beneficial compounds into a small amount of calories. This way, you can meet your increased nutritional demands without needing to eat excessively large meals.

    Thinking about variety will also ensure you get a wide range of nutrients. Don’t be afraid to experiment with different healthy foods to find what you enjoy and what agrees with you.

    Eating Smaller, More Frequent Meals

    Instead of three large meals a day, try eating five or six smaller meals. This approach can be much more manageable for your digestive system. It helps prevent your stomach from becoming too full, which can worsen heartburn and indigestion.

    Smaller meals also provide a more consistent supply of energy and nutrients throughout the day, helping to keep your blood sugar stable and prevent extreme hunger pangs.

    When planning these smaller meals, think about combining different food groups to make them balanced and satisfying. For example, a mid-morning snack could be Greek yogurt with berries and a few almonds. A mid-afternoon snack might be apple slices with peanut butter or a small whole-wheat pita with hummus and some cucumber.

    This strategy ensures you are continuously fueling your body and your baby without the discomfort of large, heavy meals.

    Managing Heartburn and Indigestion

    Heartburn is a common complaint in the third trimester because the growing uterus presses on your stomach, and hormonal changes relax the valve between your esophagus and stomach. To manage this, avoid trigger foods like spicy, greasy, or acidic items. Eating smaller meals, as mentioned, is also very helpful.

    Don’t lie down immediately after eating; stay upright for at least 30 minutes to an hour.

    Chewing your food thoroughly can aid digestion. Some women find relief from sipping on milk or eating yogurt, though this varies. Staying hydrated with water throughout the day is also beneficial.

    If heartburn is severe, talk to your doctor about safe remedies, as some over-the-counter antacids are not recommended during pregnancy. Focus on soothing, bland foods when experiencing discomfort.

    Smart Snacking Strategies

    Snacks are your best friend in the third trimester. They help you meet your increased calorie and nutrient needs between meals and prevent you from getting overly hungry. The key is to choose nutrient-rich snacks rather than empty calories.

    Think about what your body needs: protein for satiety, fiber for digestion, and healthy fats for brain development.

    Some great snack ideas include:

    • A handful of almonds or walnuts with a piece of fruit. This provides healthy fats, protein, and fiber.
    • Hard-boiled eggs. These are a fantastic source of protein and easy to prepare ahead of time.
    • Vegetable sticks (carrots, celery, bell peppers) with hummus.

      This offers fiber, vitamins, and plant-based protein.

    • A small bowl of cottage cheese or Greek yogurt with fruit. This is rich in protein and calcium.
    • Whole-grain crackers with avocado. This combines fiber with healthy monounsaturated fats.

    These snacks help keep your energy levels stable and provide essential nutrients without making you feel weighed down.

    Hydration: More Than Just Thirst

    Staying well-hydrated is incredibly important during pregnancy, especially in the third trimester. Water helps transport nutrients to your baby, aids in digestion, prevents constipation, and can help reduce swelling and leg cramps. It also plays a role in forming amniotic fluid and supporting increased blood volume.

    Aim to drink at least 8-10 glasses of water a day, or about 2.5 to 3 liters. You can also get fluids from other sources like herbal teas (check with your doctor for safe options), milk, and water-rich fruits and vegetables such as watermelon, cucumbers, and oranges. Carrying a reusable water bottle with you can serve as a constant reminder to sip throughout the day.

    Addressing Common Third Trimester Diet Challenges

    As you get closer to your due date, you might face specific dietary hurdles. These can range from a general lack of appetite due to physical discomfort to specific cravings or aversions. Understanding these challenges and having strategies to overcome them can make your third trimester much smoother.

    It’s about finding balance and listening to your body. While cravings can be fun, it’s important to balance them with nutrient-dense foods. If you’re struggling with a decreased appetite, focusing on small, calorie-rich snacks can be very effective.

    Dealing with Decreased Appetite

    It’s not uncommon for appetite to decrease in the third trimester. Your stomach is compressed, and you may feel full very quickly. If this is the case, focus on consuming calorie-dense, nutrient-rich foods.

    Small, frequent meals and snacks become even more critical. Think of foods that pack a punch in terms of nutrition, like avocado, nuts, seeds, full-fat yogurt, and dried fruits.

    Smoothies can be a lifesaver. You can blend fruits, vegetables, yogurt or milk, nut butter, and even a scoop of protein powder to create a highly nutritious and easy-to-consume meal or snack. Aim for nutrient density over volume.

    Even a few bites of a nutrient-rich food are better than nothing. Consider the times of day when you do feel hungrier and try to eat your most substantial meals then.

    Managing Cravings and Aversions

    Pregnancy cravings can be intense, and it’s okay to indulge occasionally. However, if cravings are for less nutritious foods, try to find healthier alternatives or balance them with nutrient-rich options. For example, if you crave something sweet, opt for fruit first.

    If you still want something sweeter, a small portion of dark chocolate might be a better choice than candy. If you have strong aversions, try to work around them by finding alternative sources of the nutrients you might be missing.

    For instance, if you can’t stand the thought of meat, focus on beans, lentils, tofu, and eggs for protein. If dairy is unappealing, ensure you’re getting calcium from leafy greens, fortified foods, or supplements. Don’t let aversions derail your nutrition entirely; creative substitutions can ensure you and your baby get what you need.

    When to Seek Professional Advice

    While this guide offers general advice, every pregnancy is unique. If you have persistent concerns about your diet, are struggling with severe nausea, significant weight gain or loss, or have any specific health conditions like gestational diabetes, it’s essential to consult your healthcare provider or a registered dietitian. They can provide personalized advice based on your individual needs and health status.

    Don’t hesitate to ask questions. Your doctor or midwife is there to support you through every stage of your pregnancy. They can help you create a safe and effective nutrition plan that meets both your needs and your baby’s developmental requirements.

    Early and consistent communication is key to a healthy pregnancy experience.

    Common Myths Debunked

    Myth 1: You Must Eat Twice As Much Food

    This is a common misconception. While your calorie needs do increase in the third trimester, it’s not by a full extra person’s worth of food. Typically, you need an additional 300-500 calories per day, not double.

    The focus should be on nutrient-dense foods rather than just increasing portion sizes significantly. Eating too much can lead to excessive weight gain, which can create its own set of complications.

    Myth 2: All Fish Is Bad Due to Mercury

    While it’s true that some fish contain high levels of mercury, many types are perfectly safe and highly beneficial during pregnancy. Fatty fish like salmon, mackerel, and sardines are excellent sources of omega-3 fatty acids, which are crucial for your baby’s brain development. The key is to choose low-mercury fish and eat them in moderation.

    Your healthcare provider can give you specific recommendations for safe fish consumption.

    Myth 3: Craving Certain Foods Means Your Baby Needs Them

    While cravings can sometimes be your body’s way of signaling a need, they are often more complex and influenced by hormones, cravings, and even sensory experiences. For example, a craving for ice cream doesn’t necessarily mean your baby needs more calcium; it might just be a desire for sweetness and fat. It’s important to listen to your body but also to ensure your overall diet is balanced and nutrient-rich, rather than solely driven by cravings.

    Myth 4: You Can’t Eat Dairy in Late Pregnancy

    Dairy products like milk, yogurt, and cheese are excellent sources of calcium and protein, which are vital for third trimester pregnancy nutrition. Unless you have a specific intolerance or allergy, or have been advised by your doctor to avoid them, dairy can be a healthy part of your diet. Opt for pasteurized products to ensure safety.

    If dairy is an issue, ensure you are getting calcium from other fortified sources or supplements.

    Frequently Asked Questions

    Question: How many extra calories do I really need in the third trimester?

    Answer: You generally need about 300-500 extra calories per day in your third trimester. This is not about doubling your food intake, but rather about choosing nutrient-rich foods to meet these increased needs.

    Question: What are the best snacks for the third trimester?

    Answer: Nutrient-dense snacks are best. Think of options like Greek yogurt with berries, nuts and fruit, vegetable sticks with hummus, or hard-boiled eggs. These provide essential nutrients without being too heavy.

    Question: Is it safe to drink herbal teas during the third trimester?

    Answer: Many herbal teas are safe, but it’s crucial to check with your doctor or midwife about which ones are recommended and which to avoid. Some herbs can stimulate labor or have other effects.

    Question: What if I’m not feeling very hungry?

    Answer: If your appetite is low, focus on small, frequent, and calorie-dense snacks. Smoothies can be a great way to get nutrients easily. Prioritize nutrient-rich foods over large meals.

    Question: How can I manage constipation in the third trimester?

    Answer: Increase your fiber intake by eating more whole grains, fruits, and vegetables. Drink plenty of water, and engage in light physical activity if approved by your doctor. Prunes or prune juice can also help.

    Summary

    Focus on protein, iron, calcium, and fiber in your third trimester pregnancy nutrition. Eat smaller, more frequent meals and stay hydrated. Managing heartburn and cravings is key.

    Listen to your body and seek professional advice when needed for a healthy end to your pregnancy.

  • Mastering Le Second Trimestre

    Mastering Le Second Trimestre

    Many learners find le second trimestre a bit tricky at first. It’s a common stage where things start to feel a bit more serious, and that can be a little overwhelming. But don’t worry, it’s totally normal to feel that way!

    We’re here to break it all down. Think of this as your easy guide to making le second trimestre simple and clear. Get ready to see how you can tackle it with confidence.

    We’ll walk through everything step by step.

    Key Takeaways

    • You will learn what le second trimestre means in different contexts.
    • We will explain why le second trimestre is often a turning point.
    • Discover how to approach challenges during le second trimestre with ease.
    • You will see practical ways to succeed in le second trimestre.
    • Understand the common feelings associated with le second trimestre.

    Understanding Le Second Trimestre

    When people talk about le second trimestre, they usually mean the second three-month period of something important. This could be a school year, a business cycle, or even a pregnancy. It’s a phase that follows the initial setup and before the final push.

    Because it’s a middle stage, it often brings its own unique set of tasks and goals. Things that were just starting in the first part are now in full swing. This can make it a busy but also a productive time.

    It’s where real progress is often measured.

    What Is A Trimestre?

    A trimestre is simply a period of three months. The word comes from Latin, meaning “three months.” So, le second trimestre refers to the second block of three months within a larger yearly or project cycle. For example, in many school systems, the academic year is split into three trimesters.

    The first trimester is the beginning, the second is the middle part, and the third is the end. In business, companies might also report their earnings or progress on a quarterly basis, which is the same as a trimester.

    This concept helps break down longer periods into more manageable chunks. It allows for focused planning and evaluation at regular intervals. Without these divisions, longer projects or academic years could seem endless and overwhelming.

    The trimester structure provides natural milestones.

    Why Is Le Second Trimestre Important?

    Le second trimestre is often a critical period. It’s the time when the foundations laid in the first trimester are tested and built upon. For students, it might be when more complex subjects are introduced, or when midterm exams signal the halfway point of the academic year.

    In business, it’s when early strategies are evaluated. Are they working? Do they need adjustments?

    This phase shows if initial plans are on the right track. It’s a time for both consolidation and acceleration.

    Missing or fumbling in le second trimestre can have a ripple effect. It can impact the rest of the period. Successfully navigating this middle stage sets a strong pace for what’s to come.

    It’s a time to show what has been learned and to prepare for upcoming challenges. A good performance here often leads to better overall outcomes.

    Challenges And Opportunities In Le Second Trimestre

    The middle period, le second trimestre, can present unique hurdles. As the initial excitement fades, learners might face increased difficulty or a heavier workload. This is also the time when early mistakes might become more apparent, requiring extra effort to correct.

    For instance, a student who didn’t fully grasp concepts in the first trimester might struggle significantly now. Similarly, a business might realize its initial market approach isn’t yielding expected results. This can cause stress and a feeling of falling behind.

    However, le second trimestre also offers immense opportunities. It’s a chance to apply knowledge, refine skills, and demonstrate growth. For students, it’s an opportunity to show they can handle more advanced material.

    For businesses, it’s a chance to adapt and innovate based on early feedback. Overcoming the challenges of this phase builds resilience and confidence. It proves that with dedication and the right strategies, progress is achievable even when things get tough.

    This period is a proving ground for long-term success.

    Common Difficulties Faced

    One common difficulty is the increase in complexity. Subjects or tasks that were basic in the first trimester often become more involved. For example, in math, students might move from simple addition to algebra.

    In a business context, the marketing campaigns might shift from brand awareness to direct sales, requiring more sophisticated strategies. Another challenge is maintaining motivation. The novelty of starting something new wears off.

    This is where discipline and a clear focus on goals become even more important.

    Time management also becomes a significant issue. With more demanding tasks, it’s easy to feel overwhelmed. Students might have more assignments, research papers, and exams.

    Businesses might be launching new products or expanding services, which require more resources and coordination. Without effective planning, deadlines can be missed, leading to a cascade of problems. It’s crucial to stay organized and prioritize effectively during this busy phase.

    • Increased complexity of tasks or subjects.
    • Maintaining motivation as the initial novelty wears off.
    • Time management becomes more critical with a heavier workload.
    • Pressure to perform and show tangible results.
    • Potential for early mistakes to compound if not addressed.

    The increased complexity means that what worked in the first three months might not be enough now. For example, a student who relied on memorization might find that problem-solving skills are now required. This shift can be jarring.

    Maintaining motivation is also key. When the finish line feels distant, it’s easy to lose steam. This is where setting smaller, achievable goals within le second trimestre can help.

    These mini-victories keep the momentum going.

    Time management is often tested. Students might have multiple projects due or exams to study for. Businesses might juggle product development, sales targets, and customer support.

    Effective prioritization is essential to avoid feeling swamped. The pressure to perform can also be high. This is the period where progress is often measured, and falling short can feel disheartening.

    Finally, early mistakes, if not caught and corrected, can grow into larger problems. This highlights the need for regular review and feedback.

    Opportunities For Growth

    Despite the challenges, le second trimestre is ripe with opportunities for significant growth. It’s the perfect time to apply what has been learned and to develop deeper understanding. For students, this means moving beyond rote learning to true comprehension and application.

    For businesses, it’s an opportunity to innovate, adapt to market feedback, and build stronger customer relationships. This phase allows for practical experience and skill development.

    This period allows for the refinement of strategies. Initial assumptions can be tested against real-world results. This feedback loop is invaluable for improvement.

    It’s also a time to build resilience. Successfully navigating the tougher parts of le second trimestre boosts confidence and prepares individuals or organizations for future challenges. Demonstrating competence and achieving milestones during this phase can set a positive trajectory for the remainder of the year or project.

    • Applying learned concepts to practical situations.
    • Developing deeper understanding and critical thinking skills.
    • Innovating and adapting based on real-time feedback.
    • Building resilience and confidence through overcoming obstacles.
    • Demonstrating measurable progress and setting a positive tone.

    Applying learned concepts is a big part of this. Instead of just knowing facts, students start using them to solve new problems. Think about a science class moving from learning about gravity to designing a simple experiment to test it.

    This practical application is where real learning happens. Businesses also see this opportunity. A software company might launch a beta version of its product in the second trimester.

    They then use user feedback to improve it before the full release.

    Developing deeper understanding is another key outcome. When faced with more complex material, learners are pushed to think critically. They start asking “why” and “how” rather than just accepting information.

    This fosters intellectual curiosity. Innovation and adaptation are also crucial. The second trimester often reveals what works and what doesn’t.

    Businesses can pivot their marketing or product development based on early sales data or customer reviews. This flexibility is vital for success.

    Strategies For Success In Le Second Trimestre

    To thrive during le second trimestre, a proactive approach is essential. It’s about being prepared for the increased demands and using the opportunities presented. This means having solid plans in place and being ready to adapt them.

    Effective strategies can turn potential difficulties into stepping stones for achievement. They help ensure that this important middle period leads to positive outcomes rather than setbacks.

    The focus should be on consistent effort and smart work. This isn’t the time to coast. It’s about building on initial progress and pushing forward.

    By implementing the right tactics, individuals and teams can make le second trimestre a highly productive and successful phase. This proactive mindset is key to achieving goals and setting up a strong finish.

    Effective Planning And Organization

    Good planning is the bedrock of success in any stage, but especially in le second trimestre. This involves breaking down larger goals into smaller, manageable tasks. Creating a detailed schedule or calendar can help keep track of deadlines and commitments.

    For students, this might mean outlining study plans for upcoming exams or mapping out research project timelines. For businesses, it could involve setting clear milestones for product launches or sales targets.

    Organization extends beyond just schedules. It also means keeping your workspace tidy, both physically and digitally. Having resources readily available saves time and reduces stress.

    For example, organizing digital files by project or topic makes it easy to find information. This systematic approach reduces the chances of overlooking important tasks and ensures that time is used efficiently.

    • Break down large goals into smaller, actionable steps.
    • Create detailed schedules and calendars for tracking progress.
    • Prioritize tasks based on urgency and importance.
    • Organize physical and digital workspaces for efficiency.
    • Regularly review and adjust plans as needed.

    Breaking down large goals is crucial. A big project can seem impossible to start. But if you divide it into steps like “research topic,” “outline main points,” and “write first draft,” it becomes much less intimidating.

    Each small success builds momentum. Creating detailed schedules is the next step. This means not just noting down due dates, but allocating specific time blocks for working on tasks.

    This ensures consistent progress.

    Prioritization is also key. Not all tasks are equal. Use methods like the Eisenhower Matrix (urgent/important) to decide what needs your immediate attention.

    Organizing your environment, whether it’s your desk or your computer folders, makes a big difference. Imagine trying to find a specific document if your files are a mess. It wastes valuable time.

    Finally, plans aren’t set in stone. Regularly checking your progress and making adjustments is vital. What works today might need to change tomorrow.

    Maintaining Focus And Motivation

    Staying focused and motivated during le second trimestre can be tough. As the initial enthusiasm wanes, it’s easy for distractions to creep in. One effective strategy is to regularly remind yourself of your goals.

    Why did you start this in the first place? What do you hope to achieve by the end of this period? Keeping these objectives in mind provides purpose and drives motivation.

    Celebrate small wins along the way. Acknowledging progress, no matter how small, can provide a significant boost. For example, finishing a tough assignment or meeting a minor project milestone is worth recognizing.

    This positive reinforcement helps to combat feelings of overwhelm and encourages continued effort. It turns the journey into a series of accomplishments rather than a single daunting challenge.

    • Connect with your long-term goals and purpose.
    • Break down tasks into smaller, more achievable mini-goals.
    • Reward yourself for completing milestones and achievements.
    • Find accountability partners or join study/work groups.
    • Practice mindfulness and stress management techniques.

    Connecting with your long-term goals helps you see the bigger picture. It reminds you why the effort is worthwhile. When you feel discouraged, thinking about the final outcome can reignite your drive.

    Breaking tasks into mini-goals is also very effective. Completing a small part of a larger task provides a sense of accomplishment. This can build momentum.

    Rewarding yourself is a powerful motivator. After a week of hard work or after completing a challenging assignment, give yourself a small treat. This could be watching a favorite movie, enjoying a special meal, or taking a short break.

    Finding accountability partners can also help. Knowing that someone else is expecting you to make progress can be a strong incentive. Finally, managing stress is vital.

    Techniques like deep breathing or short walks can help clear your head and refocus your energy.

    Le Second Trimestre In Different Contexts

    The concept of le second trimestre applies across various fields. Each context brings its own nuances and specific expectations. Understanding how it functions in different settings can provide valuable insights and strategies.

    This flexibility in application shows how universal the idea of a crucial middle period is.

    Whether it’s in education, business, or personal development, the principles of navigating le second trimestre remain similar: preparation, focus, and adaptation. Recognizing these common threads can help individuals and organizations approach this phase with confidence, no matter their specific circumstances. It highlights the shared human experience of moving through defined stages of progress.

    Academic Settings

    In schools and universities, le second trimestre often marks a significant shift. It’s typically when the curriculum deepens, and students are expected to demonstrate a more advanced understanding of subjects. Midterm exams often fall within or at the end of this period, serving as a critical assessment of learning.

    Performance during this trimester can heavily influence final grades and overall academic success for the year.

    Students might face more demanding assignments, research papers, and complex problem-solving tasks. The pressure to perform can increase as the end of the academic year draws nearer. Teachers often introduce new teaching methods or more challenging concepts during this time.

    For students, it’s a period to solidify their knowledge and prepare for the final stretch of their studies. It requires consistent effort and effective study habits.

    • Increased academic rigor and complexity of material.
    • Midterm exams and major assessments are common.
    • Emphasis shifts from foundational knowledge to application.
    • Students need strong study habits and time management skills.
    • Performance can significantly impact overall grades.

    The academic rigor increases because educators assume students have grasped the basics from the first trimester. Now, they build on that foundation with more intricate theories and practical applications. For instance, a history class might move from learning about major events to analyzing their causes and long-term effects.

    Midterm exams are critical checkpoints. They help students and teachers identify areas of strength and weakness. This feedback is essential for planning further study.

    The focus on application means students are expected to do more than just recall information. They need to use it to solve problems, write essays, or conduct experiments. This requires a deeper level of thinking.

    Developing strong study habits is therefore paramount. This includes regular review, active learning techniques, and efficient note-taking. Time management is also crucial, as students often juggle multiple subjects and assignments simultaneously.

    Ultimately, success in le second trimestre academically often dictates the trajectory for the rest of the school year.

    Business And Professional Contexts

    In the business world, le second trimestre is often a period of crucial evaluation and adaptation. After the first three months of a fiscal year or a new project, companies have initial data on market performance, sales figures, and operational efficiency. This information is vital for making informed decisions about strategy adjustments.

    It’s a time to assess whether initial plans are meeting objectives.

    Businesses might launch new products, revise marketing campaigns, or refine their operational processes based on the feedback received. This trimester can also present challenges such as unexpected market shifts, increased competition, or internal operational hurdles. Successfully navigating these issues is key to maintaining growth and achieving yearly targets.

    It often requires agility and a willingness to pivot.

    1. Assess performance against initial goals and KPIs.
    2. Analyze market trends and competitor activities.
    3. Adjust strategies based on sales data and customer feedback.
    4. Manage resources effectively to meet evolving demands.
    5. Prepare for the second half of the fiscal year or project lifecycle.

    Assessing performance is the first step. This involves looking at metrics like revenue, customer acquisition cost, and profit margins. Are we on track?

    Are we exceeding or falling short of expectations? Analyzing market trends and competitor activities helps businesses understand their position. What are others doing?

    Are there new opportunities or threats emerging? This external perspective is critical for staying competitive.

    Adjusting strategies is where the real work happens. If a marketing campaign isn’t working, it needs to be tweaked or replaced. If sales are slow in a certain region, the sales approach might need re-evaluation.

    Managing resources is also vital. Do we have enough staff, budget, or technology to meet our goals for the rest of the year? This period is also about looking ahead and preparing for what’s next.

    It’s about ensuring the company is well-positioned for the remainder of its operational cycle.

    Personal Development And Goals

    For personal goals, le second trimestre represents a point where initial enthusiasm meets the reality of sustained effort. If someone sets a goal in January, like learning a new skill or improving fitness, the second trimester (April-June) is when the commitment is truly tested. It’s no longer about the excitement of starting, but about the discipline of continuing.

    This is where habits are either solidified or abandoned.

    This phase offers a chance to build momentum. If early steps have been successful, this is the time to scale up or tackle more challenging aspects of the goal. It’s also an opportunity to reflect on what’s working and what isn’t.

    Are the methods being used effective? Is the goal still relevant? Making thoughtful adjustments can lead to greater success and prevent burnout.

    It’s about ensuring that the pursuit of the goal remains productive and rewarding.

    • Evaluate progress made in the first three months.
    • Identify any obstacles hindering advancement.
    • Refine strategies or methods if needed.
    • Set new, more ambitious sub-goals for the next phase.
    • Maintain consistency and celebrate achievements.

    Evaluating progress is essential. This means honestly looking at what has been accomplished. Have you been practicing that instrument regularly?

    Have you been sticking to your new diet plan? Identifying obstacles helps you address them. Perhaps you lack time, or you’re not getting enough support.

    Once obstacles are known, you can find solutions. Maybe you need to wake up earlier, or find a workout buddy.

    Refining strategies is also important. If your current approach isn’t yielding results, don’t be afraid to try something different. Set new, more ambitious sub-goals.

    This keeps things exciting and provides a sense of forward movement. Finally, consistency is the name of the game. Even small steps forward, taken regularly, add up.

    Celebrating milestones, no matter how small, keeps you motivated and reminds you of how far you’ve come.

    Common Myths Debunked

    Myth 1: Le Second Trimestre Is Always The Hardest Part

    While le second trimestre can present challenges due to increased complexity and workload, it’s not universally the “hardest.” The difficulty often depends on the specific context and the individual’s preparation. For some, the initial learning curve of the first trimester might be the most challenging. For others, the final push in the third trimester can be the most demanding.

    The perceived difficulty is subjective and can be managed with the right strategies.

    Myth 2: Progress Slows Down In Le Second Trimestre

    Contrary to this, le second trimestre is often when real progress becomes more evident. The foundational work from the first trimester is now applied, leading to tangible results. If early strategies are effective, this period can see significant acceleration.

    The key is consistent application of learned principles and effective planning, which can lead to substantial gains.

    Myth 3: You Can’t Recover From A Slow Start In Le Second Trimestre

    This is simply not true. While a strong start is beneficial, le second trimestre offers ample opportunity for recovery and improvement. By analyzing what went wrong, adjusting strategies, and dedicating focused effort, individuals and organizations can significantly turn things around.

    It’s a period of assessment and correction, making it ideal for bouncing back from any initial setbacks.

    Frequently Asked Questions

    Question: What is the main difference between the first and second trimester?

    Answer: The first trimester usually focuses on introductions and foundational concepts, while the second trimester builds upon these with more complex material and application.

    Question: Should I change my study habits during le second trimestre?

    Answer: Yes, you might need to adjust your study habits to handle more challenging topics. Focus more on problem-solving and critical thinking.

    Question: What if my business is not meeting its second trimester goals?

    Answer: Analyze your performance data to understand why. Adjust your strategies based on market feedback and competitor analysis.

    Question: How can I stay motivated during le second trimestre if things get tough?

    Answer: Remind yourself of your long-term goals, break tasks into smaller steps, and celebrate your achievements, no matter how small.

    Question: Is le second trimestre a good time to try new things?

    Answer: Yes, it can be a great time for innovation and adaptation, especially in business or personal development, by using feedback from the first trimester.

    Summary

    Le second trimestre is a vital stage where foundational knowledge is applied and built upon. It’s a period of increased complexity and opportunity. By planning effectively, staying focused, and adapting strategies, you can successfully navigate its challenges.

    This phase is key for demonstrating progress and setting up a strong finish, whether in school, business, or personal goals. Embrace this turning point with confidence.

  • The Pregnancy Test Meme Template Guide

    The Pregnancy Test Meme Template Guide

    Finding the right pregnancy test meme template can feel like a puzzle, especially if you’re new to making memes. You see them everywhere online, making people laugh with relatable situations. It might seem tricky to figure out where to start, but don’t worry!

    This guide is here to help you out. We’ll walk through everything step-by-step so you can easily find and use these fun templates. Get ready to create your own hilarious memes!

    Key Takeaways

    • You will learn where to find various pregnancy test meme templates.
    • This post explains how to identify the best template for your meme idea.
    • Discover simple ways to use and adapt pregnancy test meme templates.
    • Understand why these memes are so popular and how to make yours stand out.
    • Get tips on adding your own twist to create unique pregnancy test memes.

    Understanding The Pregnancy Test Meme Template

    What Is A Pregnancy Test Meme Template

    A pregnancy test meme template is a blank image, usually a picture of a pregnancy test, that people use as a base for creating funny jokes. These templates are super popular because they capture a shared experience or feeling that many people can relate to. Think about the mix of surprise, hope, or maybe even panic someone might feel when looking at a pregnancy test.

    Memes use this emotional core to make jokes about everyday life, not just about actual pregnancies. It’s all about expressing a thought or reaction in a humorous way.

    The power of a meme template lies in its versatility. A simple image can become a thousand different jokes depending on the text added. For pregnancy test memes, the dual lines on the test often represent a clear outcome or a moment of decision.

    This visual cue is easily understood, making it a perfect canvas for relatable humor. People often search for these templates when they have a funny thought or want to comment on a situation that feels like a “yes” or “no” moment in their own lives.

    The Appeal Of Relatable Humor

    People love memes because they are a quick and easy way to connect. When you see a meme that perfectly describes a feeling or a situation you’ve been in, it’s like a little wink from the internet. It makes you feel less alone and more understood.

    Pregnancy test memes tap into universal feelings of anticipation, surprise, and sometimes a bit of dread or excitement about outcomes.

    This relatability is key to their success. Whether the meme is about expecting good news, facing an unexpected challenge, or just making a simple choice, the pregnancy test image provides a visual shorthand. It instantly signals a moment of truth.

    This makes them perfect for sharing across social media platforms where quick, engaging content is king. The humor often comes from the unexpected text paired with the serious imagery of a test.

    Common Scenarios For Pregnancy Test Memes

    While the template is called a “pregnancy test meme template,” its use extends far beyond actual pregnancy. People adapt it for countless situations. For example, someone might see their bank account balance after a big purchase and use the template to show a negative result, humorously representing their financial state.

    Another might be waiting for a job offer and use the template to express their anxious hope.

    Think about a student waiting for their exam results, or someone hoping their favorite team wins a crucial game. The visual of the pregnancy test, with its binary outcome, translates well to these scenarios. It’s a universal symbol for waiting for an important result that will change things.

    This flexibility is why the pregnancy test meme template remains a go-to for many meme creators. It’s a simple image that speaks volumes about anticipation and consequence.

    Finding The Perfect Pregnancy Test Meme Template

    Where To Search For Templates

    Finding a good pregnancy test meme template is easier than you might think. Websites dedicated to memes and image hosting are your best bet. Popular platforms like Imgur, Pinterest, and Reddit often have dedicated communities or collections where users share meme templates.

    Simply searching for “pregnancy test meme template” on these sites will yield many results.

    Another excellent resource is meme generator websites. Many of these sites have a library of popular templates that you can browse and select from. They often categorize them, making it simple to find exactly what you’re looking for.

    Don’t forget general image search engines too. A quick search there can lead you to various versions of the template shared across different blogs and social media posts.

    Identifying A High-Quality Template

    When you’re looking for a template, several things make one stand out. First, ensure the image is clear and not blurry. A sharp image makes your meme look more professional.

    Second, check if the template is easy to add text to. Some templates have clear spaces at the top or bottom, or the image itself is simple enough not to distract from your text.

    Look for templates that are versatile. Does the image clearly show the pregnancy test without too many other distracting elements? This allows your text to be the main focus.

    Sometimes, you’ll find templates that have a slightly more exaggerated or comedic look to the test itself, which can add to the humor. Most importantly, choose one that sparks your creativity and fits the vibe of the joke you want to make.

    Different Styles Of Pregnancy Test Templates

    You’ll find that not all pregnancy test meme templates are the same. Some are very straightforward, showing a clear positive or negative result. Others might show a test with faint lines, adding an element of ambiguity that can be used for humor about uncertainty.

    You might also find templates that are slightly edited for comedic effect, perhaps with added expressions or effects.

    Some templates show the test in a hand, adding a human element. Others are just close-ups of the test itself. The variety means you can pick a template that best suits the specific emotion or situation you want to portray in your meme.

    For instance, a test with two bold lines might be perfect for a definitive “yes” or “no” scenario, while a faint line could represent a situation with a lot of doubt.

    Creating Your Meme With A Pregnancy Test Template

    Choosing The Right Template For Your Joke

    The first step in creating your meme is matching your joke to the right template. If your joke is about a clear, undeniable outcome, a template showing a bold positive or negative result works best. If your humor comes from a situation that’s a bit uncertain or makes you anxious, a template with faint lines or one that shows a moment of intense concentration might be more suitable.

    Think about the emotion you want to convey. Are you going for shock, relief, disappointment, or pure silliness? The visual of the pregnancy test itself carries a lot of emotional weight, so pairing it with text that amplifies or subverts that emotion is key.

    For example, a meme about discovering you have to pay taxes could use a positive test template with the caption “My Wallet’s Reaction to Bills.”

    Adding Text To Your Template

    Once you have your chosen pregnancy test meme template, it’s time to add text. Most meme generator websites have simple tools for this. You can typically add text boxes that you can drag and resize.

    The most common font for memes is Impact, known for its bold, blocky appearance that’s easy to read. However, many generators offer other font choices.

    When writing your text, keep it short and punchy. Memes are meant to be quick to read and understand. The text should complement the image without overcrowding it.

    Aim for a setup and a punchline, or a relatable statement that makes people chuckle. For instance, if you’re using a positive test template, the text could be something like “Me finding an excuse to eat pizza.” This juxtaposition creates the humor.

    Using Meme Generators Effectively

    Meme generators are fantastic tools for beginners. They usually have a vast library of popular templates, including the pregnancy test meme template, and offer easy-to-use editing features. You can often upload your own images too, but for this purpose, using their pre-loaded templates is simpler.

    These generators allow you to add text, adjust its size and color, and sometimes even add simple graphics or stickers. The process is usually drag-and-drop or click-and-type. After you’ve added your text, you can usually preview the meme and then download it in a common image format like JPG or PNG.

    Some generators also allow you to share your meme directly to social media.

    Examples Of Popular Pregnancy Test Meme Formats

    One very common format uses the positive pregnancy test result to represent an unwanted or unexpected positive outcome. For example:

    1. A pregnancy test showing two bright pink lines (positive).
    2. Text (Top): “Me after accidentally opening my online shopping cart at 2 AM”
    3. Text (Bottom): “The results are in!”

    Another format plays on the anxiety of waiting for results. This might use a picture of a test with faint lines or someone looking intensely at a test.

    1. A pregnancy test with one very faint line and one clear line.
    2. Text (Top): “My brain trying to remember if I locked the front door”
    3. Text (Bottom): “The evidence says. maybe?”

    These examples show how the visual cue of the test can be repurposed for everyday anxieties and silly thoughts, making the pregnancy test meme template incredibly adaptable.

    The Cultural Impact And Popularity

    Why Are Pregnancy Test Memes So Popular

    Pregnancy test memes resonate because they tap into a universal experience of waiting for a significant result. While the image is specific, the underlying emotion of anticipation and the potential for surprise or relief is something almost everyone can relate to, regardless of whether they are actually pregnant. This broad relatability is a huge driver of their popularity.

    The humor often comes from the unexpected ways people apply this “result” imagery to mundane or funny situations. It’s a simple, visual punchline that’s instantly understandable. This makes them highly shareable on social media platforms like Twitter, Instagram, and TikTok.

    The format allows for quick reactions and commentary on current events or everyday life, making the pregnancy test meme template a versatile tool for internet humor.

    Evolution Of The Meme

    Like many memes, the pregnancy test meme has evolved over time. Initially, it might have been used more literally or for very direct jokes related to pregnancy. However, as internet culture progressed, its application broadened significantly.

    Users began to employ the visual of the test for any situation where there was a clear “yes” or “no” outcome, or a moment of intense waiting.

    This adaptability has kept it fresh. We see variations where the lines are exaggerated, or the test is shown in absurd contexts. The core visual remains, but the surrounding narrative and text change, allowing it to stay relevant.

    The development of new meme formats on social media also influences how these templates are used, encouraging more creative and often sillier interpretations.

    Statistics On Meme Usage

    Understanding the reach of memes can be challenging due to their organic spread. However, studies show that billions of memes are shared online daily. A survey by GWI in 2023 indicated that 69% of internet users aged 16-64 create or share memes.

    This highlights the massive audience for relatable, humor-based content.

    Specific data on pregnancy test memes is hard to isolate, but their consistent appearance in popular meme compilations and trending topics on platforms like Reddit suggests a strong and ongoing user base. The inherent shareability and humorous potential of the pregnancy test meme template contribute to its sustained presence in online culture. It’s a testament to how a simple image can become a powerful tool for communication and comedy.

    Common Myths Debunked

    Myth 1 The template is only for jokes about actual pregnancy.

    This is a common misunderstanding. While the name suggests its origin, the pregnancy test meme template is widely used for countless non-pregnancy related jokes. People apply the “positive” or “negative” result concept to financial situations, job prospects, everyday decisions, or even silly personal observations.

    The humor lies in the relatable outcome, not necessarily the subject matter.

    Myth 2 You need advanced editing skills to use meme templates.

    Actually, you don’t! Websites called meme generators offer very simple, user-friendly interfaces. You can usually just click on a template, type your text into designated boxes, and download the final image.

    No complex software or design experience is required, making meme creation accessible to almost everyone.

    Myth 3 Pregnancy test memes are always negative or about bad news.

    This isn’t true. The template can represent any clear outcome. A “positive” result can be used humorously for something excitingly unexpected, like finding money in an old coat.

    A “negative” result can signify relief, like a diet plan that didn’t require breaking. The context provided by the text is what determines the meme’s meaning.

    Frequently Asked Questions

    Question: Where can I find the pregnancy test meme template?

    Answer: You can find it on meme generator websites, image-sharing platforms like Imgur and Pinterest, and through general image searches online.

    Question: What kind of text works best with this template?

    Answer: Short, punchy text that relates to a clear outcome, surprise, or moment of anticipation often works best. It should complement the image.

    Question: Can I use this template if I’m not good at drawing?

    Answer: Yes! Meme generators are designed for people who just want to add text to images. No drawing skills are needed.

    Question: Are there different versions of the pregnancy test template?

    Answer: Yes, you can find templates showing clear positives, clear negatives, faint lines, and sometimes even edited versions for extra comedic effect.

    Question: How do I save the meme once I create it?

    Answer: Most meme generator websites have a “Download” or “Save” button that lets you save the meme as a JPG or PNG file to your device.

    Final Thoughts

    You’ve learned how easy it is to find and use a pregnancy test meme template. These popular images offer a simple way to express relatable feelings and jokes. With user-friendly tools available, anyone can create funny memes.

    Pick your favorite template, add some clever text, and share your humor with the world.

  • Second Trimester Cramping Remedies Explained

    Second Trimester Cramping Remedies Explained

    Pregnancy can be a wonderful time, but sometimes things happen that can be a bit confusing. If you’re experiencing leg cramps during your second trimester, you’re definitely not alone. It can be a bit worrying when your legs suddenly start to ache, especially if this is your first time being pregnant.

    But don’t you worry! We’re going to break down exactly why this happens and give you some easy ways to find relief. Stick around to learn simple tips that can make a big difference.

    Key Takeaways

    • Understand the common causes of leg cramps in the second trimester.
    • Discover simple home remedies for immediate relief.
    • Learn about dietary changes that can help prevent cramps.
    • Explore safe exercise and stretching routines for pregnancy.
    • Know when to seek professional medical advice for cramps.

    Understanding Second Trimester Cramping Causes

    It’s quite common for many expectant mothers to experience leg cramps, especially as their pregnancy progresses into the second trimester. This phase often brings about significant physical changes as the baby grows, and your body is working hard to support this development. These cramps can feel like sudden, sharp pains, usually in the calf muscles, and they tend to strike without warning, often at night.

    For many, this is a new and sometimes unsettling sensation, making it challenging to know what to do when it happens. The good news is that these cramps are usually harmless and manageable with a few simple adjustments. This section will explore the primary reasons behind these discomforts, setting the stage for how to address them effectively.

    Hormonal Shifts and Blood Circulation

    During the second trimester, your body undergoes a surge of hormonal changes. These hormones play a vital role in preparing your body for childbirth, but they can also affect your muscles and circulation. One key hormone is progesterone, which helps relax muscles throughout your body, including those in your uterus to prevent early labor.

    However, this relaxation can also affect your leg muscles, potentially leading to spasms or cramps.

    At the same time, your body is increasing its blood volume to support the growing baby. This increased blood flow, combined with the pressure from your growing uterus on your veins, can sometimes lead to poorer circulation in your legs. Poor circulation means your muscles might not get all the oxygen and nutrients they need, making them more prone to cramping.

    Think of it like a traffic jam for your blood flow – it slows things down and can cause issues for the muscles waiting for their supply.

    Weight Gain and Pressure on Nerves

    As your pregnancy advances into the second trimester, you naturally gain weight. This extra weight puts more pressure on various parts of your body, including your legs and feet. The increasing size of your uterus can also press on nerves that run down your legs, like the sciatic nerve.

    When nerves are compressed, they can send faulty signals to your muscles, which might trigger involuntary muscle contractions or cramps. This pressure can also disrupt the signals from your brain to your muscles, leading to miscommunication and resulting in painful cramps. It’s like a wire getting squeezed, causing static and disruption in the signal.

    Mineral Imbalances

    Your body’s needs change significantly during pregnancy, and this includes your requirement for certain minerals. Deficiencies in minerals like calcium, magnesium, and potassium are often linked to muscle cramps. These minerals are essential for proper muscle function; they help your muscles relax after contracting and ensure nerve signals are transmitted correctly.

    During pregnancy, your body uses more of these minerals to support the baby’s development. If your intake doesn’t keep up with this increased demand, you can become deficient. Magnesium, in particular, is known for its role in muscle relaxation, and a lack of it can make your muscles more prone to spasming.

    Similarly, calcium is crucial for muscle contraction and relaxation cycles, and imbalances can lead to cramps.

    Dehydration and Fatigue

    Staying properly hydrated is crucial for everyone, but it becomes even more important when you’re pregnant. Dehydration can affect the balance of electrolytes in your body, which are vital for muscle and nerve function. When you don’t drink enough fluids, your blood volume can decrease, and your muscles may not receive adequate hydration, making them more susceptible to cramping.

    Pregnancy, especially the second trimester, also brings increased fatigue. When you’re tired, your muscles can become more strained and prone to cramping. Standing or walking for long periods when you’re already fatigued can exacerbate this.

    Your body is working overtime to grow a baby, and this can lead to tired muscles that are more likely to cramp up.

    Effective Cramping Second Trimester Remedies

    Dealing with leg cramps during pregnancy can be frustrating, but there are many effective remedies you can try right at home. These solutions focus on immediate relief when a cramp strikes and also on preventing them from happening in the first place. Many of these remedies are simple and require little effort, making them easy to incorporate into your daily routine.

    We’ll explore practical ways to ease that sudden leg pain and help you feel more comfortable as your pregnancy progresses.

    Immediate Relief Strategies

    When a cramp hits, the first thing you want is quick relief. Fortunately, there are several things you can do right away to ease the pain. These are simple actions that target the cramping muscle directly and can help it relax.

    • Stretch the affected muscle gently. If you get a cramp in your calf, try flexing your foot upwards, pointing your toes towards your shin. You can do this while sitting or lying down. Gently pulling your toes towards your knee can also help. Hold the stretch for about 20-30 seconds, and repeat if needed. This action encourages the muscle fibers to lengthen and release the painful contraction.
    • Massage the muscle. Once the immediate sharp pain subsides a bit, gently massage the cramped muscle. Use your hands to rub and knead the area. This can help improve blood flow and relax the muscle. You can use a gentle, circular motion. Sometimes, a warm compress or a heating pad on a low setting can also help soothe the muscle, but always be cautious with heat during pregnancy and avoid making it too hot.
    • Walk it off. If you can manage it, a short, gentle walk can sometimes help to work out a cramp. Walking encourages blood flow to the muscles. It’s not about intense exercise, but a slow, steady pace to get the circulation moving. If the cramp is severe, this might not be feasible, so listen to your body.

    Hydration and Electrolyte Balance

    As we touched on, staying hydrated is a cornerstone of preventing and managing cramps. Your body needs sufficient fluids to keep your muscles functioning properly. Dehydration can lead to an imbalance of electrolytes, which are critical for muscle contractions and nerve signaling.

    Aim to drink plenty of water throughout the day. It’s not just about quenching your thirst; it’s about consistently providing your body with the fluids it needs. General recommendations suggest around 8-10 glasses of water per day during pregnancy, but this can vary based on your activity level and climate.

    You can also maintain electrolyte balance by consuming foods rich in potassium, calcium, and magnesium. These essential minerals work together to keep your muscles from cramping. Foods like bananas, avocados, leafy green vegetables, nuts, and dairy products are good sources.

    Sometimes, electrolyte-rich drinks can also be beneficial, but it’s always best to discuss these with your healthcare provider to ensure they are safe for your pregnancy.

    Dietary Adjustments for Prevention

    What you eat plays a significant role in preventing those uncomfortable cramps. Focusing on a balanced diet rich in specific nutrients can make a noticeable difference. These dietary adjustments are not just for cramp prevention but also contribute to your overall health and your baby’s development.

    • Increase magnesium intake. Magnesium is often cited as a key mineral for muscle health. Many women find that increasing their dietary magnesium significantly reduces the frequency of leg cramps. Include more foods like spinach, almonds, pumpkin seeds, and whole grains in your meals. These foods are delicious and packed with this essential mineral.
    • Ensure adequate calcium. Calcium is vital for muscle function, including relaxation. If your calcium levels are low, your muscles might be more prone to spasms. Good sources of calcium include dairy products like milk, yogurt, and cheese, as well as fortified plant-based milks, tofu, and leafy greens like kale. Your prenatal vitamin likely contains calcium, but it’s worth checking and supplementing through diet as well.
    • Boost potassium levels. Potassium helps regulate muscle contractions and nerve signals. Bananas are famously high in potassium, but other good sources include sweet potatoes, beans, and yogurt. Adding these to your diet can support healthy muscle function and reduce cramping.

    Safe Exercise and Stretching

    While it might seem counterintuitive, regular, gentle exercise can actually help prevent leg cramps. Movement improves blood circulation, which is key to delivering oxygen and nutrients to your muscles and removing waste products. The right kind of exercise can also keep your muscles from becoming too tight.

    Focus on low-impact activities like walking, swimming, or prenatal yoga. These exercises are safe during pregnancy and help keep your body active without putting excessive strain on your muscles. Swimming, in particular, is excellent because the water supports your weight and can ease pressure on your joints and muscles.

    Regular stretching is another powerful tool. Incorporate daily stretching routines, especially for your legs and calves. Gentle stretches before bed can be particularly helpful, as leg cramps often occur during the night.

    Hold each stretch for about 30 seconds and breathe deeply to relax your muscles. Never stretch to the point of pain.

    Comfortable Footwear and Positioning

    The shoes you wear and how you position your legs can have a surprising impact on leg cramps. Opting for comfortable, supportive footwear is essential. High heels can shorten your calf muscles, making them more susceptible to cramping, and they can also affect your posture and balance.

    When you’re resting, try to elevate your legs. This simple act can help improve blood circulation back towards your heart, reducing the pooling of blood in your lower legs. Even propping your feet up on a pillow while sitting for extended periods can make a difference.

    Avoid crossing your legs for long durations, as this can further impede circulation.

    During sleep, try to sleep on your side, ideally your left side. This position is often recommended for pregnant women as it can improve blood flow to the uterus and other vital organs, and it may also help reduce pressure on the veins in your pelvis, potentially easing leg circulation issues and the cramps they can cause.

    When to Seek Professional Advice

    While leg cramps are usually a normal part of pregnancy, there are times when it’s important to consult your healthcare provider. Most cramps are benign, but it’s always wise to be aware of any warning signs that might indicate a more serious issue. Your doctor or midwife is the best resource for personalized advice regarding your health during pregnancy.

    Red Flags for Cramping

    There are certain symptoms that, when accompanying leg cramps, warrant a call to your doctor. These can sometimes be indicators of conditions like deep vein thrombosis (DVT) or preeclampsia, though these are less common. Pay attention to whether the cramping is accompanied by swelling, redness, or warmth in one leg, especially if it’s persistent.

    Severe, persistent pain that doesn’t improve with home remedies is also a reason to seek medical advice. If the cramps are so intense that they are significantly disrupting your sleep or daily activities and simple remedies aren’t helping, it’s worth getting it checked out. Changes in the skin color of your leg or a feeling of heat in the calf can also be concerning signs that need medical attention.

    Discussing with Your Healthcare Provider

    Don’t hesitate to bring up any concerns about cramping with your doctor or midwife at your regular prenatal appointments. They can help determine if there are any underlying causes for your cramps and offer specific guidance. They might check your mineral levels through blood tests or suggest specific dietary changes or supplements if a deficiency is suspected.

    Your provider can also offer reassurance and personalized tips based on your individual health profile. They can confirm that the cramps are a normal pregnancy symptom or identify if further investigation is needed. Open communication with your healthcare team ensures you and your baby receive the best possible care throughout your pregnancy.

    Common Myths Debunked

    Myth 1: All leg cramps during pregnancy are harmless and nothing to worry about.

    While most leg cramps are indeed normal and not serious, it’s important not to dismiss them entirely. As discussed, severe, persistent, or unusually accompanied cramps can sometimes signal underlying issues like DVT or be related to conditions like preeclampsia. Always be mindful of other symptoms and consult your doctor if you have any doubts.

    Myth 2: You need to take a lot of supplements to stop leg cramps.

    While mineral deficiencies can contribute to cramps, it’s not always necessary to take a large number of supplements. The first and often most effective approach is to focus on a balanced diet rich in magnesium, calcium, and potassium. Your prenatal vitamin likely already provides some of these.

    Excessive supplementation can sometimes be harmful. Always discuss any new supplements with your healthcare provider before taking them.

    Myth 3: Drinking pickle juice is a proven cure for pregnancy leg cramps.

    The idea that drinking pickle juice or other salty fluids can help cramps is a popular home remedy, but scientific evidence supporting it is limited. While some people report relief, it’s likely due to factors like rehydration or a placebo effect rather than a direct physiological mechanism. The salt content might encourage you to drink more fluids, which is beneficial, but it’s not a guaranteed or universally effective solution.

    Myth 4: You should avoid stretching because it might worsen cramps.

    This is the opposite of what is recommended. Gentle stretching, especially of the calf muscles, is actually one of the most effective ways to relieve and prevent leg cramps. Stretching helps to lengthen the muscle fibers and relax them.

    The key is to stretch gently and avoid overstretching, which could cause injury.

    Frequently Asked Questions

    Question: How often do leg cramps happen in the second trimester?

    Answer: Leg cramps can happen frequently for some women in the second trimester, sometimes several times a week, while others might experience them only occasionally or not at all.

    Question: Can I use a heating pad for leg cramps?

    Answer: A warm compress or a heating pad on a low setting can help soothe muscle cramps, but it’s important to use it cautiously during pregnancy and avoid making it too hot. Always test the temperature first.

    Question: Should I avoid certain exercises if I get leg cramps?

    Answer: Generally, you should continue with gentle, low-impact exercises like walking and swimming. However, avoid exercises that put excessive strain on your leg muscles or cause you pain. Listen to your body and consult your doctor if unsure.

    Question: What’s the best position to sleep in to avoid cramps?

    Answer: Sleeping on your side, particularly your left side, is often recommended to improve circulation and may help reduce leg cramps. Try propping your legs up with pillows for added comfort and support.

    Question: Are leg cramps a sign of something serious like preeclampsia?

    Answer: While leg cramps are usually normal, if they are severe, persistent, or accompanied by other symptoms like swelling, high blood pressure, or headaches, it could potentially be related to preeclampsia. It’s important to discuss any concerning symptoms with your healthcare provider.

    Summary

    You’ve learned that second trimester cramping is common due to hormonal shifts, weight gain, and circulation changes. Effective remedies include gentle stretching, staying hydrated, and adjusting your diet to ensure enough magnesium, calcium, and potassium. Simple steps like comfortable shoes and proper leg positioning can also make a difference.

    Remember to seek professional advice if cramps are severe or accompanied by other worrying symptoms, and rest assured that most cramping is manageable.

  • Creating a Grade R Weekly Programme

    Creating a Grade R Weekly Programme

    Getting started with a grade r weekly programme can feel a bit tricky. It’s a big job to plan out a whole week for young learners. Many new teachers or parents feel unsure where to begin, thinking it’s too hard to make fun and educational.

    But don’t worry! This guide will make it super simple. We’ll show you exactly how to build a great grade r weekly programme step by step.

    Let’s make learning exciting for the little ones.

    Key Takeaways

    • You will learn the basic building blocks of a grade r weekly programme.
    • Discover how to balance different learning areas for young children.
    • Find simple ways to make lessons fun and engaging for grade r students.
    • Understand how to create a flexible schedule that can adapt to classroom needs.
    • Learn how to incorporate play-based learning effectively into your weekly plan.
    • Gain confidence in planning a successful grade r weekly programme.

    Designing Your Grade R Weekly Programme Structure

    A good grade r weekly programme gives structure to the learning day. It helps teachers plan activities that cover all the important areas for young children. This structure makes sure every child gets a chance to learn and grow.

    It also helps keep the days flowing smoothly. Think of it as a map for the week’s adventures in learning.

    Setting Learning Goals for the Week

    Before you plan any activities, it’s smart to think about what you want the children to learn. These are your goals. For grade r, goals often include things like recognizing letters and numbers, learning about their feelings, or exploring the world around them.

    Setting these goals helps you pick the right activities. It ensures that what you do in class really matters.

    • Identifying Key Learning Areas

      For grade r, we usually look at different subjects. These include language, mathematics, life skills, and creative arts. Language might be about listening to stories or saying new words.

      Math could be about counting or shapes. Life skills cover things like hygiene and friendship. Creative arts involve drawing, singing, and movement.

      A strong grade r weekly programme balances all these.

    • Making Goals Achievable

      Your goals should be small and easy for young children to reach. Instead of saying “learn to read,” a better goal is “recognize five letters.” This feels like a success for them. When goals are small, children feel good about what they do.

      This keeps them wanting to learn more. For example, learning to count to ten is a great goal for a week.

    Allocating Time for Different Activities

    Children learn best when there is a good mix of activities. Some activities need quiet focus, while others need lots of movement. A weekly programme helps you plan this balance.

    You’ll want to have times for group activities, and also times for children to work on their own or in small groups. This mix keeps things interesting and helps different kinds of learners.

    • Structured Learning Time

      This is when you teach specific skills. For instance, a teacher might introduce new letter sounds or counting concepts. This time is usually shorter for young children, maybe 15-20 minutes.

      It needs to be engaging. Using songs, games, or colourful pictures makes this time effective. A good programme plans these short, focused sessions.

    • Free Play and Exploration

      Play is how young children learn best. Free play allows them to choose what they want to do and explore their own interests. This could be playing with blocks, dolls, or art supplies.

      Teachers observe during free play to see what children are interested in and where they might need more support. It’s a very important part of a grade r weekly programme.

    • Outdoor Play and Movement

      Young children need to move their bodies! Outdoor play or even indoor movement activities are essential. This helps them develop physical skills and release energy.

      Running, jumping, and climbing are great for their bodies. It also helps them focus better when they come back inside. A good programme always includes time for this.

    Developing Engaging Content for Your Programme

    The activities you choose for your grade r weekly programme are what make learning exciting. They should be fun, hands-on, and suitable for young children’s abilities. When activities are engaging, children are more likely to participate and remember what they learn.

    This means planning with creativity and a focus on play.

    The Importance of Play-Based Learning

    Play is not just fun for grade r children; it’s how they learn most effectively. Through play, they experiment, solve problems, and understand the world. A grade r weekly programme that includes lots of play is a successful one.

    It allows children to learn at their own pace and in ways that make sense to them.

    • Learning Through Play Scenarios

      Imagine a pretend play corner set up as a shop. Children take on roles, count imaginary money, and practice speaking to each other. This simple scenario teaches math, language, and social skills all at once.

      It’s much more memorable than just writing numbers on a board. Another scenario could be building a fort, which encourages teamwork and problem-solving.

    • Integrating Play Into All Subjects

      Even subjects like math and language can be taught through play. For math, this might be a treasure hunt for objects to count. For language, it could be acting out a story.

      The key is to make the learning part of the game. This makes it feel natural and fun for the children.

    Crafting Thematic Units

    Thematic units tie different learning activities together around a central idea. This makes learning more connected and meaningful. For example, a unit on “Bugs” could include reading bug stories, drawing bugs, counting bug legs, and learning about where bugs live.

    This approach helps children see how different things relate to each other. A well-planned grade r weekly programme often uses themes.

    • Choosing Relevant Themes

      Themes should be interesting to young children. Popular themes include animals, seasons, transport, or community helpers. Choosing something children can relate to makes them more excited to learn about it.

      For instance, “Our Families” is a theme that connects directly to their lives.

    • Developing Activities for a Theme

      For a “Seasons” theme, you could have a day for autumn where children collect leaves and talk about changing weather. For winter, they might learn about snow and wear warm clothes. Spring could bring discussions about new plants and animals.

      Summer activities might involve water play and talking about sunshine. Each week can focus on a new aspect of the theme.

    Practical Tips for Implementing Your Programme

    Putting your grade r weekly programme into action is the final step. It’s about making it work smoothly in the classroom. Small tips can make a big difference in how well the week goes.

    Flexibility is also key. Things don’t always go as planned with young children, and that’s okay!

    Creating a Flexible Schedule

    While a plan is good, it’s important to be able to change things. Young children have different needs each day. Some days they might be very energetic and need more active play.

    Other days, they might be tired and need quieter activities. A flexible grade r weekly programme allows you to adjust as needed.

    • Building in Buffer Time

      Always leave a little extra time between activities. This way, if one activity runs a bit long, or if children need more time to transition, you won’t feel rushed. Buffer time also allows for spontaneous moments of discovery or discussion that are valuable learning opportunities.

      This makes the day feel calmer for everyone.

    • Responding to Children’s Needs

      If the children are suddenly very interested in something unexpected, like watching ants on the playground, it’s good to go with it for a little while. This shows them that their interests are valued. You can always link it back to a planned activity later.

      Flexibility means being present and responsive to the children’s immediate world.

    Gathering Resources and Materials

    Having the right things ready makes activities much easier to do. For a grade r weekly programme, this means having art supplies, books, toys, and learning materials accessible. Planning ahead for what you need helps avoid last-minute rushing.

    • Organizing Your Classroom Space

      A well-organized classroom helps children find materials themselves and participate more independently. Clearly labeled areas for different activities, like a reading corner or an art station, are very helpful. This makes it easy for you and the children to know where things belong.

      It also makes tidying up quicker.

    • Utilizing Everyday Items

      You don’t always need fancy materials. Many everyday items can be turned into learning tools. Empty boxes can become building blocks, old magazines can be used for collage, and nature items like leaves or stones can be great for counting.

      This saves money and encourages creativity.

    Assessing Learning Progress

    As you go through your grade r weekly programme, it’s helpful to notice how the children are doing. This isn’t about formal tests for young children. It’s more about observing them and noting what they seem to understand and where they might need more help.

    • Observation as a Tool

      Watch children during play and activities. What questions do they ask? What do they try to do?

      How do they solve problems? These observations give you a clear picture of their learning. You can jot down notes or take photos.

      For example, if a child is struggling to draw a specific shape, you can plan a small, fun activity for them later.

    • Informal Checks

      You can also do quick, informal checks. When a child is counting, you can ask them to count one more. When they are looking at letters, you can ask if they know a letter sound.

      These are done casually, without pressure. They help you understand their progress without making them feel tested.

    Common Myths Debunked

    Myth 1: A Grade R Weekly Programme Must Be Rigid

    Many people think a weekly programme has to be followed exactly every day. The reality is that for young children, flexibility is much more important than strict adherence. Life with grade r learners is full of surprises, and a good programme can bend and adapt to their spontaneous interests and needs.

    It’s a guide, not a dictator.

    Myth 2: Play-Based Learning Isn’t Academically Rigorous

    Some believe that play is just ‘fun’ and doesn’t teach real skills. This is far from the truth. Play is actually a powerful learning tool that develops critical thinking, problem-solving, social skills, and creativity.

    Children learn complex concepts through hands-on experiences during play, often without even realizing they are learning.

    Myth 3: You Need Expensive Materials for a Good Programme

    There’s a belief that high-quality learning requires costly toys and resources. However, many of the best learning tools are simple, everyday items. Cardboard boxes, nature finds, and recycled materials can spark immense creativity and learning.

    The teacher’s creativity and engagement are far more valuable than expensive supplies.

    Myth 4: Planning a Grade R Weekly Programme Takes Too Much Time

    While planning is necessary, it doesn’t have to consume all your time. By using themes, having a flexible template, and reusing activities, planning becomes more efficient. The initial investment in planning pays off with smoother, more effective teaching throughout the week, saving time in the long run.

    Frequently Asked Questions

    Question: How do I include arts and crafts in my weekly programme?

    Answer: Integrate arts and crafts by linking them to your weekly theme. For example, if your theme is animals, children can paint or draw their favourite animal. Always have a variety of simple supplies like crayons, paint, paper, and glue available.

    Keep activities short and focus on the process of creating, not just the final product.

    Question: What is a good balance between teacher-led and child-led activities?

    Answer: Aim for a balance where children have ample time for free play and exploration (child-led), but also have structured times for teacher-led instruction on specific skills. A ratio of about 60-70% child-led to 30-40% teacher-led can work well for grade r, ensuring both exploration and targeted learning.

    Question: How much time should I dedicate to each learning area?

    Answer: There’s no single fixed time. The key is variety. Ensure all areas like language, math, life skills, and creative arts are touched upon daily or across the week.

    Some days might focus more on math through games, while other days might emphasize language through story time. Regular exposure is more important than strict time blocks.

    Question: What if a child doesn’t participate in an activity?

    Answer: It’s okay if a child doesn’t always participate. Gently encourage them by showing them how much fun it is or inviting them to watch first. Sometimes children need time to observe before joining in.

    If they consistently resist, try to understand why. It might be a sign they need a different kind of activity or more individual attention.

    Question: How do I manage transitions between activities?

    Answer: Use clear signals like songs, chimes, or a visual timer. Announce the upcoming transition a few minutes before it happens. Make it a game, like “tidy-up time to the song!” Having a predictable routine helps children know what to expect, making changes smoother and less disruptive.

    Wrap Up

    Creating a grade r weekly programme is about making learning a joyful adventure. By balancing structured learning with ample play, using themes, and staying flexible, you can build a rich experience. Focus on simple, engaging activities that meet children’s needs.

    This guide provides the tools to confidently plan a successful and fun week for your grade r learners.

  • Pregnancy Test Monoclonal Antibodies Explained

    Pregnancy Test Monoclonal Antibodies Explained

    Trying to figure out how pregnancy tests work can sometimes feel a bit tricky, especially when you hear terms like pregnancy test monoclonal antibodies. It might sound complicated, but it’s actually pretty straightforward once you break it down. Don’t worry, we’ll make it super easy to grasp with simple steps.

    Let’s get this clear so you know exactly what’s happening inside that little test stick.

    Key Takeaways

    • Monoclonal antibodies are proteins that target specific things in your body.
    • In pregnancy tests, they specifically find and react to a hormone called hCG.
    • This reaction is what causes the positive line or indicator to appear.
    • Understanding this helps explain why pregnancy tests are so accurate.
    • The technology behind these antibodies is a key part of modern diagnostics.

    Understanding Pregnancy Test Monoclonal Antibodies

    At its heart, a pregnancy test works by detecting a hormone your body makes when you’re pregnant. This hormone is called human chorionic gonadotropin, or hCG for short. It’s produced by the cells that will eventually form the placenta shortly after a fertilized egg attaches to the uterine lining.

    The amount of hCG in a woman’s body rises rapidly in the early stages of pregnancy, making it an excellent early indicator. Home pregnancy tests are designed to pick up even small amounts of this hormone in your urine. This is where monoclonal antibodies come into play, acting as the detective tools within the test.

    What Are Monoclonal Antibodies

    Monoclonal antibodies are special proteins made in a lab. They are like highly trained search dogs, built to find and bind to only one specific target. Think of it like a key fitting into a very specific lock.

    In the world of biology and medicine, these targets can be anything from a virus or bacteria to a specific cell type or, in the case of pregnancy tests, a particular hormone. Scientists create them by stimulating an animal’s immune system to produce antibodies against a target. Then, they isolate the specific antibody-producing cells and grow them in large quantities.

    This ensures a consistent and pure supply of antibodies that all recognize the exact same thing.

    The precision of monoclonal antibodies is what makes them so valuable. Unlike polyclonal antibodies, which are a mix of different antibodies targeting various parts of the same molecule, monoclonal antibodies are uniform. This means they offer a much cleaner and more reliable signal.

    For diagnostic tests, this uniformity is critical because it reduces the chances of false positives or false negatives. The consistent ability to bind to their target allows for accurate and repeatable results.

    How They Work in Pregnancy Tests

    In a pregnancy test, specific monoclonal antibodies are designed to latch onto the hCG hormone. These antibodies are often linked to a visible indicator, such as a dye. When you use a test, you dip it into your urine.

    If hCG is present, the antibodies in the test will bind to the hCG molecules. This binding action is the crucial first step. The test is designed with lines or zones, and embedded within these are more antibodies.

    The hCG molecules, now bound to the first set of antibodies carrying the dye, travel along the test strip. They then bind to the second set of antibodies in the test’s indicator zone. This binding causes the dye to accumulate in that specific area, making a line or symbol appear, signaling a positive result.

    This process is incredibly sensitive. Modern pregnancy tests can detect hCG levels as low as 20-25 milli-international units per milliliter (mIU/mL). This sensitivity allows you to get an accurate result very early, sometimes even a few days before your missed period.

    The reliability stems directly from the highly specific nature of the monoclonal antibodies used. They ignore everything else in the urine and focus solely on hCG.

    Consider a scenario where a woman takes a test a week after conception. Her hCG levels might be quite low, but the sensitive monoclonal antibodies are still able to find and bind to these molecules. This binding then triggers the visible reaction on the test strip, indicating pregnancy.

    Without this precise binding mechanism, the test would not be able to differentiate between hCG and other similar substances in the urine, leading to unreliable results.

    The Role of hCG

    Human chorionic gonadotropin (hCG) is often called the “pregnancy hormone” because it’s produced by the developing placenta. Its primary role is to signal to the body that pregnancy has begun and to maintain the corpus luteum, a temporary endocrine structure in the ovary that produces progesterone. Progesterone is vital for supporting the early stages of pregnancy.

    The levels of hCG rise quickly in early pregnancy, doubling roughly every 48 to 72 hours. This rapid increase makes it an ideal marker for early pregnancy detection. By the time of a missed period, hCG levels are usually high enough for most home pregnancy tests to detect.

    The concentration of hCG in urine is generally lower than in blood, but it still rises significantly enough for urine tests to be effective. For instance, typical hCG levels can range from about 5 mIU/mL in very early pregnancy (around 3 weeks from the last menstrual period) to over 200,000 mIU/mL in the first trimester. Home pregnancy tests are calibrated to detect a threshold level, ensuring that they only show a positive result when hCG is present at a significant concentration indicative of pregnancy.

    The timing of testing is important because of this hormone’s rise. Testing too early, when hCG levels are still below the test’s detection threshold, can lead to a false negative result, even if pregnancy has occurred. Conversely, the specificity of the monoclonal antibodies helps prevent false positives.

    These antibodies are engineered to recognize the unique structure of hCG, making it highly unlikely for them to react with other hormones or substances present in urine.

    The Science Behind Pregnancy Tests

    Pregnancy tests utilize a technology known as immunochromatography. This is a rapid form of immunoassay that uses antibodies to detect specific substances. The test strip itself is made of a porous material, like nitrocellulose paper, which acts like a wick.

    It’s impregnated with several different chemical components at specific points along its length. These components include the monoclonal antibodies that bind to hCG, and often, other antibodies designed to detect the presence of the test itself, ensuring the test has functioned correctly.

    How Immunochromatography Works

    When a urine sample is applied to the test, it is absorbed by the strip. The urine flows along the strip through capillary action. As it moves, it encounters the reagents embedded in the material.

    The first set of reagents usually involves monoclonal antibodies conjugated with a colored dye. If hCG is present in the urine, these antibodies will bind to it. The flow then carries this hCG-antibody complex to a region of the strip containing immobilized antibodies.

    These immobilized antibodies are also specific for hCG, but they bind to a different part of the hCG molecule than the first set of antibodies.

    When the hCG-antibody complex reaches this second region, it gets trapped by the immobilized antibodies. This trapping causes the colored dye attached to the first set of antibodies to accumulate, creating a visible line or symbol. This is what you see as a positive result.

    Most tests also include a control line. This line uses a different set of antibodies that capture any unbound dye molecules. The appearance of the control line confirms that the test worked properly and the urine flowed correctly across the strip.

    If the control line doesn’t appear, the test is invalid, regardless of whether a positive line shows up.

    This entire process happens quickly, often within a few minutes. The speed and accuracy are hallmarks of immunochromatographic tests. They have revolutionized at-home diagnostics because they are simple to use, require no special equipment, and provide reliable results.

    The underlying principle is the precise and predictable interaction between antibodies and their target antigens, in this case, hCG. The visual manifestation of this interaction is what allows for an easy-to-understand outcome.

    Key Components of a Test Strip

    A typical home pregnancy test strip contains several key areas, each with a specific function. At the sample pad, where you apply your urine, are the first set of reagents, including the hCG-specific monoclonal antibodies labeled with a dye. As the liquid moves up the strip, it passes through the reaction zone.

    This zone contains the immobilized antibodies that will capture the hCG-antibody complexes if pregnancy is present. Following this is the test line, which appears when hCG is detected.

    Further along the strip is the control zone. This zone contains antibodies that bind to the dye-labeled antibodies, but not to hCG. Its purpose is to show that the test is working correctly.

    If the control line appears, it means the dye has moved properly and the test is functional. Even if no test line appears, the control line’s presence validates the test. Finally, there’s often an absorbent pad at the end to draw excess liquid away and prevent backflow.

    The precise placement and concentration of these antibodies and dyes are critical for the test’s performance. Manufacturers spend considerable effort in optimizing these elements to ensure sensitivity and specificity. The visual readability of the lines is also important.

    The dyes are chosen for their visibility and their ability to form clear, distinct lines. The underlying science ensures that a positive result is due to the presence of hCG and not other factors.

    Sensitivity and Specificity Explained

    Sensitivity refers to a test’s ability to correctly identify individuals who have the condition being tested for. In pregnancy tests, high sensitivity means the test can detect very low levels of hCG. This is crucial for early detection.

    A highly sensitive test can give a positive result even when hCG levels are just beginning to rise. For example, a test with a sensitivity of 20 mIU/mL will react to hCG concentrations of 20 mIU/mL or higher.

    Specificity, on the other hand, refers to a test’s ability to correctly identify individuals who do not have the condition. In pregnancy tests, high specificity means the test is unlikely to give a false positive result. This is achieved by using monoclonal antibodies that are highly specific to hCG and do not react with other similar hormones, such as luteinizing hormone (LH) or follicle-stimulating hormone (FSH), which can have similar molecular structures.

    This specificity is vital for ensuring the results are trustworthy.

    The combination of high sensitivity and high specificity is what makes modern pregnancy tests so reliable. While no test is 100% perfect, the technology employing monoclonal antibodies has significantly reduced the occurrence of both false positives and false negatives. This is why doctors and individuals alike trust these tests for early pregnancy confirmation.

    The scientific design ensures that the visual outcome is a direct and accurate reflection of the hCG hormone’s presence.

    Practical Application and Real-World Examples

    The development and widespread availability of pregnancy tests powered by monoclonal antibodies have had a profound impact on reproductive health and family planning. These tests empower individuals to take control of their health by providing immediate, private, and accurate information. Their ease of use means that testing can be done at home, often before or shortly after a missed period, allowing for prompt decisions regarding pregnancy.

    This has practical implications for seeking early prenatal care, planning for a family, or making informed choices about pregnancy management.

    Case Study: Early Detection for Prenatal Care

    Sarah, a 28-year-old woman, was trying to conceive. She experienced a slight delay in her period and decided to take a home pregnancy test. The test, utilizing highly sensitive monoclonal antibodies, showed a faint positive line.

    Based on this result, she contacted her healthcare provider immediately. Her doctor confirmed the pregnancy through a blood test and recommended starting prenatal vitamins and making lifestyle adjustments. Early detection allowed Sarah to begin essential prenatal care earlier than she might have otherwise, which is crucial for a healthy pregnancy.

    This case highlights how the sensitivity of tests employing pregnancy test monoclonal antibodies can facilitate timely medical interventions and support optimal maternal and fetal health from the very beginning.

    Scenario: Planning for a Growing Family

    Mark and Emily had been hoping to expand their family. After suspecting a potential pregnancy, Emily used a home pregnancy test. The clear positive result from the test, a result made possible by the specific detection capabilities of monoclonal antibodies, allowed them to begin planning for the arrival of their new baby.

    This included informing family, adjusting budgets, and preparing their home. The confidence in the test’s accuracy, stemming from its sophisticated antibody technology, enabled them to move forward with their family planning with certainty. This demonstrates the personal and life-changing impact of accurate and accessible diagnostic tools.

    Statistical Insights on Accuracy

    Studies consistently show that home pregnancy tests, when used correctly, are highly accurate. For instance, over 99% accuracy is commonly cited for tests detecting hCG at levels of 50 mIU/mL or higher, which typically occurs about a week after a missed period. Even for tests detecting lower levels (around 20-25 mIU/mL), accuracy can be around 98% when taken on the day of the expected period.

    The reliability is largely attributed to the precise nature of the monoclonal antibodies used in their construction. These antibodies ensure that the test responds specifically to hCG, minimizing the chances of interference from other substances found in urine.

    A survey conducted by a leading health organization indicated that approximately 85% of women use home pregnancy tests before consulting a healthcare professional. This widespread use underscores the trust placed in these tests for initial pregnancy confirmation. The advancements in antibody technology have made these tests more accessible and reliable, contributing to their popularity and effectiveness in early pregnancy detection and subsequent healthcare decisions.

    Common Myths Debunked

    Myth 1: All pregnancy tests are the same

    This is not true. While most home pregnancy tests use similar underlying technology involving monoclonal antibodies and hCG detection, they vary significantly in their sensitivity levels. Some tests can detect lower levels of hCG earlier than others.

    The concentration of antibodies and the quality of the dye used can also differ between brands, affecting the speed and clarity of the results. Always check the sensitivity level stated on the test packaging to choose one that suits your needs for early detection.

    Myth 2: A faint line means you’re not pregnant or are less pregnant

    A faint positive line typically indicates that hCG is present, but at a lower concentration. This often happens when testing very early in pregnancy. As hCG levels rise, the line will become darker.

    A faint line is still a positive result. The intensity of the line is not a measure of how pregnant you are or the viability of the pregnancy. If you get a faint line, it’s best to retest in a day or two, or consult with a healthcare provider to confirm.

    Myth 3: You can trick a pregnancy test with sugar or other household items

    This is a persistent myth. Pregnancy tests are designed to detect a specific hormone, hCG, through a highly specific chemical reaction involving monoclonal antibodies. Adding substances like sugar, bleach, or vinegar to the urine sample will not produce a false positive or negative result in a way that can be reliably manipulated.

    In fact, these substances can interfere with the chemical reactions and lead to invalid or unreadable results. Always use the test as directed with a clean urine sample.

    Myth 4: Pregnancy tests can detect other conditions besides pregnancy

    While some rare medical conditions, such as certain types of tumors, can produce hCG, this is uncommon. For the vast majority of users, a positive pregnancy test result is indicative of pregnancy. If you have persistent concerns about your health or unusual symptoms, it’s important to consult a doctor.

    They can perform further diagnostic tests to investigate any underlying issues beyond pregnancy detection. The specificity of the monoclonal antibodies makes them primarily responsive to hCG.

    Frequently Asked Questions

    Question: How early can a pregnancy test detect pregnancy?

    Answer: Many modern home pregnancy tests can detect pregnancy as early as 4-5 days before your missed period. This is due to their high sensitivity in detecting low levels of hCG.

    Question: What is the main hormone detected by pregnancy tests?

    Answer: Pregnancy tests detect human chorionic gonadotropin (hCG), a hormone produced by the placenta after conception.

    Question: Are all home pregnancy tests equally accurate?

    Answer: No, accuracy can vary based on the sensitivity of the test and when it is used in relation to your menstrual cycle. Some tests are more sensitive and can detect pregnancy earlier.

    Question: What makes a pregnancy test positive?

    Answer: A positive pregnancy test occurs when the monoclonal antibodies in the test strip bind to hCG in your urine, causing a visible line or symbol to appear.

    Question: Can a negative pregnancy test be wrong?

    Answer: Yes, a negative test can be wrong if you test too early before hCG levels are high enough to be detected, or if you don’t follow the test instructions correctly. Retesting a few days later is often recommended if you suspect an early pregnancy.

    Conclusion

    Understanding pregnancy test monoclonal antibodies reveals how these tests achieve their accuracy. These specialized proteins precisely target hCG, the pregnancy hormone. This targeted reaction creates the visible positive result.

    The science ensures reliable detection, empowering individuals with timely information about their reproductive health. Trusting these tests allows for informed decisions and prompt care.

  • Understanding Third Trimester Prenatal ICD 10 Codes

    Understanding Third Trimester Prenatal ICD 10 Codes

    Coding for pregnancy can seem tricky at first, especially when you’re new to it. The third trimester prenatal icd 10 codes are often a point of confusion for beginners. You might wonder which codes apply or when to use them.

    Don’t worry, it’s easier than it looks! This guide will walk you through everything step by step. We’ll break down how to choose the right codes so you can feel confident.

    Key Takeaways

    • You will learn the basic principles of ICD-10-CM coding for prenatal care.
    • You will understand how to identify the correct codes for common third-trimester conditions.
    • This post will explain how to use Z codes for routine prenatal visits.
    • You will discover how to code for specific maternal health issues during the third trimester.
    • You will find tips for accurate and efficient coding to avoid errors.
    • The guide will help you code confidently for any prenatal encounter in the third trimester.

    Basics of ICD-10-CM for Pregnancy

    ICD-10-CM is the system used to code medical diagnoses. It helps track diseases and health problems. For pregnancy, specific chapters in the ICD-10-CM manual are very important.

    These chapters have codes that start with the letter ‘O’. These codes are for pregnancy, childbirth, and the puerperium. They help describe what is happening with the mother and the baby.

    Doctors and coders use these codes for billing and record-keeping. They tell the story of the patient’s health journey.

    The third trimester is from week 28 of pregnancy until birth. This is a time when many changes happen. The baby grows a lot, and the mother’s body also changes.

    Many conditions can arise or become more noticeable during this period. Accurate coding helps ensure the mother gets the right care. It also helps collect important health data.

    Learning these codes means you are helping to improve healthcare for pregnant people.

    Why ICD-10-CM Coding Matters

    ICD-10-CM codes are more than just numbers and letters. They are a universal language for healthcare. This language tells us about a patient’s health status.

    For prenatal care, accurate coding is vital for several reasons. It helps insurance companies pay for services. It also helps researchers study pregnancy outcomes.

    Public health officials use this data to improve care for everyone. Without good coding, it’s hard to track what’s working and what’s not in maternity care.

    Coding also helps in managing patient care. When a doctor sees the codes from previous visits, they know what has happened. This helps them plan the next steps for the patient.

    It ensures continuity of care. For example, if a patient had gestational diabetes in a previous pregnancy, the codes show this history. The doctor can then monitor for it closely in the current pregnancy.

    This proactive approach can prevent problems.

    Here are some key reasons why accurate ICD-10-CM coding is important:

    • Accurate Billing and Reimbursement: This ensures healthcare providers are paid correctly for their services. Without the right codes, claims can be denied, leading to financial problems for clinics and hospitals. It directly impacts the revenue cycle of a healthcare facility.
    • Health Data and Statistics: These codes are used to collect vital statistics on maternal health. This data helps in identifying trends and improving public health initiatives. It allows for analysis of common pregnancy complications and outcomes on a large scale.
    • Quality of Care Monitoring: Codes help in evaluating the quality of care provided. They can identify areas where care might be lacking and highlight best practices. This leads to better patient outcomes and safer pregnancies.
    • Research and Development: Medical researchers rely on coded data to study diseases and treatments. This helps in discovering new ways to prevent and manage health issues. It fuels innovation in medical science and patient care strategies.

    Understanding Code Structure

    ICD-10-CM codes have a specific structure. Most codes are alphanumeric. They often start with a letter, followed by numbers.

    For pregnancy, you will frequently see codes starting with ‘O’. These are organized into chapters based on body systems or conditions. Pregnancy codes are typically found in Chapter 15.

    This chapter covers pregnancy, childbirth, and the puerperium. It’s important to remember that a code can have up to seven characters. The more characters, the more specific the diagnosis is.

    The initial character of an obstetrical code is always ‘O’. The second character indicates the trimester or if the condition is not specific to a trimester. For example, ‘O00-O08’ are codes for pregnancy with abortive outcome.

    ‘O10-O16’ are for edema, proteinuria, and albuminuria complicating pregnancy, childbirth, and the puerperium. ‘O20-O29’ cover other maternal disorders predominantly related to pregnancy. ‘O30-O48’ detail maternal care related to the fetus, amniotic sac, and possible delivery problems.

    Codes in the ‘O30-O48’ range are particularly relevant for third-trimester care.

    The third character often specifies the trimester. For instance, a code might end with a ‘1’ for the first trimester, a ‘2’ for the second, a ‘3’ for the third, and a ‘4’ for an unspecified trimester. Some conditions can occur throughout pregnancy, so they might not have a trimester-specific character.

    Always refer to the official ICD-10-CM coding guidelines for the most accurate information. These guidelines are updated regularly.

    Coding for Routine Third Trimester Visits

    Routine prenatal visits during the third trimester are essential. They help monitor the mother and baby’s health closely. For these visits, specific ICD-10-CM codes are used.

    The most common code is Z3A.xx, which indicates the weeks of gestation. This code is always used with another code to describe the reason for the visit. For a healthy pregnancy with no complications, you’ll use Z34.0, Encounter for supervision of normal pregnancy.

    The Z3A.xx codes are critical. They tell us exactly how far along the pregnancy is. For the third trimester, this usually means weeks 28 and beyond.

    So, if a patient is 30 weeks pregnant, you would use Z3A.30. This code needs to be paired with a code for the reason for the encounter. For a normal check-up at 30 weeks, the primary code would be Z34.0.

    So the encounter would be coded as Z34.0 and Z3A.30.

    It’s important to remember that Z codes are often secondary. They add important details to the primary diagnosis. Even for a healthy pregnancy, multiple codes might be needed.

    This ensures a complete picture of the patient’s status. For example, if the patient is pregnant and also has a condition like anemia, you would code for both. The primary code would reflect the anemia, and the Z codes would note the pregnancy and weeks of gestation.

    Using Z Codes Effectively

    Z codes are a special category in ICD-10-CM. They are used to report factors influencing health status and contact with health services. They are not used for diseases or injuries.

    In prenatal care, they are used for routine visits, follow-ups, and screening. For the third trimester, Z3A.xx codes are the most important. These codes specify the number of weeks of gestation.

    They are always reported with a pregnancy-related code.

    For example, if a patient is presenting for a routine prenatal visit at 36 weeks pregnant and has a normal pregnancy, the codes would be:

    • Z34.0 Encounter for supervision of normal pregnancy
    • Z3A.36 Supervision of normal pregnancy, 36 weeks

    This combination tells the coder and the insurance company that this was a standard check-up for a pregnancy in its 36th week. The Z3A code provides the crucial gestational age information. This helps in understanding the stage of the pregnancy and any related risks or care guidelines.

    Another common scenario is screening for conditions. If a patient is coming in for a routine screening at 32 weeks pregnant, you might use:

    • Z00.00 Encounter for general adult medical examination without abnormal findings (if no pregnancy-specific screening is applicable as primary)
    • Z3A.32 Supervision of normal pregnancy, 32 weeks

    Or if the screening is specifically for pregnancy related issues, a code like Z01.89 Encounter for other specified special examinations might be used, followed by Z3A.32. Always check the ICD-10-CM guidelines to select the most appropriate Z code for the specific encounter and service provided.

    Gestational Age and Trimester Coding

    The ICD-10-CM guidelines clearly define the weeks for each trimester. The first trimester is weeks 0 through 13. The second trimester is weeks 14 through 27.

    The third trimester is weeks 28 through the end of pregnancy. The Z3A codes are structured to reflect these weeks. For instance, Z3A.30 covers weeks 28 through 37, and then it breaks down further by week.

    When coding, it’s crucial to know the exact number of weeks of gestation. This information is usually found in the patient’s chart. The physician will record this at each visit.

    If there is any ambiguity, it is best to ask the physician for clarification. Incorrect gestational age can lead to misinterpretation of the patient’s progress and potential risks.

    Let’s look at some specific examples of Z3A codes for the third trimester:

    • Z3A.28 Supervision of normal pregnancy, 28 weeks
    • Z3A.30 Supervision of normal pregnancy, 30 weeks
    • Z3A.35 Supervision of normal pregnancy, 35 weeks
    • Z3A.40 Supervision of normal pregnancy, 40 weeks

    These codes are always used with a primary code that explains the reason for the visit. For a normal pregnancy, this is usually Z34.0. If there are complications, a different code from Chapter 15 (O codes) will be used as the primary diagnosis, along with the appropriate Z3A code.

    Common Third Trimester Complications and Their Codes

    The third trimester can bring about various health issues for pregnant individuals. Many of these require specific ICD-10-CM codes. These codes help healthcare providers manage and treat these conditions effectively.

    They also allow for tracking the prevalence of these complications in the population. Accurate coding is key to ensuring that patients receive appropriate care and that claims are processed smoothly.

    Some common complications include gestational diabetes, preeclampsia, and anemia. Each of these has its own set of ICD-10-CM codes. Understanding these codes helps coders and medical professionals ensure correct documentation.

    It also aids in identifying high-risk pregnancies. This proactive approach to coding can lead to better health outcomes for both mother and baby.

    Gestational Diabetes Mellitus (GDM)

    Gestational diabetes is a common concern during pregnancy. It’s a type of diabetes that develops during pregnancy. It can affect how the baby grows and can cause complications for both mother and child.

    ICD-10-CM has specific codes for GDM. The main code is O24.41x. The last character indicates the trimester.

    For GDM in the third trimester, the code would be O24.413, Gestational diabetes mellitus in pregnancy, third trimester. This code is used when a patient is diagnosed with gestational diabetes during weeks 28 or later. It is essential to use the correct trimester code to accurately reflect the timing of the diagnosis and potential impact.

    In addition to O24.413, other codes might be needed depending on the specifics of the case. For example, if the GDM is controlled by diet alone, specific documentation might influence further coding. If medication is required, such as insulin, additional codes may be necessary to denote the type of treatment.

    Coders must always refer to the detailed ICD-10-CM tables and guidelines.

    Here’s an example of coding for GDM in the third trimester:

    1. Primary Diagnosis: O24.413 Gestational diabetes mellitus in pregnancy, third trimester.
    2. Weeks of Gestation: Z3A.32 Supervision of normal pregnancy, 32 weeks.
    3. Associated Conditions: If there are any associated conditions, such as polyhydramnios (excess amniotic fluid), an additional code for that condition would be added. For example, O40.1XX0 for polyhydramnios, unspecified.

    This complete coding set provides a clear picture of the patient’s health status. It allows for precise tracking and management of the pregnancy.

    Preeclampsia and Eclampsia

    Preeclampsia is a serious condition that can occur during pregnancy. It is characterized by high blood pressure and signs of damage to other organ systems, often the liver and kidneys. Eclampsia is a more severe form that includes seizures.

    These conditions require careful monitoring and timely intervention. The ICD-10-CM codes for preeclampsia and eclampsia are found under category O14 and O15.

    For preeclampsia in the third trimester, common codes include:

    • O14.13 Preeclampsia, severe, third trimester: This code is used when a pregnant patient has severe preeclampsia symptoms after week 28.
    • O14.03 Preeclampsia, mild, third trimester: This code is for mild preeclampsia cases in the third trimester.

    Eclampsia codes are used when seizures occur. For example, O15.03 refers to Eclampsia unspecified as to timing in pregnancy, third trimester. This indicates a severe complication that requires immediate medical attention.

    Coding for these conditions must be precise to reflect the severity and timing.

    Example scenario for coding severe preeclampsia:

    1. Primary Diagnosis: O14.13 Preeclampsia, severe, third trimester.
    2. Weeks of Gestation: Z3A.34 Supervision of normal pregnancy, 34 weeks.
    3. Other Diagnoses: If the patient also has anemia, an additional code for anemia would be listed, such as D64.81 Anemia due to blood loss complicating pregnancy, childbirth, and the puerperium.

    The combination of these codes helps document the complex health status of the patient. It supports appropriate treatment and resource allocation.

    Anemia in Pregnancy

    Anemia is a common issue during pregnancy, especially in the third trimester. It means the body doesn’t have enough healthy red blood cells. This can lead to fatigue and other problems.

    The most common type is iron-deficiency anemia. ICD-10-CM has specific codes to capture anemia during pregnancy.

    The codes for anemia complicating pregnancy are in category D64. Other codes related to pregnancy and childbirth are also relevant here. For anemia due to iron deficiency in the third trimester, the code is D50.0.

    However, when this anemia complicates pregnancy, it needs a more specific code.

    The primary code used is often D64.81, Anemia due to blood loss complicating pregnancy, childbirth, and the puerperium. If the anemia is specified as iron-deficiency anemia complicating pregnancy, the code D50.0 might be used in conjunction with other codes. However, the guidelines often point towards using codes that specifically state the complication of pregnancy.

    A typical coding example for iron-deficiency anemia in the third trimester would be:

    • Primary Diagnosis: D50.0 Iron deficiency anemia. This code is then often linked with a pregnancy complication code or a code indicating anemia complicating pregnancy. For example, if the anemia is explicitly stated as complicating pregnancy, a code from O99.0 category might be used.
    • O99.013 Anemia, uncomplicated, third trimester: This code specifies that anemia is present and complicating the third trimester of pregnancy.
    • Weeks of Gestation: Z3A.31 Supervision of normal pregnancy, 31 weeks.

    It is important to consult the official ICD-10-CM coding manual for the most precise code selection, as specific wording in the documentation can alter the code choice. For instance, if the anemia is not specified as iron-deficiency but simply as anemia complicating pregnancy, O99.013 would be the correct choice.

    Other Common Third Trimester Conditions

    Beyond the major complications, several other issues can arise in the third trimester. These include urinary tract infections (UTIs), back pain, and swelling (edema). Each of these has specific ICD-10-CM codes to ensure proper documentation.

    For example, a UTI during the third trimester is coded using N39.0, Urinary tract infection, site not specified. This code would then be accompanied by a code indicating the complication of pregnancy, if applicable. However, in many cases, UTIs are treated as a separate condition that the pregnant person is experiencing.

    Back pain is also very common. The code for this is M54.9, Dorsalgia, unspecified. When back pain is specifically stated as being related to pregnancy, such as pregnancy-related pelvic girdle pain, a more specific code like M54.59 might be considered, or a code from the O category if it’s a stated complication of pregnancy.

    Swelling, or edema, is another frequent complaint. If it’s generalized edema not related to preeclampsia, it might be coded as R60.0 Localized edema. However, if it’s part of a pregnancy-related condition, like mild preeclampsia, the preeclampsia code would be primary.

    If it’s simply physiological edema of pregnancy, it might be coded differently, such as with an O code that specifies edema as a complication.

    Here is a summary table for some other common conditions:

    Condition ICD-10-CM Code Description
    Urinary Tract Infection N39.0 Urinary tract infection, site not specified
    Back Pain M54.9 Dorsalgia, unspecified
    Generalized Edema R60.0 Localized edema
    Insomnia F51.02 Insomnia due to other causes

    When coding these conditions, always ensure to check if a more specific code exists within the pregnancy chapters of ICD-10-CM. The goal is always the highest level of specificity.

    Tips for Accurate Coding

    Coding accurately for the third trimester of pregnancy is crucial. It ensures proper patient care, billing, and data collection. Mistakes can lead to claim denials, delayed payments, and incorrect health records.

    Following best practices can help avoid these issues and improve efficiency. It’s about paying attention to the details and using the resources available.

    The ICD-10-CM coding manual and official guidelines are your best friends. They are updated regularly to reflect changes in medical practices and coding rules. Staying informed about these updates is essential for any professional coder.

    Medical documentation is also key. The physician’s notes must be clear and complete to support the codes used.

    Reviewing Documentation Carefully

    The foundation of accurate ICD-10-CM coding lies in thorough medical record review. Coders must read the physician’s notes, reports, and other documentation carefully. This ensures that all diagnoses, conditions, and procedures are captured.

    Specificity is key. The more detailed the documentation, the more accurate the code.

    For example, if a physician documents “anemia,” it’s not enough for coding purposes. The coder needs to know the type of anemia (e.g., iron deficiency, vitamin B12 deficiency) and if it complicates the pregnancy. Similarly, for “hypertension,” the coder needs to know if it’s pre-existing or gestational.

    This level of detail is often found in the progress notes or the problem list.

    Consider this scenario: A note says, “Patient presents with elevated blood pressure.” This is vague. A better note would state, “Patient diagnosed with mild gestational hypertension at 30 weeks gestation, blood pressure 145/95 mmHg.” This specific information allows for the use of code O13.1, Gestational hypertension with significant proteinuria, third trimester, if proteinuria is present, or O13.0 for gestational hypertension without significant proteinuria in the third trimester, along with the Z3A code.

    Coders should also look for signs and symptoms that point to a diagnosis, even if the physician hasn’t explicitly stated it. However, it is important to code only confirmed diagnoses. If there’s ambiguity, querying the physician is the best course of action.

    Clear communication between coders and physicians is vital for accurate coding.

    Using the Latest ICD-10-CM Resources

    The ICD-10-CM coding system is dynamic. It undergoes annual updates, including new codes, revised codes, and deleted codes. To ensure accuracy, it’s critical to use the most current version of the ICD-10-CM code book or coding software.

    Relying on outdated resources can lead to the use of invalid codes, resulting in rejected claims and potential compliance issues.

    Beyond the code book, the official ICD-10-CM Coding Guidelines are indispensable. These guidelines provide crucial instructions on how to apply the codes correctly. They clarify conventions, sequencing rules, and reporting requirements.

    For example, the guidelines explain how to sequence codes when a condition complicates pregnancy. They also specify when combination codes should be used.

    Software programs designed for medical coding often integrate the latest code sets and guidelines. These tools can help flag potential errors, suggest appropriate codes, and ensure compliance. However, they are not a substitute for coder knowledge and critical thinking.

    Coders must still understand the underlying principles of coding to use these tools effectively.

    Here are some essential resources to keep handy:

    • Official ICD-10-CM Coding Manual: The most up-to-date version of the code book.
    • Official ICD-10-CM Coding Guidelines: Published by the Centers for Medicare & Medicaid Services (CMS) and the National Center for Health Statistics (NCHS).
    • Coding Software/Platform: Ensure it’s updated regularly.
    • Provider Query Form: For clarifying documentation with physicians.

    Regular training and professional development are also highly recommended. This helps coders stay abreast of changes and improve their skills. Many professional organizations offer continuing education opportunities.

    Querying Physicians for Clarification

    There will be times when medical documentation is unclear or incomplete. In such cases, coders should not guess or make assumptions. Instead, they should query the physician or healthcare provider for clarification.

    This process is called a provider query.

    A well-written query should be specific and focus on the information needed. It should clearly state what information is missing or unclear. For example, instead of asking, “What’s wrong with the patient?” a coder might ask, “The documentation notes ‘anemia.’ Could you please specify the type of anemia and if it is complicating the pregnancy?”

    The response from the physician should be documented in the patient’s medical record. This documented clarification becomes part of the official record and supports the codes assigned by the coder. It also helps to improve the quality of documentation over time, as physicians become aware of the information coders need.

    Here are some best practices for provider queries:

    • Be specific: Clearly state the ambiguity in the documentation.
    • Be concise: Get straight to the point without unnecessary jargon.
    • Provide context: Briefly mention the encounter or suspected condition.
    • Ask a specific question: Guide the physician on what information you need.
    • Document the query and response: Keep a record for audit purposes.

    Effective communication through provider queries is a hallmark of accurate and compliant medical coding. It bridges the gap between clinical documentation and the coded data.

    Common Myths Debunked

    When learning about ICD-10-CM coding, especially for complex areas like prenatal care, several myths can arise. These misconceptions can lead to confusion and errors. Let’s address some common myths to ensure you have a clear understanding.

    Myth 1: All pregnancy codes start with ‘O’ and are only for complications.

    While many pregnancy-related codes do start with the letter ‘O’ and are found in Chapter 15 of the ICD-10-CM manual, not all pregnancy-related coding involves complications. As we’ve seen, codes like Z34.0 (Encounter for supervision of normal pregnancy) are used for routine prenatal care. These codes are essential for documenting healthy pregnancies and standard check-ups.

    Furthermore, other chapters of ICD-10-CM are used for specific conditions that may occur during pregnancy but are not exclusively pregnancy-related conditions, such as certain types of anemia or infections.

    Myth 2: Gestational age is always the primary diagnosis.

    Gestational age, indicated by Z3A codes, is critically important for context. However, it is rarely the primary diagnosis. The primary diagnosis is the condition, status, or reason for the encounter that is chiefly responsible for the medical services provided.

    For a routine prenatal visit for a normal pregnancy, Z34.0 would be the primary diagnosis, with Z3A.xx codes serving as secondary codes to specify the duration of pregnancy. If a complication such as preeclampsia is present, that complication would likely be the primary diagnosis.

    Myth 3: You only need one code per pregnancy encounter.

    Most medical encounters, especially in obstetrics, require multiple codes to accurately describe the patient’s condition and the services provided. For third trimester prenatal care, you typically need at least two codes: one for the reason for the encounter (e.g., normal pregnancy supervision, a specific complication) and one for the weeks of gestation (Z3A.xx). Additional codes may be needed for co-existing conditions, procedures performed, or follow-up instructions.

    The goal is always to provide a complete and accurate representation of the encounter.

    Myth 4: ICD-10-CM codes for pregnancy are the same across all countries.

    While ICD-10 is an international standard, many countries adopt variations of it. The United States uses ICD-10-CM (Clinical Modification). Other countries might use ICD-10-WHO (World Health Organization) or their own national modifications.

    These variations can include different code structures, additional codes, or specific coding rules. Therefore, it’s essential to be aware of the specific ICD-10 version used in your region or for your specific purpose, especially if dealing with international data.

    Frequently Asked Questions

    Question: What is the most common code for a healthy pregnancy in the third trimester?

    Answer: The most common codes for a healthy pregnancy in the third trimester are Z34.0 for supervision of normal pregnancy and a Z3A.xx code to specify the number of weeks of gestation, for example, Z3A.32 for 32 weeks.

    Question: Do I need a separate code for each trimester?

    Answer: Yes, when a condition occurs during pregnancy and has trimester-specific codes, you must select the code that corresponds to the trimester in which the condition occurred. For example, O24.413 is for gestational diabetes in the third trimester.

    Question: Can I code for symptoms if the physician hasn’t provided a definitive diagnosis?

    Answer: Generally, you should code definitive diagnoses whenever possible. If a definitive diagnosis has not been established, symptoms, signs, and abnormal findings that are not permanently established as a diagnosis are coded. However, once a diagnosis is confirmed, it supersedes any symptoms that led to that diagnosis.

    Question: What if the patient has a pre-existing condition and a new pregnancy complication?

    Answer: You will need to code both the pre-existing condition and the pregnancy complication. The sequencing of these codes depends on the encounter and which condition is chiefly responsible for the services provided. Often, the pregnancy complication will be listed first.

    Question: How do I know when to use a Chapter 15 code (O codes) versus a code from another chapter for a condition during pregnancy?

    Answer: If a condition is specific to pregnancy, childbirth, or the puerperium, use a Chapter 15 (O codes) code. If a condition exists during pregnancy but is not specific to pregnancy and is affecting the pregnant patient, you may use a code from another chapter, often in combination with a code from the O99 category (Maternal infectious and parasitic diseases complicating pregnancy, childbirth and the puerperium, or other relevant O99 subcategories) to indicate that it complicates pregnancy.

    Summary

    Coding third trimester prenatal care involves understanding specific ICD-10-CM codes for normal pregnancies and common complications. Using Z codes for weeks of gestation is essential. Accurate documentation and adherence to coding guidelines ensure correct claims and patient care.

    Mastering these codes simplifies prenatal coding.

  • Racgp Second Trimester Screening Explained Simply

    Racgp Second Trimester Screening Explained Simply

    Many new parents find information about racgp second trimester screening a bit confusing at first. It can seem like a lot to take in when you’re expecting. But don’t worry, it’s easier to understand than you might think!

    This guide will walk you through everything step by step. We’ll break down what it means and what to expect so you feel ready. Get ready to learn what you need to know!

    Key Takeaways

    • You will learn what second-trimester screening involves.
    • We will explain why these tests are done during pregnancy.
    • You will find out about the different types of screening available.
    • The post will clarify how the results are interpreted.
    • You will understand how to discuss these options with your doctor.
    • We cover common questions people have about these screenings.

    Understanding Racgp Second Trimester Screening

    Second-trimester screening tests are important check-ups during pregnancy. They help doctors look for certain conditions in your developing baby. These tests are usually done between 14 and 20 weeks of pregnancy.

    They are different from diagnostic tests, which are more definitive. Screening tests offer a probability or risk assessment. This helps you and your doctor make informed decisions about your pregnancy care.

    It is a way to gain more information about your baby’s health. Many people find it helpful to understand their options early on.

    What is the Second Trimester?

    The second trimester of pregnancy typically starts around week 13 and ends around week 28. This period is often called the “golden period” of pregnancy. Many early pregnancy symptoms like morning sickness start to ease up.

    You might feel more energetic. It’s also when your baby starts to grow rapidly. You may begin to feel the baby move.

    Your body will continue to change noticeably. This is a vital time for prenatal check-ups and screenings.

    Why Screen During the Second Trimester?

    Screening during the second trimester offers a good window of opportunity. By this stage, some fetal organs are well-developed enough to be seen on ultrasound. Blood tests can also check for specific markers.

    These markers can indicate an increased risk for certain chromosomal conditions like Down syndrome and Edward syndrome. They can also identify potential issues with the baby’s brain or spine, such as neural tube defects. Early detection allows for further discussion and planning with healthcare providers.

    Key Benefits of Second Trimester Screening

    The primary benefit of second-trimester screening is to identify pregnancies with a higher risk of certain birth defects. This information can empower parents. They can make informed choices about further testing or management of their pregnancy.

    For example, if a screening test shows a higher risk, a diagnostic test like amniocentesis might be offered. This can give a definite answer. Knowing about potential conditions early also allows for prenatal care to be adjusted.

    It can also help families prepare for the needs of a baby with specific health concerns.

    • Early Risk Assessment: Identifies pregnancies with a higher chance of specific conditions.
    • Informed Decision-Making: Provides information to help parents choose next steps.
    • Preparation for Birth: Allows for planning if a baby has a diagnosed condition.
    • Reduced Anxiety: For many, normal results offer peace of mind.

    Early risk assessment is a cornerstone of modern prenatal care. It allows for timely interventions and planning. This can significantly improve outcomes for both mother and baby.

    It helps shift the focus from reactive care to proactive management. This proactive approach is a key element in ensuring the best possible health for the pregnancy.

    Common Conditions Screened For

    Several common conditions are typically screened for during the second trimester. The most frequent are chromosomal abnormalities, such as Down syndrome (Trisomy 21), Edwards syndrome (Trisomy 18), and Patau syndrome (Trisomy 13). These conditions occur when a baby has an extra chromosome.

    Neural tube defects, like spina bifida and anencephaly, are also screened for. These affect the baby’s brain and spinal cord. Sometimes, screenings can also indicate risks for other issues like certain heart defects or abdominal wall defects.

    The Role of Royal Australian College of General Practitioners (RACGP)

    The Royal Australian College of General Practitioners (RACGP) provides guidelines and recommendations for Australian healthcare professionals. They outline best practices for antenatal care, including screening protocols. While the RACGP does not perform the tests themselves, their standards influence how GPs manage pregnancies.

    They ensure that GPs are aware of the latest evidence and can offer appropriate advice and referrals for racgp second trimester screening. GPs often act as the first point of contact for pregnant individuals, guiding them through these important tests.

    Types of Second Trimester Screening Tests

    There are several methods used for second-trimester screening. The most common approach combines a maternal blood test with an ultrasound examination. These tests are non-invasive, meaning they do not directly interact with the baby.

    They provide valuable information about potential risks. It’s important to understand that these are screening tools, not diagnostic ones. A positive screening result means further testing might be needed to confirm a diagnosis.

    A negative result means the risk is low, but not zero.

    Maternal Serum Screening

    Maternal serum screening involves a blood sample taken from the pregnant person. This blood is tested for specific levels of certain substances, often called “biomarkers.” These biomarkers include alpha-fetoprotein (AFP), human chorionic gonadotropin (hCG), and unconjugated estriol (uE3). Sometimes, inhibin-A is also measured.

    The levels of these substances can indicate an increased risk for certain conditions. For instance, high AFP levels can suggest a higher risk of neural tube defects. Low levels of AFP and uE3, along with high hCG and inhibin-A, can indicate a higher risk for Down syndrome.

    AFP Explained

    Alpha-fetoprotein (AFP) is a protein produced by the baby’s liver and yolk sac. Some AFP passes into the pregnant person’s bloodstream. During the second trimester, the level of AFP in the blood normally rises and then falls.

    Measuring AFP helps detect neural tube defects. Spina bifida, where the spinal cord doesn’t close properly, and anencephaly, where a major part of the brain is missing, can be indicated by high AFP levels. It’s also important to note that high AFP can sometimes be caused by other factors, like a dating error (the pregnancy is further along than thought) or multiple babies.

    hCG Explained

    Human chorionic gonadotropin (hCG) is a hormone produced by the placenta shortly after conception. Its levels rise rapidly in early pregnancy. In the second trimester, hCG levels typically start to decline.

    For Down syndrome screening, abnormal levels of hCG are significant. Higher-than-expected hCG levels, along with other marker changes, can suggest an increased risk of Down syndrome. Like AFP, hCG levels can be affected by various factors, and interpretation is always done in combination with other results.

    Unconjugated Estriol (uE3) Explained

    Unconjugated estriol (uE3) is another hormone produced by the placenta and the baby’s liver. Its levels also increase during the second trimester. Lower-than-normal uE3 levels, when combined with other abnormal markers, can contribute to an increased risk assessment for Down syndrome.

    It’s part of a panel of substances measured to create a risk score. The interaction between AFP, hCG, and uE3 provides a more comprehensive picture than any single marker alone.

    Inhibin-A Explained

    Inhibin-A is a hormone produced by the placenta. It is often included in what’s known as a “quad screen,” which measures four substances (AFP, hCG, uE3, and inhibin-A). Higher levels of inhibin-A, alongside other marker changes, can also suggest an increased risk for Down syndrome.

    Including inhibin-A in the screening panel can improve the detection rate for Down syndrome. It adds another layer of information for risk assessment.

    Second Trimester Ultrasound

    A detailed ultrasound scan, often called a Level II ultrasound or anomaly scan, is a crucial part of second-trimester screening. It is usually performed between 18 and 20 weeks of pregnancy. This scan allows a trained sonographer or radiologist to examine the baby’s physical development.

    They look at the baby’s brain, heart, kidneys, limbs, and other organs for any abnormalities. They also check the placenta and the amount of amniotic fluid. The ultrasound can also confirm the baby’s age and growth.

    What the Ultrasound Detects

    During the ultrasound, the sonographer will measure various parts of the baby’s body. They will assess the size of the head, abdomen, and long bones. They will look for the four chambers of the heart and check major blood vessels.

    The spine, kidneys, stomach, and bladder are also examined. The amount of amniotic fluid surrounding the baby is measured. The position of the placenta is noted.

    Soft markers, which are minor variations that can be associated with a higher risk of chromosomal conditions, may also be observed. These include things like a bright spot in the heart or a short bone.

    Combined Screening

    Combined screening is often considered the most accurate form of second-trimester screening. It integrates the results from both the maternal serum screening (blood test) and the detailed ultrasound. By combining these data points, the accuracy in detecting conditions like Down syndrome is significantly enhanced.

    This approach provides a more refined risk assessment than either test performed alone. It offers a higher detection rate and a lower false-positive rate.

    Advantages of Combined Screening

    The main advantage of combined screening is its improved accuracy. It has a higher detection rate for Down syndrome and other chromosomal abnormalities compared to single tests. This means it is better at correctly identifying pregnancies that are at higher risk.

    It also has a lower false-positive rate, meaning fewer pregnancies will be flagged as high-risk when they are actually low-risk. This can reduce unnecessary anxiety and the need for further invasive testing.

    Non-Invasive Prenatal Testing (NIPT)

    Non-Invasive Prenatal Testing (NIPT) is a newer and highly accurate screening method. It analyzes small fragments of the baby’s DNA that are present in the pregnant person’s blood. This blood sample can be taken as early as 10 weeks of pregnancy.

    NIPT can screen for the most common chromosomal abnormalities, including Down syndrome, Edwards syndrome, and Patau syndrome. It is also increasingly used to screen for sex chromosome abnormalities and some microdeletion syndromes. NIPT is considered a screening test, but its accuracy is much higher than traditional serum screening.

    How NIPT Works

    During pregnancy, a small amount of cell-free fetal DNA (cfDNA) circulates in the pregnant person’s bloodstream. NIPT uses advanced genetic technology to analyze this cfDNA. The test isolates and sequences this fetal DNA.

    By comparing the amount of DNA from specific chromosomes, the test can determine if there is an increased risk of conditions caused by an extra or missing chromosome. For example, if there is an excess of DNA from chromosome 21, it suggests a higher risk of Down syndrome.

    NIPT Accuracy and Limitations

    NIPT is highly accurate, with detection rates for Down syndrome often exceeding 99%. It also has a very low false-positive rate, typically less than 1%. However, it is still a screening test.

    A positive NIPT result should ideally be confirmed with diagnostic testing, such as amniocentesis or chorionic villus sampling (CVS). NIPT cannot detect all birth defects. It primarily focuses on common chromosomal abnormalities.

    Its effectiveness can also be reduced in cases of vanishing twin syndrome or if the pregnant person has certain medical conditions. It does not screen for neural tube defects.

    Interpreting Screening Results

    Understanding the results of your second-trimester screening tests can be complex. It’s important to remember that screening tests provide a risk assessment, not a diagnosis. They tell you the likelihood or chance of your baby having a particular condition.

    A “positive” or “high-risk” result means your baby has a higher chance of having the condition. A “negative” or “low-risk” result means your baby has a lower chance. However, a low-risk result does not mean there is no risk at all.

    Understanding Risk Factors

    Several factors influence the interpretation of screening results. These include your age, as the risk of some chromosomal conditions increases with maternal age. The specific levels of the biomarkers measured in your blood tests are crucial.

    The findings from your ultrasound also play a significant role. For example, certain “soft markers” seen on ultrasound can slightly increase the risk. Your ethnicity and medical history can also be considered by the laboratory or your doctor when calculating the final risk score.

    What is a High-Risk Result?

    A high-risk result means that the screening tests indicate an increased chance that your baby may have a specific condition. For example, a risk of 1 in 250 for Down syndrome is generally considered high-risk. This does not mean your baby definitely has Down syndrome.

    It means that for every 250 pregnancies with similar screening results, one baby is likely to have the condition. This prompts further discussion with your healthcare provider about diagnostic testing options.

    What is a Low-Risk Result?

    A low-risk result suggests that the chance of your baby having the screened-for conditions is low. For example, a risk of less than 1 in 1000 for Down syndrome is considered low-risk. This usually provides a great deal of reassurance.

    However, it’s vital to understand that even with a low-risk result, there is still a small chance of a condition being present. Screening tests are not perfect, and some conditions may not be detected.

    When Further Testing is Recommended

    If your screening tests come back as high-risk, your doctor will usually recommend further diagnostic testing. The most common diagnostic tests are chorionic villus sampling (CVS) and amniocentesis. CVS involves taking a small sample of the placenta, typically between 10 and 13 weeks of pregnancy.

    Amniocentesis involves taking a sample of amniotic fluid, usually between 15 and 20 weeks. These tests can provide a definitive diagnosis by analyzing the baby’s chromosomes directly.

    Chorionic Villus Sampling (CVS)

    Chorionic villus sampling (CVS) is a prenatal diagnostic test. It involves taking a small sample of tissue from the placenta. This tissue contains the baby’s genetic material.

    CVS can be performed either through the cervix (transcervical) or the abdomen (transabdominal). The procedure is usually done between 10 and 13 weeks of pregnancy. It can detect chromosomal abnormalities and certain genetic disorders.

    There is a small risk of miscarriage associated with CVS, similar to amniocentesis.

    Amniocentesis

    Amniocentesis is another diagnostic prenatal test. It involves inserting a thin needle through the pregnant person’s abdomen into the amniotic sac. A small amount of amniotic fluid, which contains fetal cells, is withdrawn.

    This fluid is then sent to a laboratory for genetic testing. Amniocentesis is typically performed between 15 and 20 weeks of pregnancy. It is very accurate for detecting chromosomal abnormalities and can also identify some other genetic disorders and infections.

    Making Informed Decisions

    Deciding whether to undergo second-trimester screening is a personal choice. There are pros and cons to consider for yourself and your family. It’s essential to have a thorough discussion with your healthcare provider.

    They can explain the risks and benefits of each option. They can also help you understand how the results might affect your pregnancy management and your emotional well-being.

    Discussing Options with Your Doctor

    Your doctor or midwife is your primary resource for information. They can guide you through the various screening and diagnostic tests available. Don’t hesitate to ask questions about what each test involves, its accuracy, and the potential outcomes.

    They can also discuss your personal risk factors and provide support in making the best decision for your pregnancy. Open communication is key to feeling confident about your choices.

    Pros and Cons of Screening

    The benefits of screening include gaining valuable information about your baby’s health, which can lead to peace of mind or preparation for potential needs. However, some people may experience anxiety while waiting for results, and there’s a possibility of false positives or false negatives. Diagnostic tests, while more definitive, carry a small risk of complications.

    Weighing these aspects is important for each individual or couple.

    Ethical Considerations

    Decisions about prenatal screening and testing can also involve ethical considerations. Some people may choose not to screen at all, preferring to await the baby’s birth regardless of potential conditions. Others may use the information to make decisions about continuing a pregnancy.

    These are deeply personal decisions, and healthcare providers are there to support your choices without judgment.

    Common Myths Debunked

    Myth 1: Screening Tests Will Tell Us Exactly If Our Baby Has a Condition

    Reality: This is a common misunderstanding. Screening tests are designed to assess the risk or probability that a baby has a certain condition. They do not provide a definitive diagnosis.

    For example, a high-risk result for Down syndrome means there is an increased chance, but it does not confirm the diagnosis. Diagnostic tests like amniocentesis or CVS are needed for a definitive answer.

    Myth 2: A Negative Screening Result Means Our Baby Is Perfectly Healthy

    Reality: While a negative screening result is reassuring and indicates a low risk, it does not guarantee a healthy baby. No screening test is 100% accurate. There is always a small possibility that a condition might be missed (a false negative).

    It’s important to continue with regular prenatal care and to be aware of any signs or symptoms that might require further investigation.

    Myth 3: All Second Trimester Screenings Are Invasive and Risky

    Reality: Many second-trimester screenings are non-invasive. Maternal serum screening involves a simple blood test. Anomaly ultrasounds are also non-invasive, using sound waves to create images.

    Diagnostic tests like amniocentesis and CVS are invasive and carry a small risk of complications like miscarriage. However, the screening tests themselves are generally safe for both the pregnant person and the baby.

    Myth 4: NIPT Replaces All Other Screening and Diagnostic Tests

    Reality: NIPT is a very accurate screening test, but it is not a diagnostic test. It significantly improves the accuracy of prenatal screening compared to older methods. However, for a confirmed diagnosis, diagnostic tests (CVS or amniocentesis) are still necessary, especially if NIPT results indicate a high risk.

    Furthermore, NIPT typically does not screen for neural tube defects, which are still assessed via ultrasound or other methods.

    Frequently Asked Questions

    Question: When is the best time to have second trimester screening?

    Answer: The second trimester typically spans from week 13 to week 28 of pregnancy. Most common screening tests are performed between 14 and 20 weeks. Anomaly ultrasounds are usually done between 18 and 20 weeks.

    Your doctor will advise on the specific timing based on the tests recommended.

    Question: Can I choose not to have any screening tests?

    Answer: Yes, absolutely. Prenatal screening and diagnostic testing are always optional. The decision is entirely personal.

    It is important to discuss your feelings and preferences with your healthcare provider so they can support your choice.

    Question: What happens if the ultrasound finds a problem?

    Answer: If the ultrasound reveals a potential issue, your doctor will discuss it with you. They may recommend further imaging, specialized tests, or a referral to a maternal-fetal medicine specialist. The goal is to gather more information to understand the situation fully.

    Question: How do I prepare for a blood test for screening?

    Answer: Usually, no special preparation is needed for the blood test. You can eat and drink as normal unless your doctor advises otherwise. It’s a good idea to stay hydrated.

    Make sure to inform the lab or clinic if you are taking any medications.

    Question: Are the results of these tests confidential?

    Answer: Yes, all your medical information, including prenatal screening results, is confidential. It will only be shared with healthcare professionals involved in your care or with your explicit consent.

    Wrap Up

    Second-trimester screening tests like those recommended by RACGP offer valuable insights into your baby’s health. They help assess the risk of certain conditions. Understanding what these tests involve and how to interpret their results empowers you.

    Discuss all your options openly with your doctor. You can then make the best choices for your pregnancy journey.

  • Using a Pregnancy Test Midstream

    Using a Pregnancy Test Midstream

    Getting accurate results from a pregnancy test can feel a little tricky at first. Many people find using a pregnancy test midstream a bit confusing because it’s not always clear exactly how to hold it or how long to wait. But don’t worry!

    We’ll walk you through it step by step, making it super simple and stress-free. You’ll learn everything you need to know to get a clear and correct answer. Let’s get started by looking at what you’ll discover in this guide.

    Key Takeaways

    • You will learn the correct way to use a pregnancy test midstream for accurate results.
    • Understand what a pregnancy test midstream is and how it works simply.
    • Discover tips for best timing and what to do after taking the test.
    • Learn how to read the different types of results clearly.
    • Find out common mistakes to avoid when using a pregnancy test midstream.
    • Know when to consult a doctor for further advice.

    What is a Pregnancy Test Midstream

    A pregnancy test midstream is a very common type of home pregnancy test. It is designed to be used by peeing directly onto the absorbent tip for a specific amount of time. This method is popular because it’s often seen as quick and easy to use.

    The midstream design means the sample collection and result reading happen on the same device, making it convenient. It works by detecting a hormone called human chorionic gonadotropin (hCG) in your urine. This hormone is produced shortly after a fertilized egg attaches to the uterus lining.

    How a Pregnancy Test Midstream Detects Pregnancy

    The core of how a pregnancy test midstream works is by identifying the presence of hCG. When you pee on the absorbent stick, the urine travels up a special strip inside the test. This strip has antibodies that will react if hCG is present.

    If hCG is detected, it triggers a chemical reaction that causes lines or symbols to appear in the result window. This reaction is usually visible as colored lines or a plus sign, indicating a positive result. If no hCG is found, the test will show a negative result, typically a single line or a minus sign.

    The concentration of hCG in urine rises steadily in early pregnancy, which is why timing can be important for accuracy.

    Components of a Pregnancy Test Midstream

    A typical pregnancy test midstream kit comes with a single plastic device. This device has a handle for easy gripping and an absorbent tip at the other end. The absorbent tip is the part you’ll pee on.

    There’s usually a cap to protect the tip before use. The main body of the test contains the testing strip. This strip has a sample pad where urine is absorbed, a reaction zone where the hCG detection happens, and a control zone.

    The control zone shows a line or symbol to confirm the test worked correctly. The result window is where you’ll see your outcome, often after a few minutes.

    Pros and Cons of Midstream Tests

    The main advantage of a pregnancy test midstream is its user-friendliness. You don’t need a separate cup to collect urine, which many people find less messy. The direct application is straightforward.

    The results usually appear quickly, often within 5 minutes. However, a potential downside is the need to hold the test correctly for the recommended time. If you don’t hold it at the right angle or for long enough, you might get an invalid result.

    Also, some people might feel less confident about the exact amount of urine absorbed compared to using a collection cup. Despite this, for most users, the convenience outweighs the minor challenges.

    Using Your Pregnancy Test Midstream Correctly

    Using a pregnancy test midstream is designed to be simple, but following the instructions precisely is key to getting an accurate result. It’s best to use your first-morning urine because it’s usually more concentrated, meaning any pregnancy hormone (hCG) will be at its highest level. This makes it easier for the test to detect.

    Always read the specific instructions that come with your test, as they can vary slightly between brands.

    Step-by-Step Guide to Taking the Test

    Here’s a simple way to use your pregnancy test midstream:

    1. Prepare the Test: Remove the cap from the absorbent tip. Some tests may have a protective wrapper.
    2. Position the Test: Hold the test by the handle. Point the absorbent tip downwards.
    3. Apply Urine: Place the absorbent tip directly into your urine stream. You need to pee on it for the amount of time specified in the instructions, usually about 5 to 10 seconds. Make sure the absorbent tip is well saturated.
    4. Avoid Over-Wetting: Be careful not to pee on the result window.
    5. Replace Cap and Wait: After urinating on the tip, lay the test flat on a clean, dry surface. Make sure the result window is facing upwards.
    6. Read the Results: Wait for the time indicated in the instructions, typically 3 to 5 minutes. Do not read the results after the specified time, as they may become inaccurate.

    When to Take a Pregnancy Test

    The best time to take a pregnancy test is after you’ve missed your period. This is when hCG levels are usually high enough to be detected by home tests. Taking a test too early might lead to a false negative result, meaning the test says you’re not pregnant when you actually are.

    If you have irregular periods, try to test about 14 days after you ovulated, or wait until at least 19 days after the last time you had unprotected sex. Some early detection tests can detect pregnancy a few days before a missed period, but accuracy is best when you wait.

    Tips for Accurate Results

    To get the most reliable result, here are some helpful tips:

    • Use First Morning Urine: As mentioned, this urine is more concentrated and has higher hCG levels.
    • Avoid Drinking Too Much Fluid Before Testing: Drinking excessive amounts of water can dilute your urine, making it harder to detect hCG.
    • Check the Expiration Date: Make sure your test is not expired, as this can affect its accuracy.
    • Follow Instructions Exactly: Even small deviations can lead to incorrect results.
    • Test Again if Unsure: If you get an unclear or negative result but still suspect you might be pregnant, wait a couple of days and test again.

    Understanding Your Pregnancy Test Results

    Once you’ve waited the correct amount of time, you’ll need to read the result window on your pregnancy test midstream. Different brands use different symbols or lines, so it’s important to know what to look for. Most tests will show a control line or symbol to indicate the test worked.

    If this control line doesn’t appear, the test is invalid, and you’ll need to take another one.

    Reading Positive Results

    A positive pregnancy test means you are likely pregnant. This is usually shown by two lines or a plus sign in the result window. The color and thickness of the positive lines can vary, but even a faint positive line generally indicates pregnancy.

    If you see two lines, even if one is lighter than the other, it’s considered a positive result. This is because it means the test has detected hCG in your urine.

    Reading Negative Results

    A negative pregnancy test means hCG was not detected in your urine, and you are likely not pregnant. This is usually shown by a single line or a minus sign in the result window. The control line should still be visible to confirm the test worked.

    If you get a negative result but your period is still late, it’s possible you tested too early. You might consider testing again in a few days or consulting your doctor.

    Interpreting Faint Lines

    A faint line on a pregnancy test can sometimes cause confusion. A faint positive line usually means you are pregnant, but the hCG levels are still low. This can happen if you are very early in your pregnancy or if your urine was diluted.

    If you see a faint line, it’s a good idea to retest in a day or two. If you are indeed pregnant, the line should become darker as your hCG levels rise. Some tests may also show an “evaporation line,” which is a colorless mark that can appear after the test has dried.

    This is not a positive result. Always check the test instructions for how to interpret faint lines.

    Invalid Results

    An invalid result means the test did not work correctly. This can happen if the test is expired, if you didn’t follow the instructions properly, or if there was a manufacturing defect. An invalid result often appears as no lines in the result window, or sometimes the control line doesn’t show up.

    If your test is invalid, you cannot rely on the outcome and will need to take another test. Make sure to use a new, unexpired test and carefully follow all steps.

    Common Mistakes and How to Avoid Them

    Even with simple-to-use tests, some common mistakes can lead to inaccurate results. Being aware of these can help you get a clear and dependable answer. Most errors involve timing or misinterpreting the results.

    Mistake 1 Not Following Instructions

    One of the most frequent mistakes is not reading or following the specific instructions that come with your pregnancy test. Each brand might have slight differences in how long to hold the absorbent tip in urine or how long to wait for the result. For example, some tests require 5 seconds of direct urination, while others might need up to 10 seconds.

    Ignoring these details can lead to an invalid or inaccurate reading.

    How to Avoid: Always take a moment to read the leaflet that comes with your test. Keep it handy while you are performing the test. Follow each step precisely, from uncapping the test to waiting for the result.

    Mistake 2 Testing Too Early

    Many people are eager to know if they are pregnant and take the test very soon after conception. However, hCG levels need time to build up in the body to be detectable by home pregnancy tests. If you test too early, you might get a false negative result, which can be disappointing and confusing.

    How to Avoid: The most accurate time to test is after you have missed your period. If you don’t have regular cycles, wait at least 19 days after unprotected sex. If you get a negative result but still suspect pregnancy, wait two to three days and test again.

    Mistake 3 Reading the Test Too Late or Too Early

    Pregnancy tests work within a specific timeframe. Reading the results before the indicated time means the reaction hasn’t fully completed, potentially giving a false negative. Reading the results too late, after the test has dried, can lead to misinterpreting an evaporation line as a positive result.

    Evaporation lines are faint, colorless marks that appear in the result window as the urine evaporates.

    How to Avoid: Set a timer for the exact waiting period specified in the test instructions. Only read the result during the designated window, usually between 3 and 10 minutes after the test is complete. Discard the test after the reading period is over.

    Mistake 4 Using Expired Tests

    Like any medical test, pregnancy tests have an expiration date. The chemicals and antibodies within the test can degrade over time, reducing their sensitivity and accuracy. Using an expired test significantly increases the chance of getting an inaccurate result, either false positive or false negative.

    How to Avoid: Always check the expiration date printed on the test packaging before you use it. If the test is expired, do not use it and get a new one. Store your tests in a cool, dry place away from direct sunlight to maintain their effectiveness.

    When to See a Doctor

    A home pregnancy test is a great first step, but it’s not the final word. There are specific situations where seeing a healthcare provider is important to confirm the results and discuss next steps. Your doctor can perform a blood test, which can detect pregnancy even earlier and provide a more precise measurement of hCG levels.

    They can also help rule out any rare conditions that might affect test results.

    Confirming a Positive Result

    If your home pregnancy test shows a positive result, it is highly recommended to schedule an appointment with your doctor or a healthcare provider. They will typically confirm the pregnancy with a blood test or an ultrasound. This confirmation is crucial for starting prenatal care, which involves regular check-ups, advice on nutrition, and monitoring your health and the development of the baby.

    Early confirmation also helps in determining your due date accurately.

    Dealing with Persistent Negative Results

    If you consistently get negative results on home pregnancy tests, but your period remains absent, it is advisable to consult a doctor. There can be various reasons for missed periods other than pregnancy, such as hormonal imbalances (like PCOS), stress, significant weight changes, thyroid issues, or certain medications. A doctor can help identify the underlying cause and recommend appropriate treatment.

    Understanding Ectopic Pregnancies

    In rare cases, a pregnancy might develop outside the uterus, which is known as an ectopic pregnancy. This is a serious medical condition that requires immediate attention. Home pregnancy tests might show a positive result, but hCG levels might rise more slowly or plateau.

    Symptoms of an ectopic pregnancy can include severe abdominal pain, shoulder pain, and vaginal bleeding. If you experience these symptoms, seek medical help immediately.

    Rare Cases of False Positives

    While rare, false positive results can occur. These are instances where a pregnancy test indicates pregnancy, but you are not actually pregnant. Reasons for this can include certain medications containing hCG (often used for fertility treatments), recent miscarriage or abortion, or a rare condition called a molar pregnancy.

    A doctor’s confirmation is the best way to rule out these possibilities and ensure the result is accurate.

    Pregnancy Test Midstream FAQ

    Question: How accurate is a pregnancy test midstream?

    Answer: Pregnancy test midstreams are very accurate, often over 99% accurate when used correctly starting from the day of your missed period. However, accuracy can be affected by testing too early, not following instructions, or using an expired test.

    Question: Can I use a pregnancy test midstream if I’m taking medication?

    Answer: Most common medications do not affect the accuracy of a pregnancy test midstream. However, some fertility drugs that contain hCG can cause a false positive result. Always tell your doctor about any medications you are taking.

    Question: How soon can I get a positive result with a pregnancy test midstream?

    Answer: Most midstream pregnancy tests can detect pregnancy as early as the first day of your missed period. Some early detection tests can give results up to a few days before your missed period, but accuracy is best when you wait.

    Question: What should I do if I get an evaporation line on my pregnancy test midstream?

    Answer: An evaporation line is a colorless mark that can appear as the test dries and is not a positive result. If you see a faint line, retest in a day or two. If the line has no color, it is likely an evaporation line and not an indicator of pregnancy.

    Question: Can I reuse a pregnancy test midstream?

    Answer: No, pregnancy test midstreams are designed for single use only. Attempting to reuse one will result in an inaccurate or invalid reading.

    Conclusion

    Using a pregnancy test midstream is a straightforward process when you know the right steps. By understanding how to properly apply your urine to the absorbent tip and waiting for the correct time, you can get a reliable result. Always check the expiration date and follow the specific instructions provided with your test.

    If you get a positive result, confirm it with your doctor. If the result is negative but your period is still missed, retesting later or consulting a healthcare professional can provide clarity.

  • Navigating Health 8 Quarter 2 Pregnancy

    Navigating Health 8 Quarter 2 Pregnancy

    Many new parents find certain stages of pregnancy a bit tricky. The health 8 quarter 2 pregnancy period can sometimes feel like a puzzle, especially if it’s your first time. You might have lots of questions about what’s happening and how to best support yourself and your growing baby.

    Don’t worry, it’s completely normal to feel this way! We’re here to make things simple. Let’s break down everything you need to know, step by step, so you feel confident and prepared for what’s ahead.

    Key Takeaways

    • Understand the common changes and concerns during the eighth month of pregnancy.
    • Learn about important health checks and what to expect at your appointments.
    • Discover tips for managing discomforts like swelling and fatigue.
    • Find out how to prepare your body and mind for labor and delivery.
    • Recognize signs of when to seek medical advice or attention.
    • Explore ways to stay nourished and active for optimal health.

    Understanding Health 8 Quarter 2 Pregnancy

    The eighth month of pregnancy, often referred to as the start of your third trimester and leading into quarter two of this phase, brings your baby closer to birth. This period is exciting but also a time when your body is undergoing significant changes to prepare for delivery. It’s common to experience new symptoms or intensified ones as your baby grows and settles into position.

    Staying informed about these changes is key to a comfortable and healthy final stretch of your pregnancy. This section will cover the general landscape of this stage.

    You’ll notice your baby’s movements becoming more coordinated. While kicks might feel stronger, the overall frequency may change as they have less room to move around wildly. It’s important to monitor these movements, as a significant change could be a sign to check in with your healthcare provider.

    Your body is also preparing for birth. You might experience Braxton Hicks contractions, which are practice contractions for labor. These typically feel like a tightening of the abdomen that comes and goes.

    Physical Changes in the Mother

    As your baby grows bigger, your body adapts. Your uterus has grown quite large, putting pressure on your bladder, leading to more frequent trips to the restroom. This pressure can also cause heartburn and indigestion because your stomach is being squeezed.

    Backaches are also very common. The extra weight you’re carrying shifts your center of gravity, and the hormone relaxin loosens ligaments in your pelvis, which can lead to lower back pain. Swelling, especially in your feet, ankles, and hands, is also a frequent complaint.

    Your breasts may feel heavier and more sensitive. They are preparing for breastfeeding, and you might even notice a clear or yellowish fluid called colostrum leaking from your nipples. Fatigue can return, even though you’re in the later stages.

    This is due to the physical demands of carrying a large baby, changes in sleep patterns, and your body working harder. Shortness of breath is also common as the uterus presses up against your diaphragm.

    Some women experience skin changes. Stretch marks may become more prominent on your abdomen, breasts, and thighs. You might also notice a darker line running from your belly button to your pubic bone, called the linea nigra.

    These are all normal physiological responses to pregnancy.

    Baby’s Development and Positioning

    By the eighth month, your baby is rapidly gaining weight and has very little room to move freely. Their skin is becoming smoother as the downy hair (lanugo) and the waxy coating (vernix caseosa) start to disappear. Their lungs are continuing to mature, producing surfactant, which helps their lungs stay inflated after birth.

    The bones in their skull are still soft and haven’t fused yet, which allows them to pass through the birth canal more easily.

    Most babies will have settled into a head-down position by this stage, ready for birth. This is called the cephalic presentation. If your baby is not head-down, your doctor will discuss options with you, such as external cephalic version (ECV) to try and turn the baby, or planning for a Cesarean birth.

    The baby’s brain is developing rapidly, with the cerebral cortex growing significantly. They can now likely hear sounds outside the womb quite well and may react to loud noises or music.

    Their immune system is also strengthening, receiving antibodies from you that will help protect them in the early months of life. The baby’s sleep-wake cycles are becoming more established, and they will spend a lot of time sleeping, interrupted by periods of activity. You will feel these active periods as kicks, punches, and wiggles.

    Health Monitoring and Doctor Visits

    Regular check-ups are super important during this phase. Your healthcare provider will want to monitor your health and your baby’s development closely. These appointments ensure any potential issues are caught early.

    They also give you a chance to ask all your burning questions and get personalized advice. Don’t hesitate to bring a list of things you’re wondering about.

    At these visits, your doctor will likely check your blood pressure, weight, and urine. They will also measure the size of your uterus to track your baby’s growth. You’ll hear your baby’s heartbeat, which is always a reassuring sound.

    Your provider will also discuss any symptoms you’re experiencing and check for swelling or other signs that could indicate complications.

    Essential Prenatal Appointments

    During the eighth month, prenatal appointments typically occur every two weeks. These frequent visits allow for close monitoring as you approach your due date. Your doctor will continue to assess your well-being and your baby’s status.

    They will ask about your physical and emotional state, as well as any signs of labor.

    Your provider may also perform a pelvic exam to check the position of the baby and the readiness of your cervix. This helps them estimate how close you might be to going into labor. They will also discuss your birth plan and answer any last-minute questions you might have about the delivery process, pain management options, and postpartum care.

    Your baby’s movements will be a topic of discussion. You will be encouraged to track fetal movements, often called “kick counts.” This is a simple but effective way to ensure your baby is doing well. A general guideline is to feel a certain number of movements within a specific timeframe, but your doctor will give you specific instructions.

    Key Health Indicators to Watch

    Your blood pressure is a critical indicator your doctor monitors. High blood pressure during pregnancy can be a sign of preeclampsia, a serious condition. Any sudden increase or readings consistently above normal should be reported.

    Watch for symptoms like severe headaches, vision changes (blurriness, seeing spots), upper abdominal pain, and sudden swelling.

    Fetal movement is another crucial sign. While the pattern of movement can change, a significant decrease in activity warrants immediate medical attention. Your baby’s well-being is closely linked to their movement.

    If you feel fewer kicks than usual, or if they seem weaker, contact your doctor or midwife right away.

    Vaginal bleeding, especially if it is bright red and heavy, is another serious concern. While some spotting can occur, significant bleeding needs to be evaluated by a medical professional immediately. Also, watch for signs of premature labor, such as regular contractions that become stronger and closer together, or a persistent backache.

    Rupture of membranes, often referred to as your water breaking, is another sign that labor is starting or about to start.

    Managing Discomforts and Staying Healthy

    As your pregnancy progresses, you might experience some discomforts. But don’t let them get you down! There are many simple ways to manage these issues and keep yourself feeling your best.

    Staying active, eating well, and getting enough rest are the foundations of good health at this stage. Small adjustments can make a big difference in your comfort.

    It’s about adapting to the new needs of your body and giving yourself the best possible care. This phase is about nurturing yourself as much as you are nurturing your baby. Focusing on what you can control, like your diet and activity level, can help you feel more empowered and less overwhelmed.

    Let’s explore some practical strategies.

    Tips for Common Pregnancy Ailments

    For swollen feet and ankles, try to elevate your legs whenever possible. Wearing comfortable, supportive shoes and avoiding standing for long periods can also help. Staying hydrated is important, but paradoxically, drinking enough water can help your body not to retain as much fluid.

    Gentle exercise like walking or prenatal yoga can improve circulation and reduce swelling.

    Heartburn can be managed by eating smaller, more frequent meals and avoiding foods that trigger it, like spicy or fatty foods. Sitting up straight after eating and not lying down immediately after a meal can also offer relief. Some over-the-counter antacids are safe during pregnancy, but always check with your doctor first.

    Back pain can be eased with proper posture, gentle stretching, and supporting your back with pillows when sitting or sleeping. A pregnancy support belt can also provide relief. Applying a warm compress to your back can sometimes help soothe sore muscles.

    Regular, gentle exercise like swimming or walking can strengthen back muscles.

    Nutrition and Hydration Needs

    Eating a balanced diet remains crucial. Focus on lean proteins, whole grains, fruits, and vegetables. Your body needs extra calories, but it’s more about the quality of those calories.

    Ensure you’re getting enough iron to prevent anemia, calcium and vitamin D for bone health, and omega-3 fatty acids for your baby’s brain development.

    Many prenatal vitamins contain the essential nutrients, but a healthy diet should be your primary source. Talk to your doctor about any specific dietary needs or supplements you might require. Hydration is also incredibly important.

    Aim to drink plenty of water throughout the day. This helps prevent constipation, reduce swelling, and keeps your amniotic fluid levels healthy.

    It’s a good idea to limit caffeine intake and avoid processed foods, excessive sugar, and unhealthy fats. Focus on nutrient-dense foods that will nourish both you and your baby. Some women find that certain food cravings intensify at this stage, but try to balance them with healthy choices.

    Staying Active Safely

    Gentle exercise is beneficial throughout pregnancy. Activities like walking, swimming, prenatal yoga, and stationary cycling are generally safe and can help maintain your fitness, improve circulation, reduce back pain, and prepare your body for labor. Always listen to your body and avoid overexertion.

    If you were active before pregnancy, you can often continue your routine with modifications. If you are new to exercise, start slowly. Your doctor can advise on the best types and intensity of exercise for your individual situation.

    Avoid activities that carry a high risk of falling or abdominal trauma.

    Breathing exercises and gentle stretching can also be incredibly helpful, not only for physical comfort but also for mental preparation for labor. Focus on exercises that promote flexibility and relaxation. Remember that staying active can also improve your mood and energy levels during this demanding period.

    Preparing for Labor and Delivery

    With your due date getting closer, it’s natural to start thinking more about labor and delivery. This is a time to finalize your plans, gather your essential items, and mentally prepare for what’s to come. The more prepared you feel, the more confident you’ll likely be.

    Your healthcare team is there to support you every step of the way.

    This phase is about empowering yourself with knowledge and making informed decisions. Learning about the different stages of labor, pain management options, and what to expect immediately after birth can reduce anxiety. It’s also a great time to involve your partner or support person in the preparations.

    Understanding Labor Signs

    Labor typically begins with consistent contractions. These are different from Braxton Hicks contractions because they gradually become stronger, closer together, and more regular. They might start in your back and move to the front, or vice versa.

    Another sign is the “bloody show,” which is the expulsion of the mucus plug from your cervix. This can happen days or even hours before labor begins.

    Your water might break, which can be a trickle or a gush of fluid. If your water breaks, contact your healthcare provider immediately to discuss the next steps, as there’s an increased risk of infection once your membranes have ruptured. Some women experience a persistent lower backache, feeling of pressure in their pelvis, or even diarrhea as their body prepares for labor.

    It’s important to know the difference between early labor signs and when to head to the hospital. Your healthcare provider will give you specific guidance on when to call them or come in. Generally, if your contractions are five minutes apart, last for a minute each, and have been going on for about an hour, it’s time to seek medical attention.

    Creating Your Birth Plan

    A birth plan is a written document outlining your preferences for labor and delivery. It can cover everything from pain management choices (like epidurals or natural methods) to who you want in the room with you, and your preferences for after the baby is born, like skin-to-skin contact. While it’s a helpful guide, remember that birth can be unpredictable, and flexibility is key.

    Discuss your birth plan with your healthcare provider well in advance. This ensures they are aware of your wishes and can offer guidance if certain requests aren’t feasible due to medical reasons. It’s also a good idea to share it with your support person so they can advocate for you during labor if needed.

    Your birth plan should be realistic and adaptable. It’s a conversation starter, not a rigid contract. Focus on your priorities, such as safety, comfort, and having a positive experience.

    Examples of things to consider include whether you want intermittent or continuous fetal monitoring, your preferences for pushing, and any requests for immediate newborn care.

    Packing Your Hospital Bag

    It’s wise to pack your hospital bag around the 34-36 week mark of pregnancy. This way, you’re prepared for an unexpected early arrival. Include essentials for yourself, your baby, and your partner.

    For yourself, think about comfortable clothing (like a robe and nursing bras), toiletries, snacks, and any entertainment like books or music.

    For the baby, pack a few outfits, diapers, wipes, and a hat. Remember to bring an approved infant car seat, as you won’t be able to leave the hospital without one. For your partner, essentials like comfortable clothes, snacks, a phone charger, and a book can make their hospital stay more comfortable.

    Don’t forget important documents like your insurance card and identification. Also, consider bringing a camera to capture those precious first moments. A list of phone numbers for family and friends can be helpful.

    Having everything ready in advance can significantly reduce stress when labor begins.

    When to Seek Immediate Medical Help

    While most of the pregnancy journey is normal, it’s vital to know when to seek immediate medical attention. Recognizing warning signs can ensure you and your baby receive timely care, which is crucial for a healthy outcome. Trust your instincts; if something feels wrong, it’s always best to get it checked out by a professional.

    Your healthcare provider is your best resource for understanding what is normal and what might require urgent assessment. Don’t hesitate to call them if you are concerned. Early intervention can prevent more serious complications.

    Warning Signs of Complications

    Some serious warning signs include severe abdominal pain, significant vaginal bleeding (more than spotting), a sudden gush of fluid from the vagina, severe headache that doesn’t go away, changes in vision (like blurry vision or seeing spots), swelling of the face or hands, and sudden weight gain. These symptoms can indicate conditions like preeclampsia, placental abruption, or preterm labor.

    Decreased fetal movement is another critical sign. If you notice a significant reduction in your baby’s kicks or movements, contact your doctor or go to the hospital immediately. It’s important to have a plan for how you will monitor fetal movements, and what to do if you are concerned.

    Fever, chills, or persistent vomiting can also be signs of infection or other issues that need prompt medical evaluation. Any unusual or concerning symptom should be discussed with your healthcare provider without delay.

    Recognizing Preterm Labor

    Preterm labor is labor that begins before 37 weeks of pregnancy. Signs can be similar to full-term labor but occur much earlier. These include regular contractions (even if they don’t hurt much yet), a persistent low backache, pelvic pressure, and changes in vaginal discharge.

    You might also experience flu-like symptoms or a general feeling of discomfort.

    If you experience any of these signs before 37 weeks, contact your healthcare provider immediately. It’s better to be cautious and get checked out. Prompt medical attention can sometimes help stop or slow down preterm labor, giving your baby more time to develop in the womb.

    This can significantly improve their health outcomes.

    Your doctor might recommend rest, fluids, and sometimes medications to stop contractions, known as tocolytics. They will also monitor you and your baby closely. Awareness of the signs and quick action are key in managing preterm labor.

    When to Call Your Doctor or Midwife

    Besides the emergency warning signs, there are other situations where you should contact your doctor or midwife. This includes any concerns about your baby’s movements, unusual vaginal discharge, persistent nausea or vomiting, severe itching (especially on the hands and feet), or any questions about your medications or symptoms.

    Don’t hesitate to reach out if you are feeling overwhelmed, anxious, or depressed. Mental health is just as important as physical health during pregnancy. Your healthcare team can provide support and resources.

    It’s also a good idea to call if you feel unwell in any way, even if you can’t pinpoint why.

    Remember to keep your doctor’s or midwife’s contact number handy, along with the number for the hospital or birthing center. Knowing who to call and when can provide great peace of mind.

    Common Myths Debunked

    Myth 1: You cannot exercise during the last trimester.

    This is not true. Moderate, doctor-approved exercise is generally safe and beneficial throughout pregnancy, including the last trimester. Activities like walking, swimming, and prenatal yoga can help maintain fitness, reduce discomforts, and prepare the body for labor.

    It’s essential to listen to your body and avoid strenuous or high-impact activities that could pose a risk. Always consult with your healthcare provider before starting or continuing any exercise program.

    Myth 2: If your water breaks, labor will start immediately and intensely.

    While the rupture of membranes (water breaking) often signals that labor is imminent, it doesn’t always mean labor will start right away or be intense. For some women, labor begins within hours, while for others, it can take a day or two. The nature of the fluid release also varies; it can be a dramatic gush or a slow trickle.

    Your doctor will advise you on the best course of action once your water breaks, as there’s an increased risk of infection after your membranes have ruptured.

    Myth 3: You’ll feel your baby move much less in the last month.

    While your baby has less room to perform big flips and rolls, their overall movement pattern should remain consistent. You should still feel regular kicks, nudges, and stretches. A significant decrease in fetal movement is a cause for concern and should be reported to your healthcare provider immediately.

    It’s not about feeling fewer movements, but rather about the quality and pattern of those movements.

    Myth 4: You can’t have sex during the last few weeks of pregnancy.

    For a healthy, low-risk pregnancy, sex is generally safe throughout pregnancy, including the final weeks. The amniotic sac and the mucus plug in your cervix provide protection for the baby. If your doctor has advised against intercourse for specific medical reasons, such as placenta previa or a history of preterm labor, then you should follow their advice.

    Otherwise, it is typically not a concern.

    Frequently Asked Questions

    Question: How often should I feel my baby move in the eighth month of pregnancy?

    Answer: You should still feel your baby move regularly. While their movements might feel different due to less space, the overall pattern should remain consistent. Your doctor will advise you on specific kick count methods, but generally, if you notice a significant decrease in movement, contact your healthcare provider immediately.

    Question: What are common signs of preterm labor?

    Answer: Signs of preterm labor include regular contractions that become closer together, a persistent low backache, pelvic pressure, a change in vaginal discharge, or flu-like symptoms occurring before 37 weeks of pregnancy. If you experience these, contact your doctor right away.

    Question: Is it normal to have swollen feet and ankles in the last trimester?

    Answer: Yes, swelling in the feet and ankles is very common in the last trimester due to increased fluid retention and pressure from the growing uterus. Elevating your legs, staying hydrated, and wearing comfortable shoes can help manage it. However, if swelling is sudden or severe, especially in the hands or face, contact your doctor.

    Question: How can I manage heartburn during pregnancy?

    Answer: You can manage heartburn by eating smaller, more frequent meals, avoiding trigger foods, and staying upright after eating. Some over-the-counter antacids are safe, but always consult your doctor before taking any medication.

    Question: What is the purpose of Braxton Hicks contractions?

    Answer: Braxton Hicks contractions are practice contractions that help prepare your body for labor. They typically feel like irregular tightening of the uterus that doesn’t become more frequent or intense. They differ from true labor contractions because they usually stop with changes in position or rest.

    Conclusion

    As you reach the eighth month of pregnancy, you’re in the final stretch. Focus on staying informed, managing your health, and preparing for your baby’s arrival. Gentle movement, good nutrition, and regular check-ups are key.

    Trust your body and your healthcare team. You’ve got this!