Author: Admin

  • Understanding C And T In Pregnancy Test

    Understanding C And T In Pregnancy Test

    Have you ever looked at a pregnancy test and wondered what those letters “C” and “T” mean? It can seem a bit confusing at first. Many people find the abbreviations on these tests puzzling.

    But don’t worry, it’s actually quite simple! We’ll walk through exactly what they stand for and how to read your result clearly. Get ready for an easy guide that clears up all your questions about the c and t in pregnancy test.

    Key Takeaways

    • The “C” on a pregnancy test stands for “Control.”
    • The “T” on a pregnancy test stands for “Test.”
    • The control line confirms the test is working correctly.
    • The test line shows whether pregnancy hormones are detected.
    • Interpreting results is straightforward once you know what C and T mean.
    • Proper timing and following instructions are key to accurate results.

    How Pregnancy Tests Work

    Pregnancy tests detect a hormone called human chorionic gonadotropin, or hCG. This hormone is made by the body soon after a fertilized egg attaches to the uterine lining. It shows up in both urine and blood tests.

    Home pregnancy tests usually use urine. The test strips have special chemicals that change color when they come into contact with hCG.

    The amount of hCG in your body increases rapidly in early pregnancy. This makes pregnancy tests quite reliable, especially when taken after a missed period. Even small amounts of hCG can trigger a positive result.

    The sensitivity of tests varies, meaning some can detect lower levels of hCG than others.

    The Science Behind hCG Detection

    Pregnancy test kits contain antibodies that are sensitive to hCG. When urine passes over the test strip, it flows through a pad. This pad is treated with a special dye.

    If hCG is present in the urine, it binds to these antibodies. This binding action causes a chemical reaction.

    This reaction leads to the appearance of a colored line. The intensity of the line can sometimes relate to the amount of hCG present, but usually, any line indicates a positive result. Understanding this basic process helps in grasping why specific lines appear on the test.

    When to Take A Pregnancy Test

    For the most accurate results, it’s best to take a pregnancy test after you miss your period. Taking it too early might mean there isn’t enough hCG in your urine for the test to detect. This can lead to a false negative result, meaning the test says you’re not pregnant when you actually are.

    Some highly sensitive tests can detect pregnancy a few days before your expected period. However, even with these, taking the test on the day of your missed period or a few days after is generally recommended for reliability. The first-morning urine is often suggested because hCG levels are usually more concentrated then.

    Urine vs. Blood Pregnancy Tests

    Both urine and blood tests detect hCG, but they differ in sensitivity and when they can detect pregnancy. Urine tests are what most people use at home. They are convenient, affordable, and easy to use.

    Blood tests are done in a doctor’s office and are more sensitive.

    Blood tests can detect pregnancy earlier than urine tests. They are also useful for tracking the progress of a pregnancy. There are two main types of blood tests: qualitative and quantitative.

    A qualitative blood test simply says if hCG is present or not, similar to a urine test. A quantitative blood test measures the exact amount of hCG in the blood.

    Decoding The C And T Lines

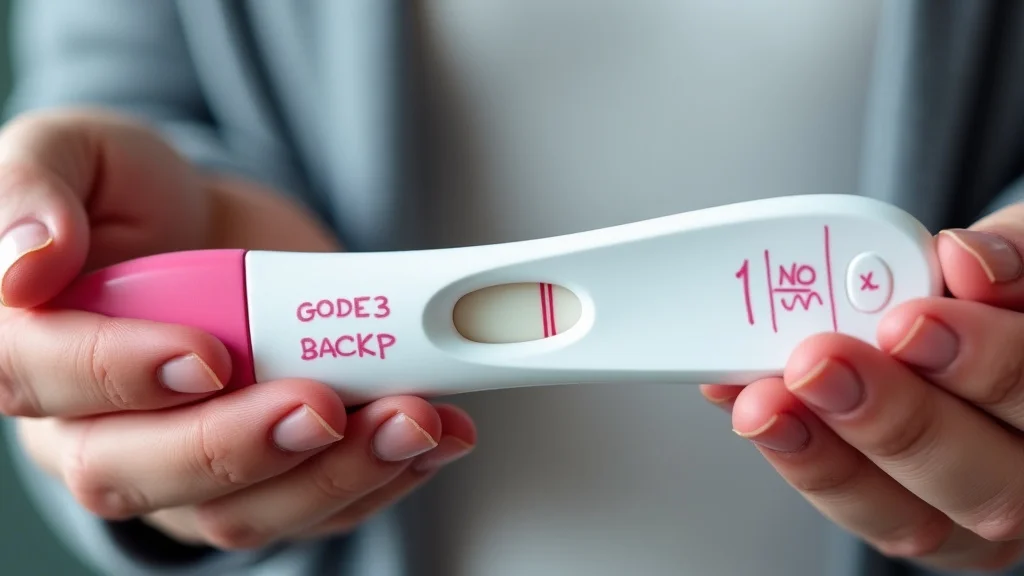
    When you take a pregnancy test, you’ll typically see two lines or symbols on the test window. These are labeled “C” and “T.” These labels are your guide to understanding the test’s result. Knowing what each one means is key to interpreting whether you are pregnant or not.

    The “C” and “T” are not arbitrary markings; they represent different parts of the test’s mechanism for confirming its functionality and detecting pregnancy. Let’s break down what each letter signifies and why both are important.

    The Meaning Of The “C” Line

    The “C” stands for Control. This line is your assurance that the test has worked correctly. It is designed to appear every time the test is used properly, regardless of whether you are pregnant or not.

    The control line confirms that the test has absorbed enough urine and that the test kit is functional.

    Think of the control line as a built-in quality check. If the “C” line does not appear, it means the test may not have worked properly. This could be due to insufficient urine, expired test, or a manufacturing defect.

    In such cases, you would need to take another test.

    Here’s why the control line is so important:

    • It validates the test procedure.
    • It shows the test kit is working.
    • It’s the benchmark for interpreting the test line.

    Without a visible “C” line, any “T” line that appears would be unreliable. So, always look for the “C” line first to make sure the test itself is performing as expected.

    The Significance Of The “T” Line

    The “T” stands for Test. This is the line that indicates the presence of hCG in your urine. If you are pregnant, the “T” line will appear, showing that the test has detected pregnancy hormones.

    The “T” line may be fainter or stronger depending on the amount of hCG in your urine.

    A visible “T” line, even if it’s faint, generally means you are pregnant. The hCG hormone concentration rises each day in early pregnancy, so a faint line might be seen very early on. As the pregnancy progresses, the “T” line usually becomes darker and more distinct.

    The “T” line’s role is:

    • To detect hCG hormones.
    • To confirm a potential pregnancy.
    • To show a positive result when visible.

    It’s crucial to remember that the “T” line should be assessed in conjunction with the “C” line. Both are needed for a conclusive result.

    Interpreting Your Test Results

    Interpreting the results of a pregnancy test is straightforward once you understand the “C” and “T” lines. The most important rule is to always ensure the “C” line appears. If the “C” line is not present, the test is invalid, and you cannot rely on the result, even if a “T” line shows up.

    Here are the possible outcomes:

    • One line (C line only): This is a negative result. It means no hCG was detected in your urine, and you are likely not pregnant.
    • Two lines (C and T lines): This is a positive result. It means hCG was detected in your urine, and you are likely pregnant. Both lines can be faint or strong.
    • No lines or only T line: This is an invalid result. The test did not work correctly, or the “C” line did not appear. You need to retake the test.

    It is always recommended to read the specific instructions that come with your pregnancy test kit, as some brands might have slightly different visual indicators or interpretations.

    Practical Tips For Accurate Testing

    Getting an accurate result from a pregnancy test involves more than just understanding the C and T lines. Following specific guidelines can help avoid common mistakes and ensure you get reliable information. These tips are designed to make the testing process as simple and effective as possible.

    Timing, storage, and the actual testing procedure all play a part. By paying attention to these details, you can gain confidence in your pregnancy test results. Let’s look at some simple steps to maximize your chances of an accurate outcome.

    Choosing The Right Test

    When you go to buy a pregnancy test, you’ll notice there are many different brands and types available. Most home pregnancy tests work by the same basic principle of detecting hCG. However, some tests are more sensitive than others.

    A more sensitive test can detect lower levels of hCG, meaning it might give you a positive result earlier.

    Consider the timing of when you want to test. If you want to test as early as possible, look for a highly sensitive test. However, remember that even with sensitive tests, testing too early can still lead to a false negative.

    For most people, a standard pregnancy test taken around the time of their missed period will be accurate.

    Following Instructions Carefully

    This is perhaps the most critical step for an accurate result. Each pregnancy test kit comes with its own set of instructions, and they can vary slightly from brand to brand. It is essential to read and follow these instructions precisely.

    Skipping steps or not performing them correctly can lead to errors.

    Key instructions usually involve:

    • How long to dip the test stick into the urine sample.
    • How long to wait for the results to appear.
    • How to interpret the lines or symbols.

    If you do not follow the instructions, the test may not work correctly, leading to an invalid result or a false reading. Always take a few minutes to read the leaflet provided.

    When To Perform The Test

    The time of day and your cycle are important factors for accurate testing. As mentioned earlier, the concentration of hCG is usually highest in your first-morning urine. This is because you haven’t had anything to drink for several hours, so your urine is less diluted.

    Testing with first-morning urine is especially helpful if you are testing very early in your pregnancy, before your missed period. If you are testing after your missed period, you might be able to test at any time of day and still get an accurate result. However, using first-morning urine consistently provides the best chance for detecting even low levels of hCG.

    Understanding False Results

    While pregnancy tests are highly accurate, it’s possible to get false results. A false negative occurs when the test shows you are not pregnant, but you actually are. This can happen if you test too early, use diluted urine, or have certain medical conditions.

    A false positive, though rarer, occurs when the test shows you are pregnant, but you are not.

    Reasons for false positives can include:

    • Recent miscarriage or abortion.
    • Certain fertility medications containing hCG.
    • Some rare medical conditions, like specific tumors.

    If you get a result that seems unexpected, or if you have concerns, it’s always best to consult with a healthcare provider. They can perform further tests and provide a definitive answer.

    Common Myths Debunked

    Myth 1: A faint “T” line always means a chemical pregnancy.

    Reality: A faint “T” line typically indicates a positive result. It means hCG has been detected in your urine. The faintness often reflects lower levels of hCG, which is common in very early pregnancy.

    It doesn’t automatically mean a chemical pregnancy, though a healthcare provider can confirm the type of pregnancy. Many healthy pregnancies start with faint lines.

    Myth 2: You must use your first-morning urine for every test.

    Reality: While first-morning urine is often recommended for its higher hCG concentration, it’s not always mandatory, especially after you’ve missed your period. If you’re testing several days after your missed period, the hCG levels might be high enough to be detected at any time of day. However, for early testing, first-morning urine is still the most reliable choice.

    Myth 3: If the “C” line is faint, the test is unreliable.

    Reality: The “C” line should be a clear, solid line to indicate the test is working correctly. Its intensity is usually not as critical as the “T” line. As long as the “C” line is visible and distinct, the test is generally considered valid.

    If the “C” line is absent or extremely faint to the point of being unnoticeable, then the test is invalid.

    Myth 4: You can test for pregnancy using household items like sugar or toothpaste.

    Reality: These home remedies are not scientifically proven and do not detect hCG. Pregnancy tests work by reacting with a specific hormone. While sugar or toothpaste might react chemically in certain ways, these reactions do not indicate the presence of hCG.

    They are unreliable methods and can lead to misleading results.

    Frequently Asked Questions

    Question: What does the “C” on a pregnancy test mean?

    Answer: The “C” stands for Control. It is a line that confirms the test is working correctly and has absorbed enough urine.

    Question: What does the “T” on a pregnancy test mean?

    Answer: The “T” stands for Test. It is the line that appears if pregnancy hormones (hCG) are detected in your urine.

    Question: How do I know if my pregnancy test is positive?

    Answer: A positive result usually means both the “C” and “T” lines are visible. Even a faint “T” line, as long as the “C” line is present, typically indicates a positive result.

    Question: What if I only see a “T” line and no “C” line?

    Answer: If you only see a “T” line and no “C” line, the test result is invalid. This means the test did not work properly, and you should take another one.

    Question: When is the best time to take a pregnancy test for accuracy?

    Answer: The most accurate time to take a pregnancy test is after you miss your period, ideally using your first-morning urine when hCG levels are most concentrated.

    Final Thoughts

    Reading a pregnancy test is simple when you know the “C” and “T” lines. The “C” confirms the test works, and the “T” shows if hCG is detected. A positive result means both lines appear, and a negative means only the “C” line is visible.

    Always follow the instructions for the most reliable results.

  • Pregnancy Test For Kids Easy Guide

    Pregnancy Test For Kids Easy Guide

    Figuring out a pregnancy test for kids can feel a bit tricky at first, especially if you’re new to it. It’s completely normal to have questions and wonder about the best way to handle it. This guide is here to make it super simple.

    We’ll walk through everything step-by-step, so you feel confident and prepared. Get ready to learn how easy it can be!

    Key Takeaways

    • Understanding how to use a pregnancy test is straightforward.
    • There are simple ways to ensure accuracy and read results correctly.
    • Knowing when and how to talk about the results is important.
    • Resources are available to help support families through this process.
    • The goal is to provide clear, calm guidance for all involved.

    How A Pregnancy Test For Kids Works

    When you’re looking into a pregnancy test for kids, the main idea is to understand the basics of how these tests detect pregnancy. These tests work by looking for a specific hormone in a person’s urine called human chorionic gonadotropin, or hCG. This hormone is only produced after a fertilized egg implants in the uterus.

    The amount of hCG starts very low and then rapidly increases as pregnancy progresses. Home pregnancy tests are designed to detect this hormone, with most tests being sensitive enough to pick it up a few days after a missed period. For younger individuals, it’s important to know that the test itself is the same, but the context around its use and interpretation requires a different approach.

    The technology relies on antibodies that bind to hCG, causing a color change or a symbol to appear on the test, indicating a positive result.

    The Science Behind Home Pregnancy Tests

    Home pregnancy tests are a marvel of modern science, making early pregnancy detection accessible and private. At their core, these tests are immunoassays. They contain antibodies specifically designed to latch onto the hCG hormone.

    When urine containing hCG flows over the test strip, these antibodies bind to the hormone. This binding action triggers a chemical reaction that results in a visible indicator, like a line, a plus sign, or the word “pregnant,” appearing on the test window. The sensitivity of these tests varies.

    Some are more sensitive than others, meaning they can detect lower levels of hCG. This higher sensitivity allows for earlier testing, sometimes even before a missed period. However, it’s crucial to follow the instructions precisely, as testing too early with a less sensitive test might yield a false negative.

    The development of these tests has been a significant advancement for women’s health. Before home tests, a pregnancy could only be confirmed by a doctor, often involving blood tests or physical examinations. Home tests provide immediate results in the comfort of one’s own home, empowering individuals with quick information.

    This accessibility is particularly important for a pregnancy test for kids, where discretion and immediate understanding are often paramount. The accuracy rates for these tests are very high when used correctly, often exceeding 99%. This high accuracy rate is a testament to the robust scientific principles behind their design and manufacturing.

    Detecting The hCG Hormone

    The key ingredient in any pregnancy test is its ability to detect human chorionic gonadotropin (hCG). This hormone is produced by cells that will eventually form the placenta shortly after a fertilized egg attaches to the uterine lining. It’s essentially the body’s signal that pregnancy has begun.

    The concentration of hCG in the urine typically doubles every 48 to 72 hours in the early stages of pregnancy. This rapid increase is why pregnancy tests become more accurate the longer someone waits to take them after conception.

    Different tests have different thresholds for detecting hCG. A highly sensitive test might be able to detect hCG as early as 10 days after conception, while others may require waiting until a missed period, which is usually around 14 days after conception. For a pregnancy test for kids, understanding this sensitivity is important so that results are as reliable as possible.

    Using a test that is too early might lead to a false negative, where the test shows negative even though pregnancy has occurred, simply because hCG levels are not yet high enough to be detected. This can cause confusion and unnecessary worry.

    The way the test works is through a process called lateral flow immunoassay. This involves a strip with different zones. When urine is applied, it moves across the strip.

    If hCG is present, it binds to colored particles, which then move to a specific test line and bind to antibodies there, creating a visible line. Control lines are also present to ensure the test worked correctly.

    Interpreting The Results

    Reading the results of a pregnancy test is usually straightforward, but it’s important to pay close attention to the instructions. Most tests will show a control line that indicates the test is working. Then, there will be a test line or a symbol that shows the result.

    A positive result typically appears as two lines, a plus sign, or the word “pregnant.” A negative result is usually one line, a minus sign, or the word “not pregnant.”

    It is very important to check the result within the time frame specified in the instructions, usually 5 to 10 minutes. Reading the test too early might not give enough time for the hCG to show up, and reading it too late could lead to a “en line ” effect, which is a faint evaporation line that can be mistaken for a positive result. For a pregnancy test for kids, understanding these nuances helps ensure a clear and accurate interpretation.

    If the result is unclear, it is always best to retest with a new kit.

    Sometimes, a very faint positive line can appear. This usually still means positive, but it’s a good idea to confirm with another test or a doctor. If the control line does not appear, the test is invalid, and you will need to use a new one.

    The clarity of the result is paramount, especially when dealing with sensitive situations.

    When To Use A Pregnancy Test For Kids

    Deciding when to use a pregnancy test for kids is a significant step that requires careful consideration. The most common reason to consider a pregnancy test is when a young person experiences a missed menstrual period. However, other signs might prompt the question as well.

    These can include unusual tiredness, nausea, or changes in appetite. It’s important to remember that these symptoms can also be caused by other factors, so a test is the best way to get a clear answer.

    For the most accurate results, it’s generally recommended to take a pregnancy test after a missed period. Testing too early can lead to a false negative because the level of hCG hormone might not yet be high enough to be detected by the test. Waiting until the first day of a missed period increases the chances of getting a reliable positive or negative result.

    If the test is negative but a period still hasn’t arrived, it’s advisable to wait a few days to a week and test again. This repeated testing is a key part of ensuring accuracy, particularly when dealing with younger individuals.

    The type of pregnancy test also plays a role in timing. Some tests are more sensitive and can detect pregnancy a few days earlier than standard tests. However, even with sensitive tests, waiting until a missed period is often best for definitive results.

    Open communication and support are crucial during this time, ensuring that any decision to test is made in a supportive environment.

    Recognizing Early Signs

    While a missed period is the most common indicator, there are other subtle signs that might suggest pregnancy. These can include breast tenderness or swelling, increased frequency of urination, and feeling unusually tired. Some individuals may experience nausea, often referred to as “morning sickness,” which can occur at any time of day.

    Food cravings or aversions to certain smells can also be early indicators.

    It’s important to note that these signs are not exclusive to pregnancy and can be caused by various other factors, such as stress, hormonal changes, or illness. Therefore, relying solely on these symptoms to confirm pregnancy is not advisable. A pregnancy test remains the most accurate way to determine if conception has occurred.

    For a pregnancy test for kids, recognizing these early signs can be the first step in seeking appropriate support and guidance. This awareness can help in making an informed decision about when to take a test.

    If a young person is experiencing these symptoms and is concerned about the possibility of pregnancy, encouraging them to speak with a trusted adult or healthcare professional is the best course of action. This conversation can help alleviate anxiety and guide them toward the next steps, including how and when to take a pregnancy test.

    The Best Time To Test

    The timing of a pregnancy test is critical for accuracy. Generally, the most reliable time to take a home pregnancy test is on the first day of your missed menstrual period. By this time, if pregnancy has occurred, the level of hCG in the urine is usually high enough for most tests to detect.

    Testing before this point, especially in the days leading up to an expected period, can result in a false negative. This happens because hCG levels might still be too low to register on the test.

    For a pregnancy test for kids, waiting for a missed period is strongly recommended. If a young person’s periods are irregular, it can be harder to pinpoint the exact timing of a missed period. In such cases, it’s advisable to wait at least 21 days after the last unprotected sexual intercourse.

    This extended waiting period helps account for variations in ovulation and implantation.

    Some highly sensitive tests claim to detect pregnancy a few days earlier than a missed period. While these can be useful, they may not be as accurate as waiting. If an early test shows a negative result but a period is still missed, it’s a good practice to retest a few days later.

    This second test can confirm the result or detect the pregnancy if hCG levels have continued to rise.

    What If Periods Are Irregular

    Irregular menstrual cycles can make timing a pregnancy test more challenging. If periods do not follow a predictable pattern, it becomes difficult to determine when a period has been “missed.” In these situations, the best approach is to wait a certain amount of time after the last instance of unprotected intercourse. A common recommendation is to wait at least three weeks (21 days) after the last sexual encounter.

    Another strategy for those with irregular periods is to track other potential signs of ovulation, such as changes in cervical mucus or basal body temperature. While these methods are not foolproof, they can provide a general idea of when ovulation might have occurred. Testing a few weeks after suspected ovulation can then provide a more accurate result.

    For a pregnancy test for kids, having a conversation with a healthcare provider can be very beneficial if periods are irregular. They can offer personalized advice on the best time to test and help rule out other causes for missed periods.

    If a test is taken and the result is negative, but a period still hasn’t arrived, it’s important not to get discouraged. Re-testing after another week or two is often recommended. Persistent irregular cycles or a consistently positive pregnancy test that needs confirmation should always prompt a visit to a doctor or a clinic for further evaluation and guidance.

    How To Use A Pregnancy Test For Kids

    Using a pregnancy test for kids involves the same basic steps as for adults, but the context and support surrounding the process are key. The most common method involves collecting a urine sample. This can be done either by urinating directly onto the absorbent tip of the test stick or by collecting urine in a clean cup and then dipping the stick into the collected urine.

    It is crucial to follow the specific instructions provided with the test kit, as different brands may have slightly varied procedures.

    After the sample is collected, the test needs a specific amount of time to process the results. This waiting period is usually indicated on the test packaging and is typically between 2 to 10 minutes. During this time, the hCG hormone in the urine interacts with the test chemicals to display the result.

    It’s vital to be patient and wait for the full duration before trying to interpret the outcome. For a pregnancy test for kids, having a trusted adult present can provide comfort and assistance in following these steps correctly.

    Once the waiting time is over, the result will appear in a designated window on the test. Carefully observing this window and comparing it to the instructions will help in understanding whether the result is positive, negative, or invalid. If there is any confusion, it is always best to re-test with a new kit and, if possible, seek guidance from a healthcare professional or a supportive adult.

    Gathering Your Supplies

    To perform a pregnancy test, you will need a few essential items. The primary item is, of course, the home pregnancy test kit itself. These are widely available over-the-counter at most pharmacies, drugstores, and even many supermarkets.

    They are usually found in the family planning or health sections. It’s a good idea to choose a test that is known for its accuracy and sensitivity.

    Beyond the test kit, you might also need a clean cup or container if you plan to collect urine in a separate vessel rather than urinating directly onto the test stick. Ensure the cup is thoroughly cleaned and dried before use to avoid any contamination that could affect the test results. Some people also find it helpful to have tissues or wipes available for cleanup afterward.

    For a pregnancy test for kids, having a calm and private environment is also a crucial “supply” to ensure the young person feels comfortable and supported.

    Reading the instructions that come with the pregnancy test kit is paramount. These instructions will detail the specific requirements for that particular brand, including how to collect the sample, how long to wait, and how to interpret the results. Keeping these instructions handy during the test is a good practice to ensure all steps are followed precisely.

    Collecting The Urine Sample

    Collecting a urine sample is a straightforward process for a pregnancy test. The most common and often recommended time to collect the sample is first thing in the morning. This is because your urine is most concentrated at this time, meaning any hCG hormone present is likely to be at its highest level, leading to more accurate results.

    There are two main ways to collect the sample. The first is to hold the absorbent tip of the pregnancy test stick directly in your urine stream for the amount of time specified in the instructions, usually about 5 to 10 seconds. Make sure the absorbent end is fully saturated.

    The second method involves urinating into a clean, dry cup. Once you have collected a sufficient amount of urine in the cup, you then dip the absorbent end of the test stick into the urine for the recommended duration, typically 5 to 20 seconds.

    For a pregnancy test for kids, it’s important to ensure privacy and provide a calm environment. If the young person feels anxious, a trusted adult can be present for support and to help them follow the instructions accurately, without influencing the process. After collecting the sample, it’s important to place the test on a flat, dry surface while you wait for the results.

    Reading And Understanding Results

    Interpreting the results of a pregnancy test is usually designed to be simple. Each test kit will come with specific instructions on how to read the outcome, but here’s a general guide. After the designated waiting period, you will look at the result window on the test stick.

    A positive result generally means that the test has detected hCG in your urine, indicating pregnancy. This is often shown by two lines appearing, or a plus sign, or the word “Pregnant” displayed. The intensity of the lines can vary; even a faint second line usually indicates a positive result.

    A negative result means no hCG was detected, suggesting that pregnancy has not occurred. This is typically shown by a single line, a minus sign, or the word “Not Pregnant.” If no control line appears, or if the test doesn’t work as expected, it means the test is invalid, and you should use a new one. For a pregnancy test for kids, it is vital to go over the results with them clearly, offering support regardless of the outcome.

    A Pregnancy Test For Kids Support And Next Steps

    When a young person takes a pregnancy test, the support they receive afterwards is just as important as the test itself. Regardless of the result, having a trusted adult to talk to can make a significant difference. For a positive result, this means discussing options, resources, and next steps in a supportive and non-judgmental environment.

    For a negative result, it means addressing any underlying concerns about health or sexual activity.

    Healthcare professionals are invaluable resources during this time. They can confirm the results of a home test, provide accurate information about pregnancy and reproductive health, and discuss available choices. This includes options for prenatal care, adoption, or terminating a pregnancy, depending on the individual’s circumstances and local laws.

    They can also offer guidance on contraception and safe sex practices to prevent future unintended pregnancies.

    It’s crucial that the young person feels empowered to make informed decisions about their health and future. This involves providing them with accurate information and access to professional support. The goal is to ensure they have the resources they need to navigate this situation with confidence and care.

    When Results Are Positive

    If a pregnancy test shows a positive result, it’s a significant moment that requires careful and compassionate attention. The first step for a young person should be to speak with a trusted adult. This could be a parent, guardian, school counselor, or another adult they feel safe confiding in.

    This adult can provide emotional support and help guide them through the next steps.

    It is highly recommended to confirm the positive result with a healthcare provider. A doctor can perform a more definitive pregnancy test, such as a blood test, and offer a confirmation of the pregnancy. They can also discuss all available options, including continuing the pregnancy, adoption, or abortion, in a way that is sensitive to the young person’s age and situation.

    They can also start discussing prenatal care if that is the chosen path.

    For a pregnancy test for kids, understanding their rights and available resources is key. Many communities have resources dedicated to supporting pregnant teenagers, offering counseling, financial assistance, and healthcare services. Open communication with healthcare providers ensures that the young person receives accurate information and appropriate care throughout their pregnancy journey, whatever decision they make.

    When Results Are Negative

    A negative pregnancy test result typically means that pregnancy has not been detected. While this can bring relief, it’s still important to consider the context. If a young person’s period is consistently irregular, or if they continue to experience symptoms they associate with pregnancy, it may be wise to retest in a week or two.

    Sometimes, hCG levels are still too low for detection, or the test might have been taken too early.

    If periods remain irregular or if there are ongoing concerns about health, consulting a healthcare provider is always a good idea. They can help determine the cause of the irregular periods or any other symptoms. This is also an excellent opportunity to discuss sexual health, including contraception options and safer sex practices, to prevent future unintended pregnancies.

    For a pregnancy test for kids, a negative result can be a moment to reinforce healthy choices and provide ongoing support.

    A healthcare professional can provide personalized advice on managing irregular cycles and addressing any anxieties. They can also ensure that the young person feels confident and informed about their reproductive health. This proactive approach is essential for their overall well-being and future decisions.

    Seeking Professional Guidance

    Seeking professional guidance after using a pregnancy test is a crucial step, regardless of the result. Healthcare providers, such as doctors, nurses, or clinic counselors, are trained to offer accurate information and support. They can confirm the results of a home test, discuss medical implications, and explain all available options in a confidential and sensitive manner.

    For a young person, a healthcare provider can be a vital ally. They can help navigate complex decisions, connect them with community resources, and ensure they receive necessary medical care. This includes discussing prenatal care, adoption services, or abortion procedures, as well as providing information on contraception and sexual health education.

    A professional can offer a safe space to ask questions and address concerns without judgment.

    Accessing this guidance is not only about managing a potential pregnancy but also about promoting long-term health and well-being. It empowers young individuals to make informed choices about their bodies and futures, ensuring they have the support system they need. Many clinics, like Planned Parenthood or local health departments, offer these services, often at reduced costs or for free.

    Common Myths Debunked

    Myth 1: You can tell if you’re pregnant just by symptoms alone.

    While certain symptoms like a missed period, nausea, and breast tenderness can be signs of pregnancy, they are not definitive. Many other common conditions, such as stress, hormonal imbalances, or illness, can cause similar symptoms. Relying solely on symptoms can lead to confusion and delayed confirmation.

    The only way to accurately determine pregnancy is through a pregnancy test that detects the hCG hormone.

    Myth 2: Taking a pregnancy test too early will always give a false negative, even if pregnant.

    While it’s true that testing too early increases the chance of a false negative, it’s not an absolute guarantee. Some highly sensitive tests can detect hCG as early as 10 days after conception. However, to ensure the most accurate result, it is generally advised to wait until after a missed period, when hCG levels are typically high enough for most tests to detect reliably.

    If a test is negative but pregnancy is suspected, retesting a few days later is recommended.

    Myth 3: All pregnancy tests are the same and give identical results.

    Pregnancy tests vary in sensitivity, which refers to the lowest level of hCG they can detect. Some tests are more sensitive and can detect lower levels of hCG, allowing for earlier testing. Others are less sensitive and require higher hCG levels for a positive result.

    Following the instructions for the specific test you are using and testing at the recommended time are key to obtaining an accurate result, regardless of the brand.

    Myth 4: A faint positive line means you aren’t really pregnant.

    A faint positive line on a pregnancy test usually indicates that hCG is present in the urine, meaning pregnancy is likely. The faintness of the line can be due to low hCG levels (perhaps testing very early) or variations in the test’s dye. If you see a faint line, it’s best to retest with a new kit in a day or two to confirm the result.

    It is generally not a sign that the pregnancy is not viable or not real.

    Frequently Asked Questions

    Question: How soon after unprotected sex can I take a pregnancy test?

    Answer: You can take a pregnancy test about two weeks after unprotected sex. For the most accurate results, it’s best to wait until the first day of your missed period.

    Question: What should I do if I get an unclear result on a pregnancy test?

    Answer: If your pregnancy test result is unclear, it’s best to wait a day or two and take another test with a new kit. You can also consult a healthcare provider to confirm the result.

    Question: Can stress affect the accuracy of a pregnancy test?

    Answer: Stress itself does not directly affect the accuracy of a pregnancy test. However, severe stress can sometimes lead to missed or irregular periods, which might make timing the test more difficult.

    Question: Are there any natural ways to confirm pregnancy without a test?

    Answer: No, there are no scientifically proven natural methods to confirm pregnancy without a test. Home pregnancy tests detect the hCG hormone, which is the only reliable early indicator.

    Question: Where can I get a pregnancy test if I am under 18?

    Answer: You can buy pregnancy tests at most pharmacies, drugstores, and supermarkets without a prescription. Many health clinics and reproductive health centers also offer free or low-cost tests.

    Summary

    Using a pregnancy test for kids is a clear process. You’ll collect a urine sample and wait for results. Always follow the test instructions carefully for accuracy.

    If the result is positive, seeking support and guidance from a trusted adult and healthcare provider is important. If negative, consider retesting if periods are irregular or symptoms persist. Professional help ensures informed decisions about health and future steps.

  • Second Trimester Hormones Your Body’s Changes

    Second Trimester Hormones Your Body’s Changes

    Feeling a little different as your pregnancy moves into the second trimester? That’s totally normal! It’s a time when things can really start to shift, and understanding what’s happening can make a big difference.

    Many people find the changes linked to second trimester hormones a bit surprising or even challenging at first. But don’t worry, we’re going to break it all down in a super simple way. Get ready for clear explanations and easy steps to help you feel more in control.

    Let’s explore what’s happening inside your body and how to manage it.

    Key Takeaways

    • You’ll learn about the main hormones active in your second trimester.
    • Discover how these hormones affect your mood and energy levels.
    • Understand common physical changes driven by these hormonal shifts.
    • Find practical tips for managing discomfort and feeling your best.
    • Gain insights into how your baby is growing alongside these changes.

    Understanding Second Trimester Hormones

    The second trimester often feels like a turning point in pregnancy. For many, the initial fatigue of the first trimester begins to fade, replaced by a surge of energy. This shift is largely thanks to the complex interplay of hormones during this stage.

    As your body continues to grow and prepare for your baby, a new hormonal balance takes hold. These powerful chemical messengers orchestrate many of the changes you’ll experience, from your physical well-being to your emotional state. Learning about these hormonal influences can help you anticipate and manage the effects, making this period of your pregnancy smoother and more enjoyable.

    The Role of Key Hormones

    During the second trimester, several hormones play starring roles in your body’s transformation. Progesterone levels continue to rise significantly. This hormone is crucial for maintaining the pregnancy, relaxing smooth muscles, and supporting the growth of the placenta.

    Estrogen also increases, contributing to breast growth and preparing your body for milk production. Human Placental Lactogen (hPL) becomes more prominent. Produced by the placenta, hPL helps ensure your baby gets the nutrients it needs by altering your metabolism.

    It also plays a role in breast development. Other hormones like relaxin begin to increase, loosening the ligaments in your pelvis to prepare for birth.

    Progesterone’s Impact

    Progesterone is often called the “pregnancy hormone” because it’s essential for carrying a baby to term. In the second trimester, its levels are high and steady. It helps prevent uterine contractions that could lead to premature birth by keeping the uterine muscles relaxed.

    Progesterone also supports the growth of the endometrium, the lining of the uterus, which nourishes the developing fetus. This hormone can also cause some of the common pregnancy symptoms like constipation and bloating because it slows down digestion.

    Estrogen’s Function

    Estrogen levels climb throughout pregnancy, and the second trimester sees a substantial increase. This hormone is vital for the growth of the uterus and breasts. It also plays a role in the development of your baby’s adrenal glands and helps prepare your body for lactation by stimulating milk duct growth.

    High estrogen can also affect your mood and contribute to skin changes like melasma, sometimes called the “mask of pregnancy.”

    Human Placental Lactogen (hPL) Explained

    Human Placental Lactogen, or hPL, is unique to pregnancy and is produced by the placenta. Its primary function is to ensure that your baby receives a continuous supply of glucose. It does this by making your body less sensitive to insulin, which can lead to a temporary increase in blood sugar levels.

    This ensures that more glucose is available for the placenta and fetus. hPL also helps prepare your breasts for breastfeeding by stimulating mammary gland development.

    Relaxin and Ligament Softening

    Another important hormone in the second trimester is relaxin. As its name suggests, relaxin works to relax ligaments and joints throughout your body. This is particularly important in the pelvic area, where it softens the ligaments of the pubic symphysis and sacroiliac joints.

    This loosening effect is necessary to allow your pelvis to expand during childbirth. However, it can also lead to joint pain and instability, especially in the hips and lower back, as your body adjusts to the increased laxity.

    Physical Changes Driven by Hormones

    The hormonal shifts of the second trimester bring about visible and tangible changes in your body. Your abdomen will continue to grow as your baby gets bigger and your uterus expands. Many women experience what’s known as the “glow” of pregnancy, often attributed to increased blood flow and hormone-induced oil production in the skin.

    However, other changes can be less welcome, such as skin discoloration, often appearing as darker patches on the face (melasma) or a line down the middle of the abdomen (linea nigra). Swelling in the hands and feet can also occur due to fluid retention, a common side effect of hormonal changes.

    Skin Changes and What Causes Them

    Hormones like estrogen can stimulate melanocytes, the cells that produce pigment. This can lead to hyperpigmentation, or darkening of the skin, in certain areas. Melasma often appears as brown or grayish-brown patches on the face, particularly the cheeks, forehead, and upper lip.

    The linea nigra is a dark line that can form from the pubic bone to the navel. While these changes are common and usually fade after birth, sun protection can help minimize their appearance during pregnancy.

    Swelling and Fluid Retention

    As pregnancy progresses, your body retains more fluid, and your blood volume increases significantly. Hormones like progesterone can cause blood vessels to relax, leading to increased pressure and fluid buildup, especially in the lower extremities. This can result in swollen ankles, feet, and hands.

    Elevating your legs, staying hydrated, and avoiding prolonged standing or sitting can help manage this swelling.

    Breast Changes and Preparation

    Your breasts will continue to grow and become more tender. This is driven by estrogen and progesterone, which prepare them for milk production. You might notice that your areolas (the area around your nipples) darken and enlarge.

    Some women may even leak a yellowish fluid called colostrum, the precursor to breast milk, during the second trimester. Wearing a supportive bra is essential during this time.

    Emotional and Mental Well-being

    The hormonal rollercoaster doesn’t just affect your physical body; it plays a significant role in your emotional landscape too. While many women report feeling more stable and energetic in the second trimester compared to the first, hormonal fluctuations can still contribute to mood swings. You might experience moments of intense happiness or excitement, followed by periods of irritability or weepiness.

    These shifts are a normal part of adapting to the profound physiological changes of pregnancy.

    Mood Swings and Emotional Sensitivity

    The dramatic changes in hormones like progesterone and estrogen can impact neurotransmitter levels in the brain, which are responsible for regulating mood. This can make you feel more sensitive or emotionally reactive. It’s important to remember that these feelings are often temporary and directly linked to the hormonal environment of pregnancy.

    Practicing self-compassion and seeking support from loved ones or a healthcare provider can be very helpful.

    The “Pregnancy Glow” and Energy Boost

    Many women find that the second trimester brings a welcome increase in energy. This is often attributed to the stabilization of hormone levels after the initial surge and the body’s adaptation to its new demands. Increased blood flow, partly driven by estrogen, can also contribute to a radiant complexion, often referred to as the “pregnancy glow.” This period is frequently considered the most comfortable phase of pregnancy for many, allowing for more activity and enjoyment.

    Managing Stress and Anxiety

    Even with increased energy, the hormonal changes can sometimes amplify feelings of stress or anxiety about the upcoming birth and parenthood. It’s crucial to have healthy coping mechanisms. Gentle exercise, mindfulness practices, adequate rest, and open communication with your partner or support system are vital tools for managing these feelings.

    Focusing on the positive aspects of your pregnancy and taking time for relaxation can make a significant difference.

    Managing Second Trimester Hormonal Effects

    While hormonal changes are a natural and necessary part of pregnancy, their effects can sometimes be challenging. Fortunately, there are many practical strategies you can employ to manage discomfort and promote overall well-being. These approaches focus on lifestyle adjustments, nutrition, and self-care.

    By understanding the root cause of many symptoms and taking proactive steps, you can significantly improve your experience during this exciting phase of your pregnancy.

    Nutrition and Hydration Strategies

    What you eat and drink plays a crucial role in how your body handles hormonal shifts. A balanced diet rich in fruits, vegetables, whole grains, and lean proteins provides the essential nutrients for both you and your baby. Fiber-rich foods can help combat the constipation often caused by progesterone.

    Staying well-hydrated is also key; water helps with digestion, reduces swelling, and supports overall bodily functions. Aim for at least 8-10 glasses of water daily.

    Dietary Recommendations for Hormonal Balance

    Focus on foods that support stable blood sugar levels, such as complex carbohydrates found in oats and brown rice, lean proteins like chicken and fish, and healthy fats from avocados and nuts. These foods can help mitigate mood swings and energy dips. Including foods rich in magnesium, like leafy greens and almonds, may also help with muscle relaxation and reduce cramps.

    Some women find that avoiding excessive sugar and caffeine helps manage energy levels and mood fluctuations.

    The Importance of Hydration

    Adequate hydration is fundamental during pregnancy, especially when hormones are influencing fluid balance. Water helps transport nutrients to your baby, aids in waste removal, and keeps your skin elastic. For those experiencing swelling, drinking more water can paradoxically help your body release excess fluid rather than retain it.

    Herbal teas, like peppermint or ginger, can also contribute to your fluid intake and may offer relief from nausea or indigestion.

    Exercise and Movement

    Gentle, regular exercise is highly beneficial during the second trimester. It can help combat fatigue, improve mood, reduce swelling, and prepare your body for labor. Low-impact activities are best, as they are easier on your joints, which may be loosened by relaxin.

    Always consult with your healthcare provider before starting or continuing an exercise program during pregnancy.

    Beneficial Pregnancy Exercises

    Walking, swimming, and prenatal yoga are excellent choices. Walking is accessible and great for cardiovascular health. Swimming offers buoyancy, which can relieve pressure on your joints and back.

    Prenatal yoga focuses on stretching, breathing, and strengthening muscles that will be used during labor, while also promoting relaxation. Pelvic floor exercises, often called Kegels, are also vital for strengthening muscles that support your bladder and uterus.

    Listening to Your Body

    It is crucial to listen to your body and not overexert yourself. Pregnancy is not the time to push your limits. If you experience pain, dizziness, or shortness of breath, stop exercising immediately and rest.

    Your body is working hard to grow a baby, and adequate rest is just as important as movement. Pacing yourself and incorporating rest breaks throughout the day will help you feel better.

    Rest and Sleep Strategies

    Getting enough quality sleep can feel challenging during pregnancy, even in the second trimester. Hormonal changes, physical discomfort, and increased bathroom trips can disrupt sleep patterns. Prioritizing rest is essential for managing energy levels, mood, and overall health.

    Optimizing Sleep Environment

    Create a sleep sanctuary by making your bedroom cool, dark, and quiet. Using blackout curtains, earplugs, or a white noise machine can help. Investing in a comfortable mattress and supportive pillows, especially a pregnancy pillow that cradles your growing belly and supports your back, can make a significant difference in comfort and sleep quality.

    Pregnancy-Safe Sleep Positions

    As your pregnancy progresses, sleeping on your back is generally not recommended because the weight of your uterus can press on a major blood vessel, reducing blood flow. Sleeping on your side, particularly your left side, is often advised. This position promotes optimal blood flow to the placenta and your baby.

    Using pillows to support your back and between your knees can help maintain this position comfortably throughout the night.

    Common Myths Debunked

    Myth 1: All pregnant women experience extreme mood swings.

    While mood swings are common due to hormonal fluctuations, not every pregnant woman experiences them severely. Many find their mood stabilizes in the second trimester. Factors like stress levels, support systems, and individual body chemistry play a significant role in the intensity of mood changes.

    Focusing on self-care and open communication can help manage any emotional shifts.

    Myth 2: Skin changes like melasma and linea nigra are permanent.

    These skin changes are very common during pregnancy and are primarily caused by increased hormones stimulating pigment production. While they can be concerning, they are typically temporary. For most women, melasma and the linea nigra fade significantly or disappear completely within a few months after giving birth.

    Consistent sun protection can help reduce their prominence during pregnancy.

    Myth 3: You should avoid all exercise during the second trimester.

    This is far from the truth. In fact, moderate, pregnancy-safe exercise is highly recommended during the second trimester. It helps maintain energy levels, reduce aches and pains, improve circulation, and prepare your body for labor.

    The key is to choose appropriate activities like walking, swimming, or prenatal yoga and to listen to your body, avoiding anything that causes strain or discomfort. Always get clearance from your doctor.

    Myth 4: All swelling in pregnancy is a sign of a serious problem.

    Some degree of swelling, particularly in the ankles and feet, is very common during the second and third trimesters due to increased fluid retention and pressure from the growing uterus. However, sudden or severe swelling, especially if accompanied by headaches, vision changes, or pain in the upper abdomen, can be a sign of preeclampsia and requires immediate medical attention. It’s important to distinguish between normal pregnancy swelling and potentially serious conditions.

    Frequently Asked Questions

    Question: What are the main hormones affecting me in the second trimester?

    Answer: The key hormones are progesterone, which maintains the pregnancy; estrogen, which supports growth and development; human placental lactogen (hPL), which helps nourish the baby; and relaxin, which loosens ligaments.

    Question: Why do I feel more energy in the second trimester than the first?

    Answer: This is often due to the stabilization of hormone levels and your body adapting to the pregnancy. Blood flow increases, and the initial fatigue of early pregnancy subsides for many.

    Question: Can I still experience nausea in the second trimester?

    Answer: While nausea often improves in the second trimester, some women continue to experience it. Hormonal levels, individual sensitivity, and even food aversions can contribute to ongoing nausea.

    Question: What can I do about back pain caused by hormonal changes?

    Answer: Gentle exercise like prenatal yoga, proper posture, sleeping with supportive pillows, and wearing comfortable shoes can help. Avoid heavy lifting and consider prenatal massage.

    Question: Will the skin changes I see during pregnancy last forever?

    Answer: Most skin changes, like melasma and linea nigra, are temporary and fade after delivery. Protecting your skin from the sun can help minimize their appearance during pregnancy.

    Summary

    The second trimester brings exciting hormonal shifts that support your baby’s growth and prepare your body for birth. Understanding the roles of progesterone, estrogen, and other key hormones helps explain physical and emotional changes. By focusing on balanced nutrition, hydration, gentle exercise, and sufficient rest, you can effectively manage common symptoms and enjoy this vibrant stage of your pregnancy.

  • Sims 4 Third Trimester Cheat Guide

    Sims 4 Third Trimester Cheat Guide

    Playing The Sims 4 can be super fun, but sometimes you hit little snags. For new players, figuring out how to speed up or manage a Sim’s pregnancy, especially the final stretch, might seem tricky. You might be wondering about that sims 4 third trimester cheat, and if it’s hard to use.

    Don’t worry! This guide will show you exactly how to do it, step by step. We’ll make getting to the end of a Sim’s pregnancy simple and quick.

    Let’s get your Sim ready for baby time!

    Key Takeaways

    • You can use cheat codes to change your Sim’s pregnancy stage.
    • The game allows players to skip forward in pregnancy.
    • Specific cheat commands make managing pregnancy easier.
    • These cheats help speed up gameplay for busy players.
    • Using cheats is a fun way to control your Sims 4 experience.

    Sims 4 Pregnancy Cheats Explained

    The Sims 4 offers a lot of freedom for players to control their game. This includes managing Sim pregnancies. Sometimes, waiting for a Sim to go through all three trimesters can feel slow, especially if you want to see the baby or get back to other gameplay.

    This is where cheats come in handy. Cheats are special codes you can enter into the game to make things happen instantly or change game mechanics. For pregnancy, this means you can skip ahead or even get a Sim ready to give birth right away.

    It’s a quick way to move your story along without the waiting period. Many players use these cheats to manage their households more efficiently or just to experience different parts of the game faster. We will look at the specific commands that let you do this with ease.

    What Are Pregnancy Cheats

    Pregnancy cheats in The Sims 4 are essentially commands that you type into the game’s cheat console. These commands directly interact with the game’s systems to alter pregnancy progression. They can advance a Sim’s pregnancy to the next stage, or in some cases, even trigger labor immediately.

    These are not mods; they are built-in functions of the game that players can access by enabling the cheat console. Using them is straightforward once you know the steps. They provide a direct shortcut for players who want to fast-forward the biological clock of their Sims.

    This feature is perfect for players who have limited playtime or want to focus on specific story elements rather than the waiting period of pregnancy.

    The primary benefit of these cheats is time-saving. Instead of waiting multiple Sim days for a Sim to progress through pregnancy, a cheat can achieve the same result in seconds. This allows for a more dynamic and often faster-paced gameplay experience.

    For instance, if you have multiple Sims in your household, you might not want all of them to be pregnant at the same time. Cheats allow you to manage pregnancy timelines across your Sims, ensuring your household remains balanced and manageable.

    Enabling The Cheat Console

    Before you can use any cheats, including the sims 4 third trimester cheat, you need to enable the cheat console in the game. This is a simple process that requires a few key presses. Once enabled, a bar will appear where you can type in your commands.

    It’s like having a secret command center for your game. You can toggle this console on and off whenever you want, making it easy to use cheats when you need them and play normally otherwise.

    • Open the cheat console. This is done by pressing Ctrl + Shift + C simultaneously on your keyboard. For Mac users, this is Command + Shift + C.

      A white bar will appear at the top of your screen. This is where you type your cheat codes.

    • Type ‘testingcheats true’. After opening the console, type the phrase testingcheats true and press Enter. This command enables all cheats in the game.

      You should see a message confirming that cheats are enabled.

    • Type ‘pregnancy.force_offspring_count ‘. This is the specific cheat that allows you to influence pregnancy outcomes, though it’s more about controlling the number of babies. For pregnancy stage cheats, we use different commands.

    It’s important to enable cheats in a safe save file or a game you don’t mind experimenting with. While these specific cheats are generally safe, enabling all cheats can sometimes have unintended effects in very complex game situations. However, for managing pregnancy, the risk is minimal.

    Players often use this console for various game modifications, from altering Sim needs to changing relationships, all through simple text commands.

    Understanding Pregnancy Stages

    In The Sims 4, pregnancy is divided into three distinct stages, or trimesters. Each trimester has a duration of roughly 3 Sim days. The first trimester is when the pregnancy is first established, and the Sim may experience morning sickness.

    The second trimester is when the Sim’s belly starts to visibly grow, and they gain weight. The third trimester is the final stage, where the pregnancy is most prominent, and the Sim is very close to giving birth. Knowing these stages helps you understand what the cheats will do.

    The game simulates these stages with visual cues and moodlets. A Sim in the first trimester might complain about feeling queasy. In the second, they will become noticeably larger.

    By the third trimester, the Sim’s belly is at its largest, and they may experience more frequent discomforts or a strong urge to prepare for the baby. These stages are part of the natural simulation that makes the game feel realistic. Players who wish to fast-track this experience often seek out cheats to bypass the waiting period.

    Each stage has its own set of gameplay implications. For example, a pregnant Sim might have reduced mobility or need to eat more. Certain social interactions might also change.

    For players who enjoy the simulation aspect, these stages add depth. For those who prefer action and quicker progression, cheats are a valuable tool. The cheats we will discuss allow you to jump directly to or towards the end of the third trimester, or even trigger labor.

    Accessing The Sims 4 Third Trimester Cheat

    The main focus for players wanting to speed up the end of pregnancy is often the third trimester. This is the final push before the baby arrives. If you want to get there quickly, there are specific cheats for it.

    These cheats are designed to move your Sim to the next logical stage of pregnancy or to make the pregnancy conclude sooner. It’s all about giving you control over your game’s timeline. You do not need to wait for your Sim to naturally progress if you want them to be ready for childbirth sooner.

    The Sims 4 third trimester cheat is not a single command that instantly puts your Sim in labor, but rather commands that allow you to advance the pregnancy forward. This means you can choose to move your Sim to the beginning of the third trimester, or then to the end of it, bringing them closer to labor. This allows for a degree of control over when you want the birth to happen within the final stage of the pregnancy, making the cheat useful for various gameplay scenarios.

    Advancing To The Third Trimester

    To get your Sim into the third trimester, you’ll use a cheat that pushes their pregnancy forward. This is a common request for players who want to see the visual changes of the late stage pregnancy or are on a tight schedule in their game. The game’s cheat system is quite robust and allows for specific stage advancement.

    This is typically done by interacting with the Sim directly once cheats are enabled.

    After enabling cheats and ensuring your Sim is pregnant, you will need to shift-click on the pregnant Sim. This will bring up a pie menu with various options. Among these options, you will find ‘Debug Cheats Enabled’ or a similar category that leads to pregnancy-related cheats.

    The exact wording might vary slightly depending on game updates, but the function remains the same.

    • Make sure your pregnant Sim is active and selected.

    • Open the cheat console (Ctrl + Shift + C or Command + Shift + C).

    • Type testingcheats true and press Enter.

    • Close the cheat console.

    • Hold down the Shift key and click on your pregnant Sim. A menu will appear.

    • Look for an option like “Pregnancy” or “Cheats” within the menu, and then select “Force Trimester” or “Advance Pregnancy.” You will then be able to choose “Third Trimester.”

    This method allows you to directly place your Sim into the final stage of pregnancy. It bypasses the need to play through the first and second trimesters if your goal is to reach this specific point in the game. This is particularly useful for storytelling or when you want to quickly get to the part of the game where the baby is born.

    Initiating Labor

    Once your Sim is in the third trimester, you might want to trigger labor to have the baby. There are a couple of ways to approach this, either by waiting for the natural progression within the third trimester or by using a more direct cheat. The game provides options for both patient players and those who want immediate results.

    The goal here is to conclude the pregnancy and welcome the new Sim into the household.

    Some cheat menus that appear after enabling `testingcheats true` might offer a direct option to “Start Labor” or “Force Birth” for a pregnant Sim. This is often found under the same Debug Cheats or Pregnancy options that let you advance to a trimester. If you’re in the third trimester and want the baby now, this is the quickest way to make it happen.

    Here’s how to attempt to force labor:

    1. Ensure you have enabled testingcheats true.

    2. Shift-click on the pregnant Sim.

    3. Navigate through the debug menu options, typically under “Pregnancy.”

    4. Look for an option that says “Make Pregnant” or similar, and then select “Trigger Labor” or “Start Labor.” If this option isn’t directly available, you might need to use a different method or look for a cheat that specifically advances the pregnancy to its very end, which often triggers labor.

    If a direct “Trigger Labor” option isn’t visible, you can sometimes use a cheat that forces the pregnancy to completion. This would effectively be the same as triggering labor. Some players might need to experiment with different debug menus that appear, as game updates can sometimes change menu structures.

    The key is to look for options that directly manipulate the pregnancy state.

    Benefits of Using Pregnancy Cheats

    Using cheats in The Sims 4, especially for something like pregnancy, offers several advantages. It’s not just about making things faster; it’s about enhancing the player’s control and enjoyment of the game. For many, The Sims 4 is a sandbox for creating stories and managing virtual lives, and cheats are just another tool in that sandbox.

    They can help players overcome gameplay hurdles or simply get to the parts of the game they find most engaging.

    The primary benefit is time efficiency. Pregnancies in The Sims 4, while simulated realistically, can take a significant amount of time. If a player has a busy schedule or limited playtime, they might not want to spend days waiting for a Sim to give birth.

    Pregnancy cheats allow them to skip this waiting period and move on to other gameplay aspects, such as raising the child, managing their Sim’s career, or developing other household members. This makes the game more accessible for players with less free time.

    Faster Story Progression

    One of the biggest draws of The Sims 4 is creating and playing out stories with your Sims. Sometimes, a lengthy pregnancy can put a pause on the narrative you want to tell. If your story requires the baby to be born quickly, pregnancy cheats are invaluable.

    They let you move the plot forward without delay, enabling you to focus on the next chapter of your Sim’s life. This is especially useful for legacy challenges or specific role-playing scenarios where a rapid succession of events is desired.

    For example, imagine you are playing a Sim who needs to have a child to inherit a fortune or fulfill a specific aspiration. Waiting for the natural pregnancy cycle might set back your entire game plan. By using the sims 4 third trimester cheat to advance the pregnancy and trigger labor, you can ensure your Sim has their heir or fulfills their life goal in a timely manner.

    This kind of control allows for more dynamic and responsive storytelling.

    Managing Multiple Sims

    For players who manage large households or multiple families, keeping track of several pregnancies simultaneously can be overwhelming. Cheats offer a way to synchronize or space out pregnancies according to your preference. You might want to have one Sim give birth before another becomes pregnant, or you might need all your Sims to have children around the same time for a particular challenge.

    Pregnancy cheats give you this management power.

    • Synchronize Births: If you want multiple Sims in your household to give birth around the same time, you can use cheats to advance each Sim to their third trimester and then trigger labor for them sequentially or simultaneously. This can lead to a busy, but rewarding, period of gameplay.

    • Space Out Pregnancies: Conversely, if you prefer a more manageable pace, you can use cheats to ensure only one Sim is pregnant at a time, or that pregnancies are staggered. This prevents your household from being overwhelmed with newborns all at once.

    • Focus on Specific Sims: Cheats allow you to quickly progress one Sim’s pregnancy while you focus on other Sims in your household who are not pregnant. This means you can keep your other Sims active and engaged in their own pursuits without being held back by a lengthy pregnancy period.

    The ability to control the timing of pregnancies across your entire Sim neighborhood or household provides a significant gameplay advantage. It ensures that your game remains fluid and responsive to your desires, rather than dictated by the game’s default pacing. This level of control is a key reason why many players enjoy using cheats.

    Experimentation and Fun

    The Sims 4 is, at its heart, a game about experimentation and having fun. Pregnancy cheats add another layer of enjoyment by allowing players to play around with different scenarios. You can see what happens if a Sim has twins or triplets (which can also be influenced by cheats or game mechanics like moodlets), or how quickly you can manage a large family.

    The freedom to alter game mechanics without restriction can lead to some hilarious and memorable gameplay moments. It’s about making the game what you want it to be.

    For instance, a player might want to see the immediate impact of a baby on a Sim’s life without the build-up. Using the sims 4 third trimester cheat to trigger labor right after conception, though not directly possible in one step, can illustrate how quickly a Sim’s life changes. More realistically, advancing quickly to the third trimester and then birth lets players jump into the ‘baby-raising’ phase of the game much faster.

    This allows for more rapid exploration of all the different life stages available in The Sims 4.

    Sims 4 Third Trimester Cheat Scenarios

    To better illustrate how these cheats work and why they are useful, let’s look at a few common scenarios where players might use the sims 4 third trimester cheat. These examples show practical applications that go beyond just speeding up the game.

    1. The Urgent Heir: Your Sim is aging rapidly, and they need to have an heir to continue their legacy. They are currently in their elder stage and only have a few Sim days left. You’ve just found out they are pregnant, but they are only in the first trimester.

      To ensure the baby is born before your Sim passes away, you would use the cheats to advance them directly to the third trimester and then trigger labor. This secures the next generation for your legacy.

    2. The Busy Family Manager: You have a household with several young children, and your adult Sim becomes pregnant. You find yourself constantly managing toddlers and babies, and the idea of another one on the way is a bit overwhelming with the standard pregnancy timeline. By using the cheat to quickly advance your Sim to the third trimester, you can then trigger labor and have the baby arrive sooner, allowing you to manage the transition more smoothly by having a bit more control over the timing.

    3. Storytelling Twist: You are playing a dramatic storyline where a Sim unexpectedly becomes pregnant. To heighten the drama and surprise for your intended audience or for your own gameplay, you might choose to have the pregnancy progress extremely quickly. This involves using cheats to skip directly to the third trimester and then triggering labor almost immediately, making the pregnancy itself a brief, intense plot point rather than a drawn-out phase.

    These scenarios highlight how pregnancy cheats can be integrated into various gameplay styles. They are not just for players who dislike waiting, but also for those who want to craft specific narratives or manage complex Sim families more effectively. The flexibility offered by these cheats makes the game a more dynamic and personal experience.

    Common Myths Debunked

    Myth 1: Pregnancy cheats are difficult to use.

    This is a common misconception. While it requires enabling a cheat console and typing specific commands, the process is very straightforward. Once you know the key presses and the exact command, it becomes a quick and simple way to manage your Sim’s pregnancy.

    Many players find it easier than waiting for natural progression.

    Myth 2: Pregnancy cheats can break your game.

    While any cheat has the potential for unintended consequences in very rare circumstances, the standard pregnancy cheats in The Sims 4 are very safe. They are built-in game functions designed for player interaction. As long as you are using the correct commands and have enabled `testingcheats true` properly, your game should remain stable.

    It’s always good practice to save your game before using cheats, but these particular ones are generally reliable.

    Myth 3: You need mods to control pregnancy stages.

    This is absolutely false. The Sims 4 has a robust built-in cheat system that allows for direct manipulation of pregnancy stages, including advancing to the third trimester and triggering labor. You do not need to download any external mods or custom content to achieve these outcomes.

    All the necessary tools are already present within the base game, accessible through the cheat console.

    Myth 4: Cheats only speed up pregnancy to the very end.

    While the sims 4 third trimester cheat focuses on the final stage, the cheat system is more nuanced. By interacting with your Sim after enabling cheats, you can often choose to advance to the first, second, or third trimester specifically. This means you have control over where in the pregnancy cycle you want to jump to, not just the very end.

    This offers a good level of flexibility.

    Frequently Asked Questions

    Question: How do I open the cheat console in The Sims 4?

    Answer: You open the cheat console by pressing Ctrl + Shift + C on your keyboard if you are playing on a PC or Mac. For Mac users, it is Command + Shift + C.

    Question: What command do I use to enable all cheats?

    Answer: Once the cheat console is open, you need to type testingcheats true and press Enter. This will enable all cheats in the game.

    Question: Can I choose to go to the first or second trimester instead of the third?

    Answer: Yes, by shift-clicking on your pregnant Sim after enabling cheats, you can often find options to force the pregnancy into the first, second, or third trimester through a debug menu.

    Question: What happens if I use a cheat that’s not recognized?

    Answer: If you type a command that the game doesn’t recognize, it will usually display an error message stating that the cheat is not valid. Make sure you are typing the commands exactly as they are shown.

    Question: Will using pregnancy cheats affect my Sim’s relationship with their baby?

    Answer: No, using cheats to advance pregnancy or trigger labor does not negatively impact your Sim’s relationship with their baby or any other aspect of the game’s social mechanics. It only affects the timing of the pregnancy.

    Wrap Up

    Quickly getting your Sim to their third trimester is easy with built-in cheats. You can advance the pregnancy stage and even trigger labor. This gives you control to speed up gameplay or fit it into your storytelling.

    Experiment with these simple codes to manage your Sims’ pregnancies perfectly.

  • Month Three Of Pregnancy Guide

    Month Three Of Pregnancy Guide

    Many people find month three of pregnancy a bit tricky, especially if it’s their first time. It’s a time when things start to feel very real, but you might still have lots of questions. Don’t worry, it’s totally normal to feel a mix of excitement and a little bit overwhelmed.

    This guide will make things simple, showing you what to expect step by step. We’ll cover all the important changes happening during this exciting stage.

    Key Takeaways

    • You’ll learn about the key developments for your baby in month three.
    • Discover common physical changes you might experience.
    • Understand important health and wellness tips for this period.
    • Get a clear picture of what emotional shifts can occur.
    • Find out what practical steps to take during this trimester.

    Your Baby’s Growth Month Three

    The third month of pregnancy marks a significant transformation for your little one. By the end of this month, your baby is no longer an embryo but a fetus. This is a huge milestone.

    Their basic body structure is now complete, and they’ll spend the rest of the pregnancy growing and maturing. You’ll see remarkable changes week by week, as tiny features become more defined.

    Major Milestones in Fetal Development

    During month three, your baby’s fingers and toes become distinct, losing their webbed appearance. They also start to develop fingernails and toenails. The major organs continue to grow and develop.

    Kidneys begin to produce urine, and the liver starts making red blood cells. The brain is growing rapidly, with over 100 new brain cells forming every minute.

    The skeleton, which starts as soft cartilage, begins to harden into bone. This process is called ossification. Your baby’s ears are forming on the sides of their head, and their eyes are developing, though their eyelids are still fused shut.

    A tiny tail that was present in earlier weeks starts to disappear. By the end of month three, your baby will be about 3 to 4 inches long, roughly the size of a plum or a lime.

    How Organs Mature

    The development of internal organs is a focus in month three. The heart, which started as a simple tube, now has four chambers and beats with a steady rhythm. This heartbeat is strong enough to be heard with a Doppler device.

    The digestive system is forming, with intestines developing outside the body temporarily before moving inside the abdomen.

    Lungs continue to develop, forming bronchi, the air passages that will carry air to the lungs. While not yet functional for breathing air, they are laying the groundwork. The pancreas, essential for digestion and blood sugar regulation, also starts to form.

    These intricate developments highlight how complex and rapid fetal growth is during this period.

    Sensory and Movement Development

    Though you can’t feel it yet, your baby is becoming more active. They can flex their arms and legs, make fists, and even suck their thumb. These movements are reflexes at this stage.

    Their jaw is developing, and they might practice opening and closing their mouth.

    The development of sensory organs is also underway. While the eyes are still covered by fused eyelids, they are sensitive to light. The inner ear is developing, contributing to balance.

    Though not fully formed, the foundations for hearing are being laid. These early sensory developments prepare the baby for interacting with the world after birth.

    Statistics on Fetal Growth

    By the end of the first trimester, which includes month three, a fetus typically weighs around 1 ounce. Their length can be measured from crown to rump, averaging about 3 inches. This rapid growth is crucial for establishing all body systems.

    Fetal Development Summary

    • Baby is now a fetus, with all major body parts formed.
    • Fingers, toes, and nails begin to develop clearly.
    • Internal organs like the heart, kidneys, and liver mature significantly.
    • Bones start to harden from cartilage.
    • Baby can move their limbs and practice reflexes like thumb sucking.

    Your Body’s Changes Month Three

    Month three is often when the early, sometimes unsettling, pregnancy symptoms start to become more noticeable or change slightly. For many, the nausea that characterized the early weeks might begin to ease, or it could persist. Your body is undergoing significant hormonal shifts to support the growing baby.

    These changes affect you both physically and emotionally.

    Common Physical Symptoms

    Many women experience persistent nausea and vomiting, commonly known as morning sickness, during this period. While the name suggests it only happens in the morning, it can occur at any time of day or night. Some women find relief by eating small, frequent meals and avoiding strong smells.

    Fatigue is another significant symptom. Your body is working hard to grow a new life, which requires a lot of energy. Getting enough rest is vital.

    You might also notice changes in your breasts, such as increased sensitivity, tenderness, and darkening of the areolas. These are signs that your body is preparing for breastfeeding.

    Frequent urination is common as your uterus grows and puts pressure on your bladder. You might also experience constipation or heartburn. These are all normal digestive changes due to hormonal influences and the growing uterus.

    Weight Gain and Body Changes

    Weight gain during the first trimester is usually minimal, often around 2 to 4 pounds. However, this can vary greatly from person to person. Some may gain more, while others might even lose a little weight due to morning sickness.

    The focus at this stage is on nourishing the body and the developing baby, not on strict weight management.

    Your abdomen may start to show a little more, though for many, it’s still subtle. The uterus is growing rapidly, expanding from the size of a small pear to a grapefruit. This growth pushes your abdominal organs upwards and outwards.

    Your clothing might start to feel a bit snug around the waist.

    Hormonal Influences

    The surge in hormones like progesterone and estrogen plays a central role in all these changes. Progesterone helps maintain the uterine lining and prevents premature contractions. Estrogen supports the growth of the uterus and breasts.

    These hormones are essential for a healthy pregnancy but can also cause various side effects.

    These hormonal shifts can also lead to mood swings. You might feel more emotional, irritable, or sensitive than usual. It’s important to acknowledge these feelings and practice self-care.

    Talking to your partner, friends, or a healthcare provider can be very helpful.

    Health and Wellness Tips

    Maintaining a healthy diet is crucial. Focus on nutrient-dense foods like fruits, vegetables, lean proteins, and whole grains. Prenatal vitamins are essential to ensure you’re getting enough folic acid, iron, and calcium.

    Folic acid is particularly important for preventing neural tube defects in the baby.

    Staying hydrated is also key. Drink plenty of water throughout the day. Gentle exercise, like walking or prenatal yoga, can help manage energy levels, improve mood, and reduce some common pregnancy discomforts.

    Always consult your doctor before starting any new exercise program.

    Body Changes Summary

    • Nausea and fatigue are common symptoms that may start to change.
    • Breast changes like tenderness and darkening are normal.
    • Frequent urination and digestive issues like constipation can occur.
    • Weight gain is typically modest in the first trimester.
    • Hormonal shifts can cause mood swings and emotional sensitivity.

    Important Health Considerations

    The third month of pregnancy, like all stages, requires careful attention to your health and the well-being of your baby. Regular medical check-ups are fundamental for monitoring progress and addressing any concerns promptly. Your healthcare provider is your primary resource for accurate information and guidance throughout your pregnancy.

    Prenatal Appointments

    Typically, your first prenatal appointment will be around 8 to 10 weeks of pregnancy, which falls within month three. During this visit, your doctor will confirm the pregnancy, estimate your due date, and discuss your medical history. They will likely perform a physical examination, including checking your blood pressure and weight.

    Blood tests are common, checking for blood type, Rh factor, anemia, and immunity to certain infections like rubella and hepatitis B. Urine tests help monitor for urinary tract infections and protein levels, which can indicate preeclampsia. You might also have an ultrasound during this appointment or a subsequent one to confirm the viability of the pregnancy, check the baby’s development, and get a clearer estimate of the due date.

    Nutrition and Diet

    A balanced diet is paramount for both your health and your baby’s growth. It’s recommended to consume about 300 extra calories per day during the second and third trimesters, but in the first trimester, the focus is more on nutrient quality than quantity. Ensure you’re getting enough essential vitamins and minerals.

    Key nutrients include folic acid, which helps prevent neural tube defects; iron, to prevent anemia and support increased blood volume; calcium and vitamin D, for bone health; and protein, for tissue growth. Foods rich in these include leafy green vegetables, lean meats, dairy products, legumes, and whole grains. Avoid raw or undercooked meats, fish, and eggs, as well as unpasteurized dairy products, to prevent foodborne illnesses.

    Limit caffeine intake and avoid alcohol and smoking entirely.

    Managing Common Discomforts

    Many of the discomforts experienced in month three are manageable with simple lifestyle adjustments. For nausea, try eating small, bland meals often. Ginger in various forms, like ginger ale or ginger candies, can also help.

    Staying hydrated is crucial; sip water or other clear fluids throughout the day.

    For constipation, increase your fiber intake by eating more fruits, vegetables, and whole grains. Ensure you drink plenty of water, as this helps move food through your digestive system. If heartburn is an issue, avoid spicy, fatty, or acidic foods.

    Eating smaller meals and staying upright after eating can also provide relief. Always consult your doctor if discomforts are severe or persistent.

    Exercise Recommendations

    Moderate exercise during pregnancy offers numerous benefits, including improved energy levels, better sleep, reduced backaches, and improved mood. Activities like walking, swimming, and prenatal yoga are generally considered safe. It’s essential to listen to your body and avoid overexertion.

    Avoid exercises that involve a high risk of falling or abdominal trauma. If you were active before pregnancy, you can likely continue your routine with modifications, but it’s best to get clearance from your healthcare provider. They can advise on safe exercises and any activities to avoid.

    Medical Advice and When to Seek It

    While many pregnancy symptoms are normal, some require immediate medical attention. Signs that warrant a call to your doctor include severe abdominal pain, persistent vomiting that leads to dehydration, vaginal bleeding, or leakage of fluid. Fever, chills, or painful urination can also indicate an infection that needs treatment.

    If you experience any severe headaches, blurred vision, or sudden swelling in your hands or face, these could be signs of preeclampsia, a serious condition requiring prompt medical evaluation. Don’t hesitate to contact your healthcare provider if you have any concerns, no matter how small they may seem. Early communication can help prevent complications.

    Health Considerations Summary

    • Regular prenatal check-ups are vital for monitoring health.
    • A balanced diet rich in folic acid, iron, and calcium is essential.
    • Common discomforts like nausea and constipation can be managed.
    • Moderate exercise offers many benefits; choose safe activities.
    • Know the warning signs that require immediate medical attention.

    Emotional and Mental Well-being

    Pregnancy is not just a physical transformation; it’s a significant emotional and mental experience too. Month three can bring a rollercoaster of feelings as the reality of becoming a parent sinks in. It’s a time of adjustment, and prioritizing your mental health is just as important as your physical health.

    Mood Swings and Emotional Changes

    The dramatic hormonal shifts during pregnancy, particularly the rise in progesterone and estrogen, can significantly impact your mood. You might find yourself feeling more sensitive, easily upset, or experiencing bursts of energy followed by periods of exhaustion and irritability. These mood swings are a normal part of pregnancy for many women.

    It’s helpful to acknowledge these feelings without judgment. Understand that they are often a temporary response to the complex hormonal environment. Practicing self-compassion and allowing yourself to feel a range of emotions can make this period easier to navigate.

    Coping Strategies for Stress

    Stress can affect both you and your baby, so finding healthy ways to manage it is crucial. Techniques like deep breathing exercises, meditation, or mindfulness can help calm your nervous system. Gentle physical activity, such as walking or prenatal yoga, is also an excellent stress reliever.

    Spending time in nature, listening to calming music, or engaging in hobbies you enjoy can also reduce stress. Prioritizing sleep and ensuring you get adequate rest will improve your resilience and ability to cope with daily challenges.

    Building a Support System

    You don’t have to go through this alone. Building a strong support system is vital. Talk openly with your partner, family members, and close friends about your feelings and needs.

    Their understanding and support can make a significant difference.

    Consider joining a prenatal support group, either online or in person. Connecting with other expectant mothers who are experiencing similar changes can provide a sense of community and shared understanding. Hearing their experiences and sharing yours can be incredibly reassuring.

    When to Seek Professional Help

    While mood swings are normal, persistent feelings of sadness, hopelessness, or anxiety could indicate prenatal depression or anxiety. If these feelings interfere with your daily life, or if you have thoughts of harming yourself or your baby, it’s essential to seek professional help immediately.

    Talk to your doctor or midwife about how you’re feeling. They can provide resources, therapy options, or medication if necessary. Mental health is an integral part of overall well-being, and seeking help is a sign of strength.

    Many effective treatments are available for prenatal mental health conditions.

    Emotional Well-being Summary

    • Hormonal changes are a major cause of mood swings.
    • Self-compassion and acceptance of emotions are important.
    • Stress management techniques like deep breathing and exercise are helpful.
    • Building a strong support network with loved ones is beneficial.
    • Seek professional help if experiencing persistent sadness or anxiety.

    Preparing for the Next Stage

    As you reach the end of month three, you’ve completed the first trimester, a critical period of development. You’re likely starting to feel more comfortable with the idea of pregnancy and are looking ahead to what comes next. This is a good time to reflect on what you’ve learned and start thinking about the upcoming months.

    Understanding the Trimester Transition

    The end of month three signifies the close of the first trimester and the beginning of the second. Many women report that symptoms like nausea and extreme fatigue start to decrease as they enter the second trimester. This period is often referred to as the “golden period” of pregnancy because many women feel more energetic and less unwell.

    This transition is a milestone. It means the highest risk period for miscarriage has passed, and the baby’s major organs are formed. While you still need to be mindful of your health, there’s often a renewed sense of energy and well-being that allows you to enjoy the pregnancy more fully.

    What to Expect in the Second Trimester

    The second trimester, from month four to month six, typically brings a sense of relief from earlier symptoms. You might start to feel your baby’s movements, often described as flutters or bubbles. This is an exciting milestone known as quickening.

    Your baby will continue to grow rapidly, and your baby bump will become more noticeable.

    Energy levels usually increase, and appetite may return or even improve. This is a good time to focus on maintaining a healthy lifestyle, enjoying physical activity, and perhaps starting to prepare your home for the baby. You might also consider childbirth education classes, which often begin in the second trimester.

    Planning and Preparation

    As your pregnancy progresses, it’s wise to start planning. This can involve discussing birth plans with your healthcare provider, researching pediatricians, and thinking about childcare options. For some, it might also mean informing their employer about the upcoming leave.

    It’s also a good time to consider financial planning. This might involve reviewing your budget, understanding maternity leave benefits, and looking into insurance coverage for childbirth and pediatric care. Early planning can reduce stress later on.

    Lifestyle Adjustments

    Continue to prioritize a healthy diet and regular, gentle exercise. Listen to your body and rest when you need to. As your pregnancy progresses, you may need to adjust your sleeping positions to find comfort.

    Sleeping on your side, particularly the left side, is often recommended to improve circulation.

    It’s also important to stay informed. Read reputable books or websites about pregnancy and childbirth. Attending prenatal classes will equip you with knowledge and practical skills for labor, delivery, and newborn care.

    Future Milestones

    Looking ahead, you’ll experience many more milestones. Feeling your baby’s kicks, seeing them on ultrasound scans, and preparing the nursery are all special moments. Each stage of pregnancy brings its unique joys and challenges.

    Knowing what to expect can help you embrace each phase with confidence.

    Next Steps Summary

    • Month three marks the end of the first trimester.
    • The second trimester often brings increased energy and reduced symptoms.
    • You may start to feel your baby’s movements soon.
    • Begin planning for the birth and life with a newborn.
    • Continue healthy lifestyle habits and stay informed about pregnancy.

    Common Myths Debunked

    Myth 1: You will look noticeably pregnant by month three.

    This is not always true. While your uterus is growing, the changes might be subtle in month three. Some people show more than others depending on their body type, whether it’s their first pregnancy, and other factors.

    Many women’s clothes will still fit, though some might feel a bit tighter. It’s more common for a more visible baby bump to appear in the second trimester.

    Myth 2: Morning sickness only happens in the morning.

    The term “morning sickness” is misleading. Nausea and vomiting associated with pregnancy can occur at any time of the day or night. Some women experience it only in the morning, while others have it all day long.

    Triggers can include certain smells, specific foods, or an empty stomach.

    Myth 3: You need to eat twice as much during pregnancy.

    You do not need to double your food intake. During the first trimester, the calorie needs increase by only about 150-300 calories per day, which is like having an extra snack. The focus should be on nutrient-dense foods to ensure you and the baby get the necessary vitamins and minerals, not just on increasing the quantity of food.

    Myth 4: All pregnancy symptoms disappear once morning sickness stops.

    While morning sickness often subsides in the second trimester, other pregnancy symptoms can continue or new ones might emerge. Fatigue, hormonal changes, and physical discomforts can persist throughout the pregnancy. Each woman’s experience is unique, and symptoms vary.

    Myth 5: You can’t exercise safely during pregnancy.

    This is false. Moderate exercise is generally safe and highly recommended during pregnancy for most women, provided there are no medical complications. Activities like walking, swimming, and prenatal yoga can offer significant benefits.

    It’s crucial to consult with a healthcare provider before starting or continuing any exercise routine to ensure it’s safe for your specific situation.

    Frequently Asked Questions

    Question: When can I expect to feel my baby move?

    Answer: You might start to feel your baby’s first movements, often described as flutters, between 16 and 25 weeks of pregnancy. For first-time mothers, this may happen closer to 25 weeks. It often depends on the baby’s position and the mother’s body.

    Question: Is it safe to travel during month three?

    Answer: For most healthy pregnancies, traveling during the second trimester, which begins after month three, is generally considered the safest time. However, travel during month three might be safe if you are feeling well and have no complications. Always discuss your travel plans with your doctor beforehand.

    Question: What should I do if I have a headache?

    Answer: Mild headaches are common during pregnancy. Try resting in a quiet, dark room or using a cool compress. Staying hydrated and ensuring you are getting enough sleep can also help.

    If headaches are severe or persistent, consult your healthcare provider, as they can sometimes be a sign of a more serious condition.

    Question: Can I still have sex during pregnancy?

    Answer: Yes, for most uncomplicated pregnancies, sex is safe throughout all trimesters. The baby is well-protected by the amniotic sac and the uterus. If you have any concerns or specific medical advice from your doctor, it’s best to follow their guidance.

    Question: What if I’m not showing much by month three?

    Answer: Not showing much by month three is perfectly normal, especially for first-time mothers. Every body is different, and how and when you start to show varies. The baby is still small, and the uterus is growing internally.

    Focus on your health and well-being, not just the outward signs of pregnancy.

    Conclusion

    Month three of pregnancy is a time of incredible development for your baby and significant changes for your body. You’ve learned about the foundational growth of your little one and the common symptoms you might experience. Remember to prioritize your health with good nutrition and rest.

    Your emotional well-being is also key, so build your support system and address any concerns promptly. You are moving into a new phase, and staying informed will empower you through this amazing experience.

  • Third Trimester 3d Ultrasound Explained Simply

    Third Trimester 3d Ultrasound Explained Simply

    Seeing your baby in the third trimester with a 3D ultrasound is so exciting. It can feel a bit tricky for new parents, especially with all the new things to learn during pregnancy. But don’t worry!

    We’ll make understanding your third trimester 3d ultrasound easy, step-by-step. Get ready to see your little one in amazing detail.

    Key Takeaways

    • You will learn why a third trimester 3d ultrasound is often done.
    • We will explain what you can see during the scan.
    • Discover the best timing for your 3d ultrasound appointment.
    • Find out what to do to get the best images.
    • Understand the benefits of this special kind of ultrasound.
    • Learn about any safety considerations for the scan.

    Why Choose a Third Trimester 3d Ultrasound

    Many parents look forward to a third trimester 3d ultrasound because it offers a unique chance to see their baby’s face and features before they are born. This type of imaging goes beyond the standard 2D ultrasound, which shows flat, black-and-white slices. 3D ultrasounds create detailed, lifelike images by combining multiple 2D images.

    This makes it feel much more personal and helps parents bond with their unborn child. It’s a wonderful way to capture memories that will last a lifetime.

    The third trimester is typically the best time for these scans because the baby has put on enough weight and developed more distinct features, like a nose, lips, and eyes. Before this stage, the baby might be too thin, making the images less clear. Later in the third trimester, the baby might also be too big and crowded in the womb, which can also affect image quality.

    So, finding that sweet spot in the third trimester is key for the best results.

    When Is The Best Time For Your Scan

    Timing is super important for getting clear, beautiful images during your 3D ultrasound. Most experts suggest scheduling your scan between 26 and 32 weeks of pregnancy. This is because your baby is likely to have a good amount of baby fat by this point, which helps to define their facial features.

    Before 26 weeks, your baby might still be a bit too lean, and their features may not be as well-formed. After 32 weeks, the baby starts to get pretty snug in the uterus, and their features can become a little less distinct due to the lack of space. You might also see more bone than soft tissue, making the images look different.

    However, every pregnancy is different. Some people might get great images a little earlier or a little later. It really depends on the baby’s position and how much amniotic fluid is around them.

    If your provider offers 3D ultrasounds, they can help you decide on the perfect window for your scan based on how your pregnancy is progressing. It’s always a good idea to talk to your doctor or the ultrasound technician about the ideal timing for you.

    • The ideal window for a 3D ultrasound is typically between 26 and 32 weeks of pregnancy.
    • This timeframe allows the baby to develop sufficient facial fat for clearer imaging.
    • Scheduling too early may result in less defined features.
    • Scheduling too late can lead to reduced space for the baby, affecting image clarity.
    • Individual pregnancy factors can influence the best timing for optimal results.

    What To Expect During The Scan

    During your third trimester 3d ultrasound, you’ll lie down comfortably while a technician applies a warm gel to your belly. This gel helps the ultrasound waves travel better. A special probe is then moved gently over your skin.

    The ultrasound machine sends sound waves into your body, and they bounce back to create an image. For a 3D scan, the machine takes many 2D pictures from different angles and puts them together to build a detailed 3D image on a screen. You might see your baby’s profile, their hands, feet, and even their cute little face!

    The technician will work to get the best possible views. Sometimes the baby cooperates perfectly, turning to show their face. Other times, they might be shy and have their hands or the placenta in front of their face.

    The technician may ask you to shift positions, take a short break, or drink some water to encourage the baby to move. It’s a relaxing experience, and many parents find it incredibly emotional to see their baby so clearly before birth. You’ll usually get to take home pictures or even a video of the scan.

    Preparing For Your Ultrasound Appointment

    To get the clearest possible images during your third trimester 3d ultrasound, a few simple preparation steps can make a big difference. Staying well-hydrated is one of the most important things you can do. Drink plenty of water in the hours leading up to your appointment.

    This increases the amount of amniotic fluid surrounding your baby, which acts like a clearer medium for the ultrasound waves to travel through, resulting in better picture quality. A full bladder can also help to push your uterus up and provide a better angle for the technician.

    Try to eat a light meal or snack about an hour before your appointment. This can sometimes help wake up your baby, encouraging them to move around. Movement can lead to better pictures.

    Avoid wearing anything that is too restrictive, and wear comfortable clothing that allows easy access to your belly. If you have any specific requests or concerns, such as wanting to know the baby’s gender if it hasn’t been revealed yet, mention them to the technician before they start. They will do their best to accommodate you.

    • Stay well-hydrated by drinking plenty of water beforehand.
    • A full bladder can improve the clarity and angle of the images.
    • Consider a light snack to encourage baby’s movement.
    • Wear comfortable, loose-fitting clothing for easy access to your abdomen.
    • Communicate any specific requests or concerns to the technician in advance.

    Understanding The Technology Behind 3D Ultrasounds

    3D ultrasounds use a technology called volumetric imaging. Instead of capturing just one flat image at a time like traditional 2D ultrasounds, 3D ultrasound machines capture a series of 2D images from different angles very quickly. These images are then processed by powerful software that reconstructs them into a three-dimensional picture.

    Think of it like taking many slices of a loaf of bread and then being able to put them back together to see the whole loaf in its shape. The sound waves are used to build up a more complete picture of the baby’s surface and internal structures.

    This advanced imaging allows for much more detailed visualization of your baby’s external features. You can see the shape of their nose, the curve of their lips, and the outline of their fingers and toes in a way that is not possible with 2D imaging. The software works by analyzing the intensity and timing of the returning echoes from the sound waves.

    Different tissues reflect sound waves differently, and the software interprets these differences to create a textured, almost photographic, representation of the baby. This is why the images can look so realistic and are such a popular keepsake for expectant parents.

    What You Can See In A 3D Image

    With a successful third trimester 3d ultrasound, you can expect to see remarkably lifelike images of your baby. The most striking feature is often the baby’s face. You can clearly make out the shape of their nose, the fullness of their lips, and even the contours of their cheeks.

    It’s common to see them yawning, sucking their thumb, or even making funny little expressions. The detail can be so fine that you might recognize certain features that remind you of yourself or your partner.

    Beyond the face, 3D ultrasounds can show you your baby’s hands and feet with impressive clarity. You might see them wiggling their fingers or kicking their legs. It’s also possible to get views of their body, allowing you to see their general shape and size.

    While the primary focus is often on capturing a beautiful facial image, the technology can provide a comprehensive, albeit surface-level, view of your baby’s developing form. These images are treasured mementos, offering a tangible connection to your baby before their arrival.

    The Benefits Of This Special Scan

    One of the biggest benefits of a third trimester 3d ultrasound is the emotional connection it fosters. Seeing your baby’s face in such detail can make them feel more real and present, increasing anticipation and excitement for their arrival. It’s a powerful bonding experience for parents and can be shared with family members, creating lasting memories.

    Many families even use these images for gender reveals or to announce their pregnancy to loved ones.

    Beyond the emotional aspect, these ultrasounds can also provide valuable medical information, although they are primarily used for keepsake purposes. They can help healthcare providers assess fetal growth and development by providing more detailed measurements and visualizations than standard 2D scans. In some cases, they can help detect certain physical abnormalities, though they are not typically used as a primary diagnostic tool for this.

    The enhanced visualization allows for a more thorough visual inspection of the baby’s external features.

    Comparing 2D 3D and 4D Ultrasounds

    Understanding the differences between 2D, 3D, and 4D ultrasounds can help you choose the best imaging experience for you. 2D ultrasounds are the standard type of ultrasound you might have had throughout your pregnancy. They show flat, black-and-white images, like slices through your baby.

    They are excellent for medical assessments and seeing the baby’s internal structures and movements.

    3D ultrasounds take those 2D images and build them into a lifelike, three-dimensional picture. This allows you to see the surface features of your baby, like their face and limbs, in great detail. It’s like looking at a photograph of your baby.

    4D ultrasounds are essentially 3D ultrasounds in motion. They add the dimension of time, allowing you to see your baby moving in real-time. You can see them stretch, yawn, or even kick their legs.

    It’s like watching a short video of your baby inside the womb. Each type of ultrasound serves a different purpose, from medical diagnosis to capturing precious memories.

    Ultrasound Type Description Primary Use Visuals
    2D Ultrasound Standard flat, black-and-white images showing slices. Medical diagnosis, monitoring fetal growth and health. Like a blueprint or cross-section.
    3D Ultrasound Reconstructed from multiple 2D images to create a detailed, static 3D view. Viewing surface features, keepsake images, bonding. Like a photograph of the baby.
    4D Ultrasound 3D images in motion, showing real-time movements. Viewing baby’s actions, enhanced bonding, keepsake videos. Like a video of the baby.

    Common Myths Debunked

    Myth 1: 3D Ultrasounds Are Harmful To The Baby

    This is a common concern, but it’s not true. Ultrasound technology, including 3D and 4D ultrasounds, has been used for decades and is considered safe when performed by trained professionals. The sound waves used are very low energy and do not produce harmful radiation.

    Regulatory bodies like the FDA provide guidelines for the safe use of ultrasound equipment. The benefits of the bonding experience and visual information gained often outweigh any theoretical risks, which are generally considered negligible for diagnostic and keepsake ultrasounds.

    Myth 2: You Can See Everything Clearly No Matter When You Get The Scan

    While 3D ultrasounds are amazing, image clarity is heavily dependent on several factors. As mentioned, the timing during pregnancy is crucial; too early or too late can make features less distinct. The amount of amniotic fluid also plays a big role; more fluid means better image quality.

    The baby’s position is another major factor; if the baby is facing away from the probe or has their hands or the placenta in front of their face, it can obscure the view. So, while the technology is advanced, the actual outcome can vary.

    Myth 3: 3D Ultrasounds Are Only For Keepsake Photos

    While many parents opt for 3D ultrasounds primarily for keepsake photos and videos, they can also provide valuable medical insights. The detailed imaging can sometimes help healthcare providers identify certain fetal anomalies or assess fetal well-being more thoroughly. Although not typically the first-line diagnostic tool, the enhanced visualization offered by 3D technology can complement standard 2D ultrasounds and contribute to a more complete picture of the baby’s development and health.

    It offers a different perspective that can sometimes highlight subtle details.

    Myth 4: You Can Get Perfect Pictures Every Time

    The reality is that getting a perfect, clear picture every time is not guaranteed. Several factors influence the outcome of a 3D ultrasound. The baby’s position inside the womb is a major determinant; sometimes the baby is simply not in a cooperative pose.

    The amount of amniotic fluid, maternal tissue thickness, and even the baby’s gestational age all play a role. While technicians are skilled at maneuvering the probe and encouraging the baby to move, sometimes the best images are simply the result of good luck and a cooperative baby on the day of the scan.

    Frequently Asked Questions

    Question: How much does a third trimester 3d ultrasound usually cost

    Answer: The cost of a third trimester 3d ultrasound can vary greatly depending on your location, the clinic, and what packages they offer. Some packages might include just pictures, while others offer video clips, CDs, or USB drives of the images. Prices can range from around $100 to $300 or more.

    It’s best to call local ultrasound studios to compare prices and services.

    Question: Can my partner and other family members come to the scan

    Answer: Most clinics that offer 3D ultrasounds encourage family members to attend. They often have viewing rooms that can accommodate several people. It’s a wonderful way to share this special experience with your loved ones.

    It’s always a good idea to confirm their guest policy when you book your appointment.

    Question: Are 3D ultrasounds covered by insurance

    Answer: Typically, 3D ultrasounds done purely for keepsake or bonding purposes are not covered by insurance. Insurance usually covers ultrasounds that are medically necessary for monitoring your pregnancy and your baby’s health. If your doctor orders a 3D ultrasound for a specific medical reason, it might be covered, but you should always check with your insurance provider and the ultrasound clinic.

    Question: What is the difference between a 3D and a 4D ultrasound

    Answer: A 3D ultrasound provides a static, lifelike image of your baby, much like a photograph. A 4D ultrasound takes the 3D images and adds the element of time, showing your baby moving in real-time, like a video. So, 4D is 3D in motion.

    Question: Will I be able to see my baby’s gender with a 3D ultrasound

    Answer: Yes, if the baby is in the right position and the technician can get a clear view of the baby’s anatomy, you will likely be able to determine the baby’s gender during a 3D ultrasound, especially in the third trimester. Many parents choose this type of scan for gender reveals.

    Conclusion

    A third trimester 3d ultrasound offers a magical glimpse of your baby before they arrive. By timing your scan well, staying hydrated, and preparing a bit, you can help ensure clear, beautiful images. These scans provide more than just pictures; they offer a unique bonding experience for your growing family.

    Enjoy this special moment as you prepare to meet your little one.

  • Understanding The C Line On Pregnancy Test

    Understanding The C Line On Pregnancy Test

    Seeing a “C” line on a pregnancy test can sometimes feel confusing, especially if it’s your first time. Many people wonder what it means and if it means they are pregnant. This line is a normal part of how most tests work, and it’s usually a good sign that the test is working correctly.

    We’ll break down exactly what the C line means and what you need to look for next. It’s simpler than you might think!

    Key Takeaways

    • The “C” line indicates the control window on a pregnancy test.
    • A visible “C” line means the test has been performed correctly.
    • The “T” line is the test window, which shows a positive pregnancy result.
    • Both “C” and “T” lines appearing means a positive result.
    • Only the “C” line appearing means a negative result.
    • If no “C” line appears, the test is invalid and needs to be repeated.

    What Is A Pregnancy Test Control Line

    Pregnancy tests work by detecting a hormone called human chorionic gonadotropin (hCG) in your urine. This hormone is produced shortly after a fertilized egg attaches to the uterine lining. The test has a few parts, including a control window and a test window.

    The control window is where you’ll see the “C” line, and the test window is where you’ll see the “T” line. The control line is super important because it shows that the test is working correctly.

    Think of the control line like a little check mark from the test itself. It proves that the liquid you applied flowed through the test strip properly and that the test’s internal mechanisms are functioning as they should. Without this control line, you wouldn’t be able to trust the result shown in the test window.

    It’s a built-in reassurance that you’re getting a reliable reading.

    The presence of the c line on pregnancy test is a fundamental part of the testing process. It’s designed to be visible with every valid test, regardless of whether you are pregnant or not. This uniformity is key to interpreting the results accurately.

    Many manufacturers aim to make this line appear relatively quickly after you’ve performed the test, giving you an early indication of its functionality.

    How The Control Line Works

    The control line uses a special chemical reaction. When urine passes over the test strip, it encounters a set of antibodies. Some of these antibodies are designed to bind to the liquid that is moving through the strip, triggering the color change that forms the “C” line.

    This happens no matter what. It’s a consistent process that relies on the physical movement of the urine and the chemical properties of the test strip’s components.

    This process ensures that the test has received enough urine to function and that the internal elements are reacting. If the urine doesn’t reach the control line area, or if the antibodies in that area are faulty, the “C” line will not appear. This is why seeing the “C” line is the very first thing you should check after taking a pregnancy test.

    The color of the control line can sometimes vary between brands, but its presence is what matters most. Some tests have a pink control line, others blue. What’s important is that a distinct line forms in the designated “C” area within the specified time frame.

    This indicates that the test has successfully absorbed the urine and is ready to show a pregnancy result if hCG is present.

    Why The C Line Is Important For Accuracy

    The control line is your guarantee that the test is valid. If you see the “C” line, it means the test has worked properly, and you can trust the result shown in the “T” window. If the “C” line does not appear, it means the test is faulty.

    You cannot rely on any line that shows up in the test window if the control line is missing. This is a critical point for anyone trying to get an accurate pregnancy result.

    Imagine you’re baking a cake, and the oven light doesn’t turn on. You can’t be sure if the oven is heating up properly, so you wouldn’t trust the cake to be cooked. The control line is like that oven light for your pregnancy test.

    It tells you the “oven” (the test) is working correctly.

    When you take a pregnancy test, always wait for the recommended amount of time before reading the results. This time allows the urine to travel through the test strip and react with the chemicals. Reading it too early or too late can lead to misinterpretation, especially concerning the appearance of any lines, including the control line.

    Interpreting Pregnancy Test Results

    Understanding what the lines mean is key to getting the right answer. The result is a combination of what you see in the control window (C) and the test window (T). Most home pregnancy tests have clear instructions, but sometimes the lines can be faint or appear in unexpected ways.

    Let’s break down the common scenarios so you know exactly what to look for.

    The primary goal of the test is to detect hCG. The control line simply confirms the test is ready to do its job. The test line is where the magic happens for pregnancy detection.

    Its appearance, or lack thereof, directly relates to the presence of hCG in your urine.

    It’s always a good idea to read the instructions that come with your specific pregnancy test brand. While most work on similar principles, there can be slight variations in how results are displayed or read. Familiarizing yourself with the instructions beforehand can save you confusion later.

    Positive Pregnancy Result

    A positive pregnancy result is indicated by the presence of two lines: one in the “C” window and one in the “T” window. This means the test has detected hCG in your urine. Even if the line in the “T” window is faint, it is generally considered a positive result.

    Seeing two lines means your body is producing hCG, which is a strong sign of pregnancy. The intensity of the “T” line can sometimes indicate how far along you are in your pregnancy, with darker lines typically appearing later. However, even a very light “T” line warrants further confirmation.

    It’s important to remember that even a faint line is significant. It signals the presence of the pregnancy hormone. Some women experience very early pregnancies where the hCG levels are still low, leading to a faint “T” line.

    It’s always best to follow up with a healthcare provider to confirm a positive result.

    Negative Pregnancy Result

    A negative pregnancy result is shown by only one line appearing, and that line is in the “C” window. This means that no hCG was detected in your urine at the time of the test. It indicates that you are likely not pregnant, or that your hCG levels are too low to be detected by the test.

    If you get a negative result, but you still suspect you might be pregnant, it’s recommended to wait a few days and test again. Sometimes, hCG levels may not be high enough to be detected by the test yet. Repeating the test after a few more days, or at a time when your urine is more concentrated (like first thing in the morning), can provide a more accurate result.

    A negative result with a visible “C” line confirms the test worked correctly and that pregnancy hormones were not found. If you have missed your period and continue to get negative results, it may be worth discussing with your doctor to explore other potential reasons for the delay.

    Invalid Test Result

    An invalid test result occurs when the “C” line does not appear at all, even if a “T” line is present. In this situation, the test is not reliable, and you cannot interpret the result. This usually means there was an error in the testing process or the test itself is defective.

    If your test is invalid, you should discard it and take a new one. Make sure to follow the instructions carefully this time. Incorrectly performing the test, such as not using enough urine or using urine that is too diluted, can sometimes lead to an invalid result.

    An invalid test can be frustrating, but it’s better to know it’s not working than to trust a potentially false result. Double-checking the expiration date on the test kit is also a good practice, as expired tests can lead to inaccurate readings.

    Understanding hCG And Pregnancy Tests

    The core of any pregnancy test’s ability to work lies in its detection of human chorionic gonadotropin (hCG). This hormone is a vital indicator of pregnancy and is produced by the cells that will develop into the placenta. Once a fertilized egg implants in the uterus, hCG production begins.

    The amount of hCG in a woman’s body increases rapidly in the early stages of pregnancy. It typically doubles every 48 to 72 hours. This rising level is what pregnancy tests are designed to measure.

    Home pregnancy tests are sensitive enough to detect hCG in urine once it reaches a certain threshold.

    The development of home pregnancy tests has made early detection more accessible. They offer a convenient way for individuals to find out if they are pregnant without needing to visit a doctor immediately. The accuracy of these tests has improved significantly over the years, making them a reliable tool for many.

    What is hCG

    Human chorionic gonadotropin (hCG) is a hormone that your body starts producing soon after a fertilized egg attaches to the wall of your uterus. This is typically about six to ten days after conception. hCG is often called the “pregnancy hormone” because its levels are very high during pregnancy and it is not usually found in the body of a non-pregnant woman.

    The primary role of hCG in early pregnancy is to maintain the corpus luteum, a temporary gland that produces progesterone. Progesterone is essential for sustaining the uterine lining and supporting the pregnancy. Without hCG, the corpus luteum would break down, leading to a loss of pregnancy.

    The concentration of hCG in the blood and urine of a pregnant woman increases dramatically in the first trimester. This makes it a perfect marker for pregnancy tests. Different pregnancy tests have different sensitivities, meaning they can detect different minimum levels of hCG.

    Tests with higher sensitivity can detect pregnancy earlier.

    How Tests Detect hCG

    Pregnancy tests use a process called immunoassay. They contain antibodies that are specifically designed to bind to hCG molecules. When you urinate on the test strip, the urine travels through it.

    If hCG is present in the urine, it will bind to these antibodies.

    This binding action then triggers a chemical reaction that causes a colored line to appear. The “C” line, or control line, appears because it is designed to react with the flow of liquid itself, showing that the test is working. The “T” line, or test line, only appears if there are hCG molecules present in the urine that bind to the specific antibodies in that section of the test.

    The intensity of the colored lines can depend on the concentration of hCG. Higher levels of hCG will typically result in darker, more visible lines. This is why, in some cases, a faint “T” line can appear in very early pregnancy, and the line gets darker as the pregnancy progresses and hCG levels rise.

    When To Test For Best Results

    For the most accurate results, it’s best to take a pregnancy test after you have missed your period. Testing too early might result in a false negative because the hCG levels might not be high enough for the test to detect. Waiting until at least the first day of your missed period significantly increases the chances of getting an accurate positive result if you are pregnant.

    Another tip for accuracy is to use your first-morning urine. This urine is typically more concentrated, meaning it has a higher level of hCG if you are pregnant. Testing at other times of the day might yield less reliable results if you have been drinking a lot of fluids, which can dilute your urine.

    If you are tracking your ovulation or have a regular cycle, you can generally expect to get accurate results about 14 days after you ovulate. However, if your cycles are irregular, or if you are unsure about your ovulation dates, waiting until you miss your period is the most straightforward approach.

    Factors Affecting Pregnancy Test Accuracy

    While home pregnancy tests are quite accurate, several factors can influence their reliability. Understanding these factors can help you avoid common mistakes and ensure you get the most dependable result possible. It’s not just about following the steps; it’s about understanding the nuances that can make a difference.

    Even with the best intentions, errors can happen during the testing process. These can range from how the test is handled to when it is read. Being aware of these potential pitfalls can save you from unnecessary worry or confusion about your results.

    The technology behind these tests is advanced, but human error and biological variations can still play a role. Let’s explore some of the most common issues that can lead to inaccurate pregnancy test results.

    Diluted Urine

    As mentioned before, drinking a lot of fluids right before taking a pregnancy test can dilute your urine. This means that the concentration of hCG, if present, might be too low to be detected by the test. This is why using first-morning urine is often recommended, as it is less likely to be diluted.

    If you need to test at a time other than first thing in the morning, try to limit your fluid intake for a couple of hours beforehand. This helps ensure that your urine is concentrated enough to provide an accurate reading. A diluted sample can lead to a false negative result, making you think you are not pregnant when you actually are.

    It’s a delicate balance; you need enough urine for the test to work, but not so much fluid that it washes away the detectable levels of hCG. This is a common reason why some women get negative results on one day and positive results a few days later.

    Expired Tests

    Pregnancy test kits have an expiration date, just like any other medical or diagnostic product. The chemicals and antibodies within the test strip can degrade over time, making them less effective or completely non-functional. Using an expired test can lead to inaccurate results, either a false positive or a false negative.

    Always check the expiration date printed on the test packaging before using it. If the test is expired, it’s best to purchase a new one to ensure accuracy. Expired tests might not show a control line, or they might show incorrect results in the test window.

    Storing pregnancy tests properly is also important. Keep them in a cool, dry place away from direct sunlight and humidity. Extreme temperatures can also affect the integrity of the test components, even before the expiration date.

    Reading The Test Too Early Or Too Late

    Each pregnancy test has a specific timeframe for reading the results, usually indicated in the instructions. Reading the test before this time means the urine may not have fully flowed through the strip, and the chemical reactions might not have completed. This can lead to faint or no lines appearing.

    On the other hand, reading the test too late can also cause problems. Some tests might show “evaporation lines” after a certain period. These are faint, colorless lines that can appear as the urine dries on the test strip.

    They can be mistaken for a positive result, leading to a false positive.

    It’s crucial to stick to the recommended reading window. If you are unsure, it’s better to retest than to misinterpret a result. The instructions are there for a reason, and following them precisely is key to accuracy.

    Rare Medical Conditions

    In very rare cases, certain medical conditions or medications can affect the accuracy of a pregnancy test. For example, some fertility treatments involve hCG injections, which can lead to a false positive result if the test is taken too soon after the treatment. Certain rare tumors can also produce hCG.

    Some medical conditions that affect hormone levels might also cause unusual test results. If you have a medical condition or are taking medication that you suspect might affect a pregnancy test, it’s wise to discuss it with your doctor. They can advise you on the best course of action.

    It’s also important to note that some women have a very low baseline level of hCG even when not pregnant. This is extremely rare, but it could theoretically cause a false positive on highly sensitive tests. However, for most people, these rare conditions are not a concern.

    Common Myths Debunked

    Myth 1 The C line is the test line.

    The “C” line on a pregnancy test is actually the control line. It indicates that the test is working correctly. The “T” line is the test line, which shows whether hCG has been detected, suggesting pregnancy.

    Both lines need to be correctly interpreted to get the right result.

    Myth 2 A faint T line means the pregnancy is not viable.

    A faint “T” line usually means that hCG levels are present but might still be low, which is common in very early pregnancy. It does not necessarily mean the pregnancy is not viable. It’s a positive sign, and the line often gets darker as pregnancy progresses and hCG levels rise.

    Follow up with a doctor for confirmation.

    Myth 3 If I get a negative result, I’m definitely not pregnant.

    A negative result means that hCG was not detected at a detectable level at the time of testing. However, if you test too early, or if your urine is too diluted, you might get a false negative. If your period is still missed, it’s advisable to retest in a few days or consult a healthcare provider.

    Myth 4 You can tell if you’re pregnant just by looking at the test stick without reading the instructions.

    While many tests look similar, the specific way results are displayed can vary slightly between brands. Relying on general knowledge without reading the instructions can lead to misinterpretation. Always read the instructions for the specific test you are using to ensure accurate reading of the “C” line and the “T” line.

    Frequently Asked Questions

    Question: What does it mean if I see a C line and a T line on a pregnancy test?

    Answer: If you see both a “C” line (control line) and a “T” line (test line), it means the test has detected hCG in your urine, and the result is positive. You are likely pregnant.

    Question: What if only the C line appears on the pregnancy test?

    Answer: If only the “C” line appears, it means the test worked correctly, but no hCG was detected. This is a negative result, indicating you are likely not pregnant.

    Question: What should I do if no C line appears on my pregnancy test?

    Answer: If no “C” line appears, the test is invalid. This means the test did not function correctly, and you cannot rely on the result. You should discard the test and take a new one, following the instructions carefully.

    Question: Can I use an expired pregnancy test?

    Answer: It is not recommended to use an expired pregnancy test. The chemicals and antibodies in the test can degrade over time, leading to inaccurate results, including false positives or false negatives.

    Question: How soon after unprotected sex can I get an accurate result?

    Answer: For the most accurate results, it’s best to wait until after you’ve missed your period, usually at least 14 days after unprotected sex. Testing too early can lead to a false negative.

    Final Thoughts

    Understanding the meaning of the c line on pregnancy test is straightforward. It confirms the test is functional. A positive result requires both a C and T line.

    A negative result shows only the C line. If the C line doesn’t show, the test is invalid. Always follow instructions for the most reliable results.

  • Understanding Second Trimester Hot Flashes

    Understanding Second Trimester Hot Flashes

    Lots of moms-to-be feel a bit surprised when they start getting hot flashes during their second trimester. It’s not always something people talk about much, and that can make it feel a little strange or even worrying. You might be wondering why your body is doing this now, in the middle of your pregnancy.

    It’s totally normal, and we’ll walk through simple steps to help you feel more comfortable. Get ready to learn how to manage these unexpected waves of heat.

    Key Takeaways

    • Second trimester hot flashes are common due to hormonal changes.
    • Simple lifestyle adjustments can help manage the intensity of hot flashes.
    • Identifying triggers is key to preventing or reducing occurrences.
    • Staying hydrated and dressing in layers are effective strategies.
    • Seeking professional advice can offer personalized support.
    • Focusing on relaxation techniques can improve overall well-being.

    What Causes Second Trimester Hot Flashes

    The second trimester is a time of significant changes in a woman’s body. As your pregnancy progresses, your hormones are constantly shifting. These hormonal fluctuations, especially the rise and fall of estrogen and progesterone, can affect your body’s temperature regulation.

    Think of it like your internal thermostat getting a little confused. This confusion can lead to sudden feelings of intense heat, which we call hot flashes. It’s your body’s way of responding to these changing hormone levels.

    Many women experience this, so you are not alone. The intensity can vary from mild warmth to feeling like you’ve run a marathon. It’s a common pregnancy symptom that many women deal with.

    Hormonal Shifts Explained

    During pregnancy, particularly in the second trimester, your body experiences a surge in hormones like estrogen. Estrogen plays a role in regulating your body temperature. When estrogen levels fluctuate, it can send signals to your brain’s hypothalamus, the part of your brain that controls temperature.

    This can cause your body to suddenly think it’s too hot, even when the environment is cool. Blood vessels near your skin may widen to release heat, leading to flushing and sweating. This is the body’s attempt to cool down quickly.

    These changes are a normal part of preparing your body for childbirth and beyond. Sometimes, these hormonal shifts can be more pronounced, leading to more frequent or intense hot flashes for some individuals.

    Progesterone levels also rise significantly during pregnancy. While estrogen is often the primary suspect for hot flashes, progesterone can also play a role. Its effects on thermoregulation are not as well understood as estrogen’s, but it’s believed to contribute to the changes in body temperature.

    The interplay between these hormones creates a dynamic internal environment. This is why managing hot flashes involves understanding that it’s not just one hormone but a complex interaction. The body is working hard to support the growing baby, and these are just some of the side effects of that intense biological activity.

    Body Temperature Regulation

    Your body has an amazing system for keeping its temperature just right, around 98.6 degrees Fahrenheit. This system, called thermoregulation, is managed by the hypothalamus in your brain. During pregnancy, especially in the second trimester, hormonal changes can interfere with this system.

    Your body might mistakenly perceive a normal room temperature as too warm. It then tries to cool you down by increasing blood flow to the skin and making you sweat. This rapid cooling process is what you feel as a hot flash.

    It’s like your body has an overheating alarm that goes off unexpectedly. These surges can be quite noticeable and sometimes disruptive to daily activities.

    The increase in blood volume and metabolic rate during pregnancy also contributes to feeling warmer. Your body is working harder to supply nutrients to the baby and manage the extra demands of pregnancy. This naturally raises your core body temperature slightly.

    So, even without hormonal shifts, you might feel warmer than usual. When hormones add another layer to this, the hot flashes can become more apparent. Learning to recognize these signals from your body helps you respond effectively.

    It’s about adapting to these new physiological states that come with carrying a child.

    Managing Second Trimester Hot Flashes

    Dealing with sudden waves of heat can be uncomfortable, but there are many simple things you can do to feel better. The good news is that most of these strategies are easy to incorporate into your daily life. We’ll look at ways to cool yourself down when a flash hits and how to prevent them from happening as often.

    It’s all about making yourself more comfortable during this stage of pregnancy. These tips are designed to be practical and help you feel more in control. Let’s explore some effective methods to keep you cool and calm.

    Immediate Relief Strategies

    When a hot flash strikes, the most important thing is to cool down quickly. Keep a small, portable fan nearby, whether it’s at home, at work, or when you’re out and about. A gentle breeze can make a big difference.

    You can also sip on ice-cold water. The internal cooling effect can help your body temperature drop. Some women find it helpful to hold a cool cloth or an ice pack on their neck or wrists.

    These pulse points have large blood vessels close to the skin, so cooling them can lower your overall body temperature faster. Keep a spray bottle filled with water handy for a refreshing mist on your face and neck.

    Changing your environment can also provide relief. If you’re in a warm room, try to move to a cooler area or open a window. If you’re feeling a flash come on, try to step outside for some fresh air, if possible.

    The slight drop in temperature can be very effective. Sometimes, just taking a few slow, deep breaths can help calm your nervous system and reduce the intensity of the sensation. Focusing on your breath can distract you from the heat and help regulate your body’s response.

    These immediate actions are your first line of defense.

    Lifestyle Adjustments

    Making some changes to your daily habits can significantly reduce the frequency and intensity of hot flashes. Dressing in light, breathable layers is key. Opt for natural fabrics like cotton and linen, which allow your skin to breathe.

    Avoid synthetic materials like polyester, which can trap heat. Having multiple thin layers means you can easily remove one if you start to feel warm, and put it back on when you feel chilled. This ability to adapt to changing temperatures is crucial.

    It allows you to manage your comfort throughout the day.

    Paying attention to your diet is also important. Spicy foods, caffeine, and hot drinks can often trigger hot flashes. Try to identify if any specific foods or beverages seem to make your flashes worse and reduce your intake of those items.

    Staying well-hydrated by drinking plenty of water throughout the day is also beneficial. Dehydration can sometimes exacerbate temperature regulation issues. Aim for at least eight glasses of water daily.

    Making these small adjustments can lead to a noticeable improvement in your comfort levels. They help your body maintain a more stable internal temperature.

    Creating a Cool Environment

    Your bedroom environment can play a big role in managing hot flashes, especially during sleep. Keep your bedroom cool at night. Use a fan or open a window to ensure good air circulation.

    Consider using breathable bedding made from natural materials like cotton or bamboo. These fabrics wick away moisture and allow air to flow freely, helping you stay cooler. A lower room temperature can significantly reduce nighttime hot flashes, allowing for more restful sleep.

    Many women find that investing in a good quality fan or even a specialized cooling pillow can be a worthwhile expense for better sleep quality.

    During the day, try to spend time in cooler parts of your home. If you don’t have air conditioning, using fans strategically can help. Place a bowl of ice in front of a fan to create a makeshift air cooler.

    Keep windows open when the outside air is cooler than inside, especially in the early morning or late evening. If you work in an office, try to position your desk near a vent or a window. Bringing a small, personal fan to your workspace can also be a lifesaver.

    Creating a consistently cool environment reduces the chances of overheating and triggering hot flashes.

    Understanding Triggers for Hot Flashes

    While hormonal changes are the main reason for hot flashes, certain things can make them appear more often or feel stronger. Recognizing these triggers is a powerful tool for managing them. It’s like knowing when a storm might be coming so you can prepare.

    By spotting patterns, you can take steps to avoid or minimize the impact of these triggers. This makes you feel more in charge of your comfort during pregnancy. Let’s explore some common culprits that can set off those uncomfortable waves of heat.

    Common Environmental Triggers

    The temperature of your surroundings is a major factor. Being in a hot, stuffy room can easily bring on a hot flash. This includes crowded places with poor ventilation, such as public transport during peak hours or busy waiting rooms.

    Direct sunlight can also be a trigger, especially on a warm day. It’s wise to seek shade and wear protective clothing when you’re outdoors. Even a warm bath or shower can sometimes raise your body temperature enough to start a hot flash.

    While warmth is comforting, extreme heat can be a common trigger.

    Sudden changes in temperature can also be disruptive. For instance, walking from a cool air-conditioned building into the hot outdoors can sometimes shock your system. Similarly, moving from a warm environment to a very cold one might also have an effect.

    It’s about maintaining a stable and comfortable temperature as much as possible. Being aware of these environmental factors allows you to plan ahead. For example, carrying a light scarf can help you adjust if you enter a much cooler building from the heat outside.

    Dietary and Lifestyle Triggers

    What you eat and drink can have a significant impact on your body’s temperature. Spicy foods, like those with chili peppers, are notorious for triggering hot flashes. This is because they can temporarily raise your body temperature.

    Alcohol consumption, even in moderation, can also be a trigger for some women. Caffeine, found in coffee, tea, and chocolate, can also increase your body heat and blood pressure, potentially leading to hot flashes. Even hot beverages can contribute to raising your internal temperature, so consider opting for cooler drinks.

    Smoking is another lifestyle factor that is strongly linked to increased hot flashes. Nicotine can affect blood vessel function and hormone levels, contributing to the problem. Stress and anxiety can also play a role.

    When you’re feeling overwhelmed or anxious, your body releases stress hormones, which can affect your temperature regulation. Practicing relaxation techniques, as we’ll discuss later, can help mitigate this. Keeping a journal to track your food, activities, and when hot flashes occur can help you pinpoint your personal triggers.

    This awareness is the first step to managing them effectively.

    Emotional and Stress Triggers

    Your emotional state is closely linked to your physical sensations, and this is especially true during pregnancy. Stress and anxiety are common triggers for hot flashes. When you’re feeling stressed, your body goes into a “fight or flight” response, releasing adrenaline and other hormones.

    These hormones can cause your heart rate to increase and blood vessels to constrict and then dilate, which can lead to feelings of heat and flushing. It’s like your body is preparing for a threat by raising its temperature, even when there’s no real danger. Learning to manage stress is therefore very important.

    Strong emotions, whether positive or negative, can also sometimes trigger a hot flash. Excitement, anger, or even intense happiness can lead to a surge in adrenaline. This sudden hormonal shift can affect your body temperature.

    For example, a particularly exciting piece of news or a heated discussion might be followed by a wave of heat. Recognizing that your emotions can influence your physical symptoms is key. This understanding empowers you to employ coping mechanisms that address both your emotional well-being and your physical comfort.

    It’s about creating a sense of calm and control amidst the bodily changes of pregnancy.

    When to Seek Professional Advice

    While most hot flashes during the second trimester are normal and manageable with home remedies, there are times when it’s important to talk to your doctor or midwife. They can provide personalized advice and ensure that there isn’t another underlying issue. Don’t hesitate to reach out if your hot flashes are severe, persistent, or significantly affecting your quality of life.

    Your healthcare provider is there to support you through every stage of your pregnancy. They can offer reassurance and professional guidance. They can also help rule out any other potential concerns.

    Consulting Your Doctor or Midwife

    Your healthcare provider is your best resource for accurate information and support during pregnancy. If you are experiencing frequent or intense hot flashes that disrupt your sleep or daily activities, it’s a good idea to mention them at your next prenatal appointment. They can help determine if your hot flashes are a typical pregnancy symptom or if they might be related to something else.

    They will likely ask about the timing, frequency, and intensity of your hot flashes, as well as any other symptoms you might be experiencing. This information helps them assess your situation accurately.

    They can also offer more specific advice based on your individual health history and pregnancy. Sometimes, they might suggest dietary changes, hydration strategies, or even specific relaxation techniques that are best suited for you. In rare cases, if hot flashes are extremely problematic and not responding to lifestyle changes, they might discuss other options, though typically lifestyle management is the primary recommendation for pregnancy-related hot flashes.

    The goal is to ensure your comfort and well-being throughout your pregnancy, and your doctor is there to help you achieve that.

    When Hot Flashes Are a Concern

    While hot flashes are a common pregnancy symptom, there are a few situations where they might indicate a need for further medical attention. If your hot flashes are accompanied by other unusual symptoms, such as severe headaches, vision changes, persistent nausea, or dizziness, it’s important to get them checked out. These symptoms, combined with hot flashes, could sometimes point to conditions like preeclampsia, although hot flashes alone are not a primary symptom of preeclampsia.

    It’s always better to be safe and have any concerning symptoms evaluated by a healthcare professional. Don’t dismiss them.

    If the hot flashes are so intense that they prevent you from sleeping, eating, or carrying out your daily tasks, it’s also a sign to seek help. Chronic lack of sleep can negatively impact your health and the health of your baby. Your doctor can offer strategies to improve sleep quality and manage the severity of the flashes.

    They can also reassure you if your symptoms are within the normal range for pregnancy. Prompt consultation ensures you receive the right care and peace of mind. Your comfort and health are priorities during this special time.

    Common Myths Debunked

    Myth 1: Hot flashes only happen during menopause

    This is a very common misconception. While hot flashes are strongly associated with menopause, they can occur at other times in a woman’s life, including during pregnancy. The hormonal fluctuations of pregnancy, particularly in the second and third trimesters, can trigger similar responses in the body’s thermoregulation system.

    So, experiencing them while pregnant is not unusual and doesn’t mean you are menopausal.

    Myth 2: You can’t do anything about pregnancy hot flashes

    This is simply not true. While you can’t eliminate hormonal changes, there are many effective lifestyle adjustments and immediate relief strategies you can employ. From simple things like wearing layers and staying hydrated to identifying and avoiding personal triggers, you have a good amount of control over managing the discomfort.

    These methods can significantly reduce the frequency and intensity of hot flashes.

    Myth 3: All pregnant women get hot flashes

    Pregnancy symptoms vary greatly from one woman to another. While second trimester hot flashes are common, not every pregnant person will experience them. Some may have very mild episodes they barely notice, while others might have none at all.

    Your experience is unique to your body and your pregnancy. Not experiencing them doesn’t mean anything is wrong with your pregnancy.

    Frequently Asked Questions

    Question: How long do second trimester hot flashes usually last?

    Answer: The duration of hot flashes can vary greatly. Some women experience them for a few weeks, while others might have them throughout their pregnancy. They can come and go, and their intensity can change over time.

    Generally, they tend to be more common in the second and third trimesters and may lessen after the baby is born, although some women might experience them for a while postpartum.

    Question: Are second trimester hot flashes harmful to the baby?

    Answer: Second trimester hot flashes themselves are not considered harmful to the baby. They are a physiological response to hormonal changes and are a common part of pregnancy for many women. The main concern is your own comfort and well-being.

    If they are severely impacting your sleep or daily life, it’s worth discussing with your healthcare provider.

    Question: Can diet really affect my hot flashes?

    Answer: Yes, diet can play a significant role. Spicy foods, caffeine, alcohol, and hot beverages are known triggers for hot flashes in many individuals. By identifying and reducing your intake of these items, you may find a noticeable decrease in the frequency and intensity of your hot flashes.

    Staying hydrated with plenty of water is also beneficial.

    Question: What is the best way to cool down during a hot flash?

    Answer: The best immediate ways to cool down include sipping ice water, using a fan, applying a cool cloth to your neck or wrists, and moving to a cooler environment. Wearing breathable, layered clothing also helps you adjust quickly if you start to feel warm.

    Question: Should I worry if I start getting hot flashes late in my second trimester?

    Answer: No, you generally shouldn’t worry if you start getting hot flashes late in your second trimester. It’s quite common for these symptoms to appear or become more noticeable as your pregnancy progresses and hormones continue to shift. However, if they are severe or accompanied by other concerning symptoms, it’s always best to consult your doctor.

    Conclusion

    Second trimester hot flashes are a common and usually harmless part of pregnancy. They’re caused by shifting hormones that can temporarily affect your body’s temperature control. You can manage them with simple lifestyle changes like dressing in layers, staying hydrated, and avoiding known triggers.

    Focus on keeping your environment cool and practicing relaxation techniques for added comfort. If you’re ever concerned, your doctor is there to help guide you.

  • Your Weekly Magazine Latest Issue Guide

    Your Weekly Magazine Latest Issue Guide

    It can sometimes feel a bit tricky to talk about my weekly magazine latest issue, especially when you’re just starting out. You might wonder if you’re looking at the right pages or if you’re missing something important. But don’t worry at all!

    We’re going to break it all down step-by-step, making it super easy to follow. Get ready to see how simple it is to find exactly what you need.

    Key Takeaways

    • You will learn how to easily find and enjoy my weekly magazine latest issue.
    • Discover tips for making the most of your reading experience.
    • Understand where to look for current and past editions.
    • Get guidance on accessing digital and print formats.
    • Learn how to get the most value from your magazine subscription.

    Finding My Weekly Magazine Latest Issue

    Locating my weekly magazine latest issue is usually straightforward if you know where to look. Most magazines offer several ways to access their newest content. This includes picking up a physical copy from a newsstand or store, or going online to their official website.

    Digital versions often come out at the same time, or even a bit earlier, than the print ones. This section will guide you through the most common places to find it.

    Where to Buy My Weekly Magazine Latest Issue

    The most direct way to get your hands on my weekly magazine latest issue is by visiting a retail location. Think about places where magazines are sold regularly. This might be your local supermarket, a dedicated newsstand, a bookstore, or even a convenience store.

    These places stock current publications so you can browse and pick up the latest edition as soon as it’s released.

    • Local Supermarkets and Grocery Stores
      These are great places to check first. Most have a magazine rack near the checkout aisles. You can often find popular weekly magazines here. The selection might vary depending on the store’s size and location, but it’s usually a reliable spot for current issues.
    • Bookstores and Newsstands
      Larger bookstores and specialized newsstands often have a wider variety of magazines. They are a good option if you’re looking for something a little more niche or if your local supermarket doesn’t have your preferred title. These locations are dedicated to selling print media, so their stock is typically very up-to-date.
    • Convenience Stores
      Smaller convenience stores might carry a limited selection of the most popular weekly magazines. It’s worth a quick look if you’re already there, but don’t count on finding every title. They cater to impulse buys, so it’s usually the big names that make it to their shelves.

    Accessing the Digital Version

    Many magazines now offer digital versions of their issues. This means you can read my weekly magazine latest issue on your tablet, smartphone, or computer. To get the digital copy, you usually need to visit the magazine’s official website.

    You might need to purchase it as a single issue or as part of a digital subscription. This option is convenient for readers who prefer to carry their reading material electronically.

    • Official Magazine Website
      The primary place to find digital issues is the magazine’s own website. Look for a section labeled “Digital Edition,” “Buy Online,” or “Current Issue.” Here, you can often purchase a PDF or an interactive digital copy. Many sites also offer a preview of the issue before you buy.
    • Subscription Apps and Platforms
      Some magazines partner with digital subscription services or have their own dedicated app. If you subscribe digitally, you’ll get access to the latest issue automatically through this app. Popular platforms include Readly, Magzter, or specific apps created by the magazine publisher themselves. These often allow you to download issues for offline reading.
    • E-reader Stores
      Occasionally, you can find digital magazine issues on e-reader platforms like Kindle or Kobo. These stores sell digital content and may offer individual magazine issues for sale. Check the magazine’s page on these platforms to see if the latest issue is available for purchase there.

    Maximizing Your Reading Experience

    Once you have my weekly magazine latest issue, you’ll want to enjoy it fully. This means setting aside time to read and perhaps using some simple techniques to get the most out of the content. Whether you prefer to skim headlines or read every article, there are ways to make your reading time more rewarding and informative.

    Setting the Mood for Reading

    To truly enjoy my weekly magazine latest issue, create a comfortable reading environment. This might mean finding a quiet spot where you won’t be disturbed. Turning off notifications on your phone can also help you focus.

    Some people like to have a warm drink while they read, or they might prefer to read outside if the weather is nice. The goal is to make it a relaxing activity.

    • Find a Comfortable Space
      Choose a place where you feel relaxed and can concentrate. This could be your favorite armchair, a cozy nook on the sofa, or even a bench in a park. Ensure good lighting to avoid eye strain.
    • Minimize Distractions
      Put your phone on silent or ‘do not disturb’ mode. Let others in your household know you’d like some quiet time. If you have a lot of background noise, consider using noise-canceling headphones.
    • Set Aside Dedicated Time
      Don’t try to rush through your magazine. Allocate a specific amount of time, maybe an hour or two each week, solely for reading. This treats it as an important event, not just a casual pastime.

    Engaging with the Content

    Reading a magazine can be more than just looking at words and pictures. You can actively engage with the articles to better understand and remember what you read. This involves thinking about what the writer is saying and how it relates to your own life or interests.

    • Skim First, Then Read Deeply
      Start by quickly looking over the headlines and any images. This gives you an idea of what the issue covers. Then, go back and read the articles that interest you most in more detail. This helps you prioritize your reading.
    • Take Notes or Highlight
      If you’re reading a physical copy, don’t be afraid to jot down notes in the margins or highlight key points. For digital versions, many apps allow you to add annotations or bookmarks. This helps you remember important information or come back to interesting ideas later.
    • Discuss What You Read
      Share interesting articles or topics with friends or family. Talking about what you’ve learned can help solidify the information in your mind and often leads to new perspectives or discussions.

    Understanding Your Subscription Options

    When you are looking for my weekly magazine latest issue, you might also consider how you get it. Subscribing to a magazine is often more cost-effective and convenient than buying single issues. Subscriptions ensure you never miss an edition and often come with extra perks.

    Benefits of a Print Subscription

    A print subscription means my weekly magazine latest issue arrives right at your doorstep. This is ideal for those who enjoy the tactile experience of holding a magazine. You can collect issues and have a physical library of your favorite content.

    Print subscriptions also sometimes include bonus content or early access to special editions.

    • Convenience
      Never worry about missing an issue. It’s delivered directly to your home, saving you trips to the store.
    • Cost Savings
      Usually, a subscription is cheaper per issue than buying them individually. This makes it a more budget-friendly way to keep up with your favorite publication.
    • Exclusive Content
      Some print subscriptions offer exclusive articles, interviews, or supplements that aren’t available elsewhere.
    • Physical Collection
      For collectors, having a shelf full of your favorite magazines is a rewarding experience. You can revisit old issues anytime you like.

    Benefits of a Digital Subscription

    Digital subscriptions offer flexibility and accessibility. You can read my weekly magazine latest issue on any device, anywhere you have an internet connection. Many digital subscriptions also provide access to archives of past issues, giving you a wealth of content at your fingertips.

    • Portability
      Access your magazine on your phone, tablet, or laptop. This makes it easy to read while commuting, traveling, or simply relaxing at home.
    • Instant Access
      Receive the latest issue the moment it’s released, often before the print version is available in stores.
    • Searchability
      Digital archives often have search functions, allowing you to quickly find articles on specific topics from past issues.
    • Eco-Friendly
      Opting for a digital subscription reduces paper waste, making it a more environmentally conscious choice.

    Troubleshooting Common Issues

    Sometimes, getting my weekly magazine latest issue might not go as smoothly as planned. There could be a delay in delivery, a problem with a digital download, or a question about your subscription. Knowing how to handle these common issues can save you frustration.

    Delivery Problems with Print Issues

    If your print copy of my weekly magazine latest issue doesn’t arrive on time, the first step is to check the expected delivery date. Magazines often have a specific release date and a few days for delivery. If it’s well past that window, contact the magazine’s customer service.

    They can track your delivery or send a replacement copy. Sometimes, there are delays due to postal service issues or weather.

    • Check Publication Schedule
      Confirm the official release date of the issue. Sometimes, what you think is the “latest” might be a week behind the actual release.
    • Contact Customer Service
      The magazine’s customer service department is your best resource. They have the tools to check your subscription status and delivery history. Have your subscription number ready when you call or email them.
    • Report Missing Issues
      If an issue is consistently missed, politely explain the situation. They can often resend the missing copy or extend your subscription by an issue.

    Digital Access Difficulties

    Digital issues can sometimes be hard to access. If you can’t download or view my weekly magazine latest issue, try a few simple steps. First, ensure your internet connection is stable.

    Then, try closing and reopening the app or browser window. If the problem persists, check if there’s an update available for the app or if your subscription is still active.

    • Verify Internet Connection
      A weak or unstable Wi-Fi or cellular data connection can prevent downloads. Try moving to an area with a stronger signal or restarting your router.
    • Restart the App or Browser
      Sometimes, simply closing the application or browser tab and reopening it can resolve temporary glitches.
    • Check Subscription Status
      Make sure your digital subscription is current. An expired subscription will prevent you from accessing new issues. Log into your account on the magazine’s website to confirm.
    • Update the App
      If you’re using a dedicated magazine app, check the app store for any available updates. Developers frequently release patches to fix bugs and improve performance.

    Common Myths Debunked

    Myth 1: You must have the newest device to read digital magazines.

    This is not true. While newer devices offer a smoother experience, most digital magazines are designed to be readable on a wide range of devices. Older smartphones, tablets, and even some laptops can access digital magazines, especially if they use standard PDF formats or common e-reader apps.

    The key is having a device that can run the necessary app or browser and display text and images clearly.

    Myth 2: Buying single issues is always cheaper than subscribing.

    This is often a misconception. While a single purchase might seem like less commitment, the cost of buying individual issues over a year usually adds up to more than a subscription. Magazine publishers often offer significant discounts for annual or multi-year subscriptions.

    So, if you read a magazine regularly, subscribing is generally the more economical choice.

    Myth 3: Digital magazines are exactly the same as print ones.

    While digital magazines aim to replicate the print experience, they can differ. Digital versions may include interactive elements like videos, audio clips, or clickable links that aren’t possible in print. Conversely, some very special print editions might have unique textures or layouts that can’t be translated digitally.

    The core content is usually the same, but the delivery format can offer different features.

    Frequently Asked Questions

    Question: How can I be sure I am getting the absolute latest issue?

    Answer: Check the publication date printed on the cover or inside the magazine. For digital versions, look for the most recently released edition on the magazine’s official website or app.

    Question: Can I cancel my magazine subscription at any time?

    Answer: Most magazine subscriptions allow cancellation, but terms can vary. Check the subscription agreement for details on refunds and cancellation policies.

    Question: What should I do if I receive two copies of the same issue?

    Answer: Contact the magazine’s customer service. They can correct their records to prevent duplicate mailings and may offer a credit for the extra issue.

    Question: Are digital magazines accessible for people with visual impairments?

    Answer: Many digital magazine platforms support accessibility features like text resizing, screen reader compatibility, and adjustable contrast settings, but it varies by publisher.

    Question: How do I find older issues of my favorite magazine?

    Answer: Digital subscriptions often include access to archives. For print, check the magazine’s website for past issue sales or consider looking at used bookstores or online marketplaces.

    Final Thoughts

    Finding and enjoying my weekly magazine latest issue is easy. You can grab a copy at stores or get it online. Subscribing saves money and hassle.

    Enjoy your reading!

  • My Weekly Preview Magazine Tips

    My Weekly Preview Magazine Tips

    Getting started with my weekly preview magazine can feel like a puzzle at first. Many beginners wonder where to begin or what makes it tricky. Don’t worry, it’s simpler than it looks!

    This guide breaks everything down step-by-step, making it easy to follow. We will show you exactly how to create your own amazing preview magazine. Get ready to see how straightforward it can be.

    Key Takeaways

    • You will learn what makes my weekly preview magazine unique.
    • We explain how to plan and gather content for your magazine.
    • Discover easy ways to design and lay out your preview.
    • Find out how to share your finished magazine with others.
    • Simple tools and tricks will be shared to make it fun.

    Creating Your Weekly Preview Magazine

    This section is all about the foundational steps to get your my weekly preview magazine off the ground. Think of it as building the blueprint before you start constructing. We will cover the essential planning and content gathering that makes any magazine successful.

    This isn’t just about putting words on a page; it’s about crafting a compelling snapshot of what’s coming up. A well-planned preview magazine can build excitement and keep your audience engaged.

    What Is a Preview Magazine

    A preview magazine is a special publication that gives readers a sneak peek into upcoming events, new products, or future content. It’s like a teaser trailer for your news. The goal is to inform and excite people about what they can expect soon.

    This format is great for magazines, businesses, or even personal projects where you want to generate interest.

    • Purpose of a Preview: To create anticipation and inform readers about what’s next. It helps people decide what they want to engage with.
    • Target Audience Engagement: It helps you connect with your readers by showing them exciting upcoming content. This can increase readership and participation.
    • Content Focus: It highlights key items, events, or features that will be available in the near future. This keeps the content fresh and relevant.

    Planning Your Preview Content

    Before you write a single word or pick an image, good planning is key. You need to know what you want to show people. Think about the most exciting things happening in the next week.

    What will grab your readers’ attention the most? This might be a special event, a new article series, or a behind-the-scenes look at something interesting.

    • Brainstorming Topics: Jot down all the potential items for your preview. Don’t hold back; list everything that comes to mind.
    • Selecting Key Highlights: Choose the top 3-5 items that will create the most buzz. These should be the stars of your magazine.
    • Gathering Information: Collect all the necessary details for your chosen items. This includes dates, times, locations, and brief descriptions.

    Gathering Visuals

    People love to see pictures! Your preview magazine will be much more appealing with good photos or graphics. Think about what kind of images would best represent your upcoming content.

    Are they photos from an event, artwork for a new story, or pictures of a new product? High-quality visuals make a big difference in how attractive your magazine looks.

    • Image Sources: Use photos you have taken, stock images, or artwork created specifically for your preview.
    • Image Quality: Ensure your images are clear, well-lit, and the right size for your layout. Blurry or pixelated images can make your magazine look unprofessional.
    • Image Relevance: Pick images that directly relate to the content they are paired with. This helps readers quickly grasp what the preview is about.

    Designing Your Weekly Preview Magazine Layout

    Now that you have your content and visuals, it’s time to make it look good. The layout of your my weekly preview magazine is super important. It’s how you organize everything so it’s easy to read and visually pleasing.

    A good design guides the reader’s eye and makes the information accessible. We’ll explore simple design principles that anyone can use.

    Choosing A Simple Format

    You don’t need fancy software to make a great-looking magazine. Many common tools can do the job well. Think about what you’re comfortable with.

    A simple, clean format is often the most effective for a preview. It ensures your message comes across clearly without overwhelming the reader.

    • Software Options: Tools like Canva, Google Docs, or even Microsoft Word can be used. Canva is particularly user-friendly for design.
    • Template Use: Many programs offer templates that you can adapt. This saves time and gives you a professional starting point.
    • Page Structure: Decide how many items will appear on each page. A single item per page or a few items grouped together can work well.

    Typography and Color

    The words you use and the colors you choose play a big role in your magazine’s feel. Pick fonts that are easy to read. For titles, you can use something a bit more decorative, but body text should be very clear.

    Colors should complement each other and not be too distracting. Think about the mood you want to create.

    • Font Selection: Stick to one or two easy-to-read fonts. A clean sans-serif font is usually a safe bet for body text.
    • Color Palettes: Use colors that match your brand or the theme of your preview. Limit your palette to 2-3 main colors for a cohesive look.
    • Contrast: Make sure there is enough contrast between your text and the background so everything is legible.

    Organizing Content Flow

    How you arrange elements on the page is crucial. You want to guide the reader smoothly from one piece of information to the next. Start with the most important highlight and then move down the page.

    Use white space effectively to prevent the page from looking cluttered.

    1. Headline First: Place a clear, exciting headline at the top of each section or item.
    2. Visual Placement: Position your main image near the headline.
    3. Supporting Text: Follow with a short, punchy description of the item.
    4. Call to Action (Optional): If applicable, tell readers where to find more information.

    Sharing Your Weekly Preview Magazine

    You’ve put in the work to create your my weekly preview magazine. Now, it’s time to share it! Getting your preview into the hands of your audience is the final, vital step.

    How you share it can affect how many people see it and how they interact with it. We will look at the most effective ways to distribute your creation.

    Digital Distribution Methods

    In today’s world, sharing online is often the easiest and quickest way. Digital formats mean your preview can reach a wide audience almost instantly. It also allows for interactive elements if you choose.

    Think about where your audience spends their time online.

    • Email Newsletters: Sending your preview as a PDF attachment or a link in an email is very common. This directly reaches people who have subscribed.
    • Social Media: You can post a link to your preview on platforms like Facebook, Instagram, or X. Create an engaging graphic to go with the link.
    • Website/Blog: Uploading your preview to your own website or blog makes it easily accessible to visitors. You can embed it or offer it as a download.

    Print and Physical Sharing

    While digital is popular, don’t forget the power of print. Sometimes, a physical copy can feel more special and impactful. This might be suitable for certain events or if your audience prefers physical materials.

    It offers a tangible way to connect with them.

    • Local Distribution: If you have a local audience, you can print copies and leave them at community centers, cafes, or relevant businesses.
    • Event Handouts: Printing copies to hand out at events or meetings is a direct way to get your preview to interested parties.
    • Direct Mail: For a more personal touch, you could mail copies to a targeted list of subscribers or customers.

    Measuring Success

    How do you know if your preview magazine is working? It’s important to track what happens after you share it. This helps you understand what your audience likes and how to improve for next time.

    Simple tracking methods can give you valuable insights.

    • Website Analytics: If you share a link, you can see how many people clicked on it using tools like Google Analytics.
    • Social Media Engagement: Monitor likes, shares, and comments on your social media posts related to the preview.
    • Reader Feedback: Directly ask your audience what they thought. Comments, emails, or quick surveys can provide direct feedback.

    Common Myths Debunked

    Myth 1: My Weekly Preview Magazine Needs Professional Design Software

    Many people think they need expensive, complicated software to create a good-looking magazine. The reality is that user-friendly tools like Canva, Google Docs, or even Microsoft Word are perfectly capable of producing professional results. These platforms offer templates and drag-and-drop features that make design accessible to everyone, regardless of their experience level.

    Myth 2: Creating a Preview Magazine Takes Too Much Time

    It’s easy to believe that a magazine format is a huge time commitment. However, a preview magazine is by design short and to the point. By focusing on just a few key highlights and using templates, you can actually create a compelling preview in a surprisingly short amount of time.

    Planning ahead is the biggest time-saver.

    Myth 3: Preview Magazines Are Only For Big Companies

    There’s a misconception that only large organizations can benefit from or create preview magazines. This couldn’t be further from the truth. Small businesses, community groups, artists, or even individuals can use a preview magazine to announce events, new work, or special offers.

    It’s a versatile tool for anyone wanting to generate interest.

    Myth 4: Visuals Are Too Difficult To Source

    Some people worry about finding suitable images for their preview magazine. However, there are many easy ways to get great visuals. You can use your own photos, utilize free stock photo sites like Unsplash or Pexels, or even create simple graphics with online tools.

    The key is relevance and clarity, not necessarily professional photography.

    Frequently Asked Questions

    Question: How many items should I include in my weekly preview magazine?

    Answer: It’s best to keep it focused. Aim for 3 to 5 key items per preview to avoid overwhelming your readers. Quality over quantity is key.

    Question: What if I don’t have a lot of images to use?

    Answer: You can use graphics, illustrations, or even well-written text descriptions. Simple icons or color blocks can also add visual interest without photos.

    Question: Can I make my preview magazine interactive?

    Answer: Yes, if you share it digitally, you can include clickable links to more information or videos.

    Question: How often should I send out my preview magazine?

    Answer: “Weekly” in the title implies sending it out once a week. Consistency is important for building reader habits.

    Question: What’s the best way to get people to read my preview?

    Answer: Promote it! Let people know it’s coming and why they should look forward to it. Share it on channels where your audience is active.

    Conclusion

    Creating my weekly preview magazine is a straightforward way to share exciting upcoming news. Focus on picking the best highlights and presenting them clearly. Use simple design tools and share your work where your audience will see it.

    This process helps build anticipation and keeps everyone informed.